• Menu
  • Skip to right header navigation
  • Skip to main content
  • Skip to secondary navigation
  • Skip to primary sidebar
  • Skip to footer

Before Header

  • Facebook
  • Instagram
  • Pinterest
  • Twitter
  • YouTube

The Cooking Family

Your Family Can Cook and Enjoy Great Meals Together!

  • Home
  • Recipes
  • School
  • Blog
  • About
  • Contact
  • Home
  • Recipes
  • School
  • Blog
  • About
  • Contact

Last updated on October 1st, 2020 at 01:49 pm

Creamy Ginger Butternut Squash Soup in the Instant Pot

November 19, 2017 by //  by Holly 4 Comments

Last updated on October 1st, 2020 at 01:49 pm

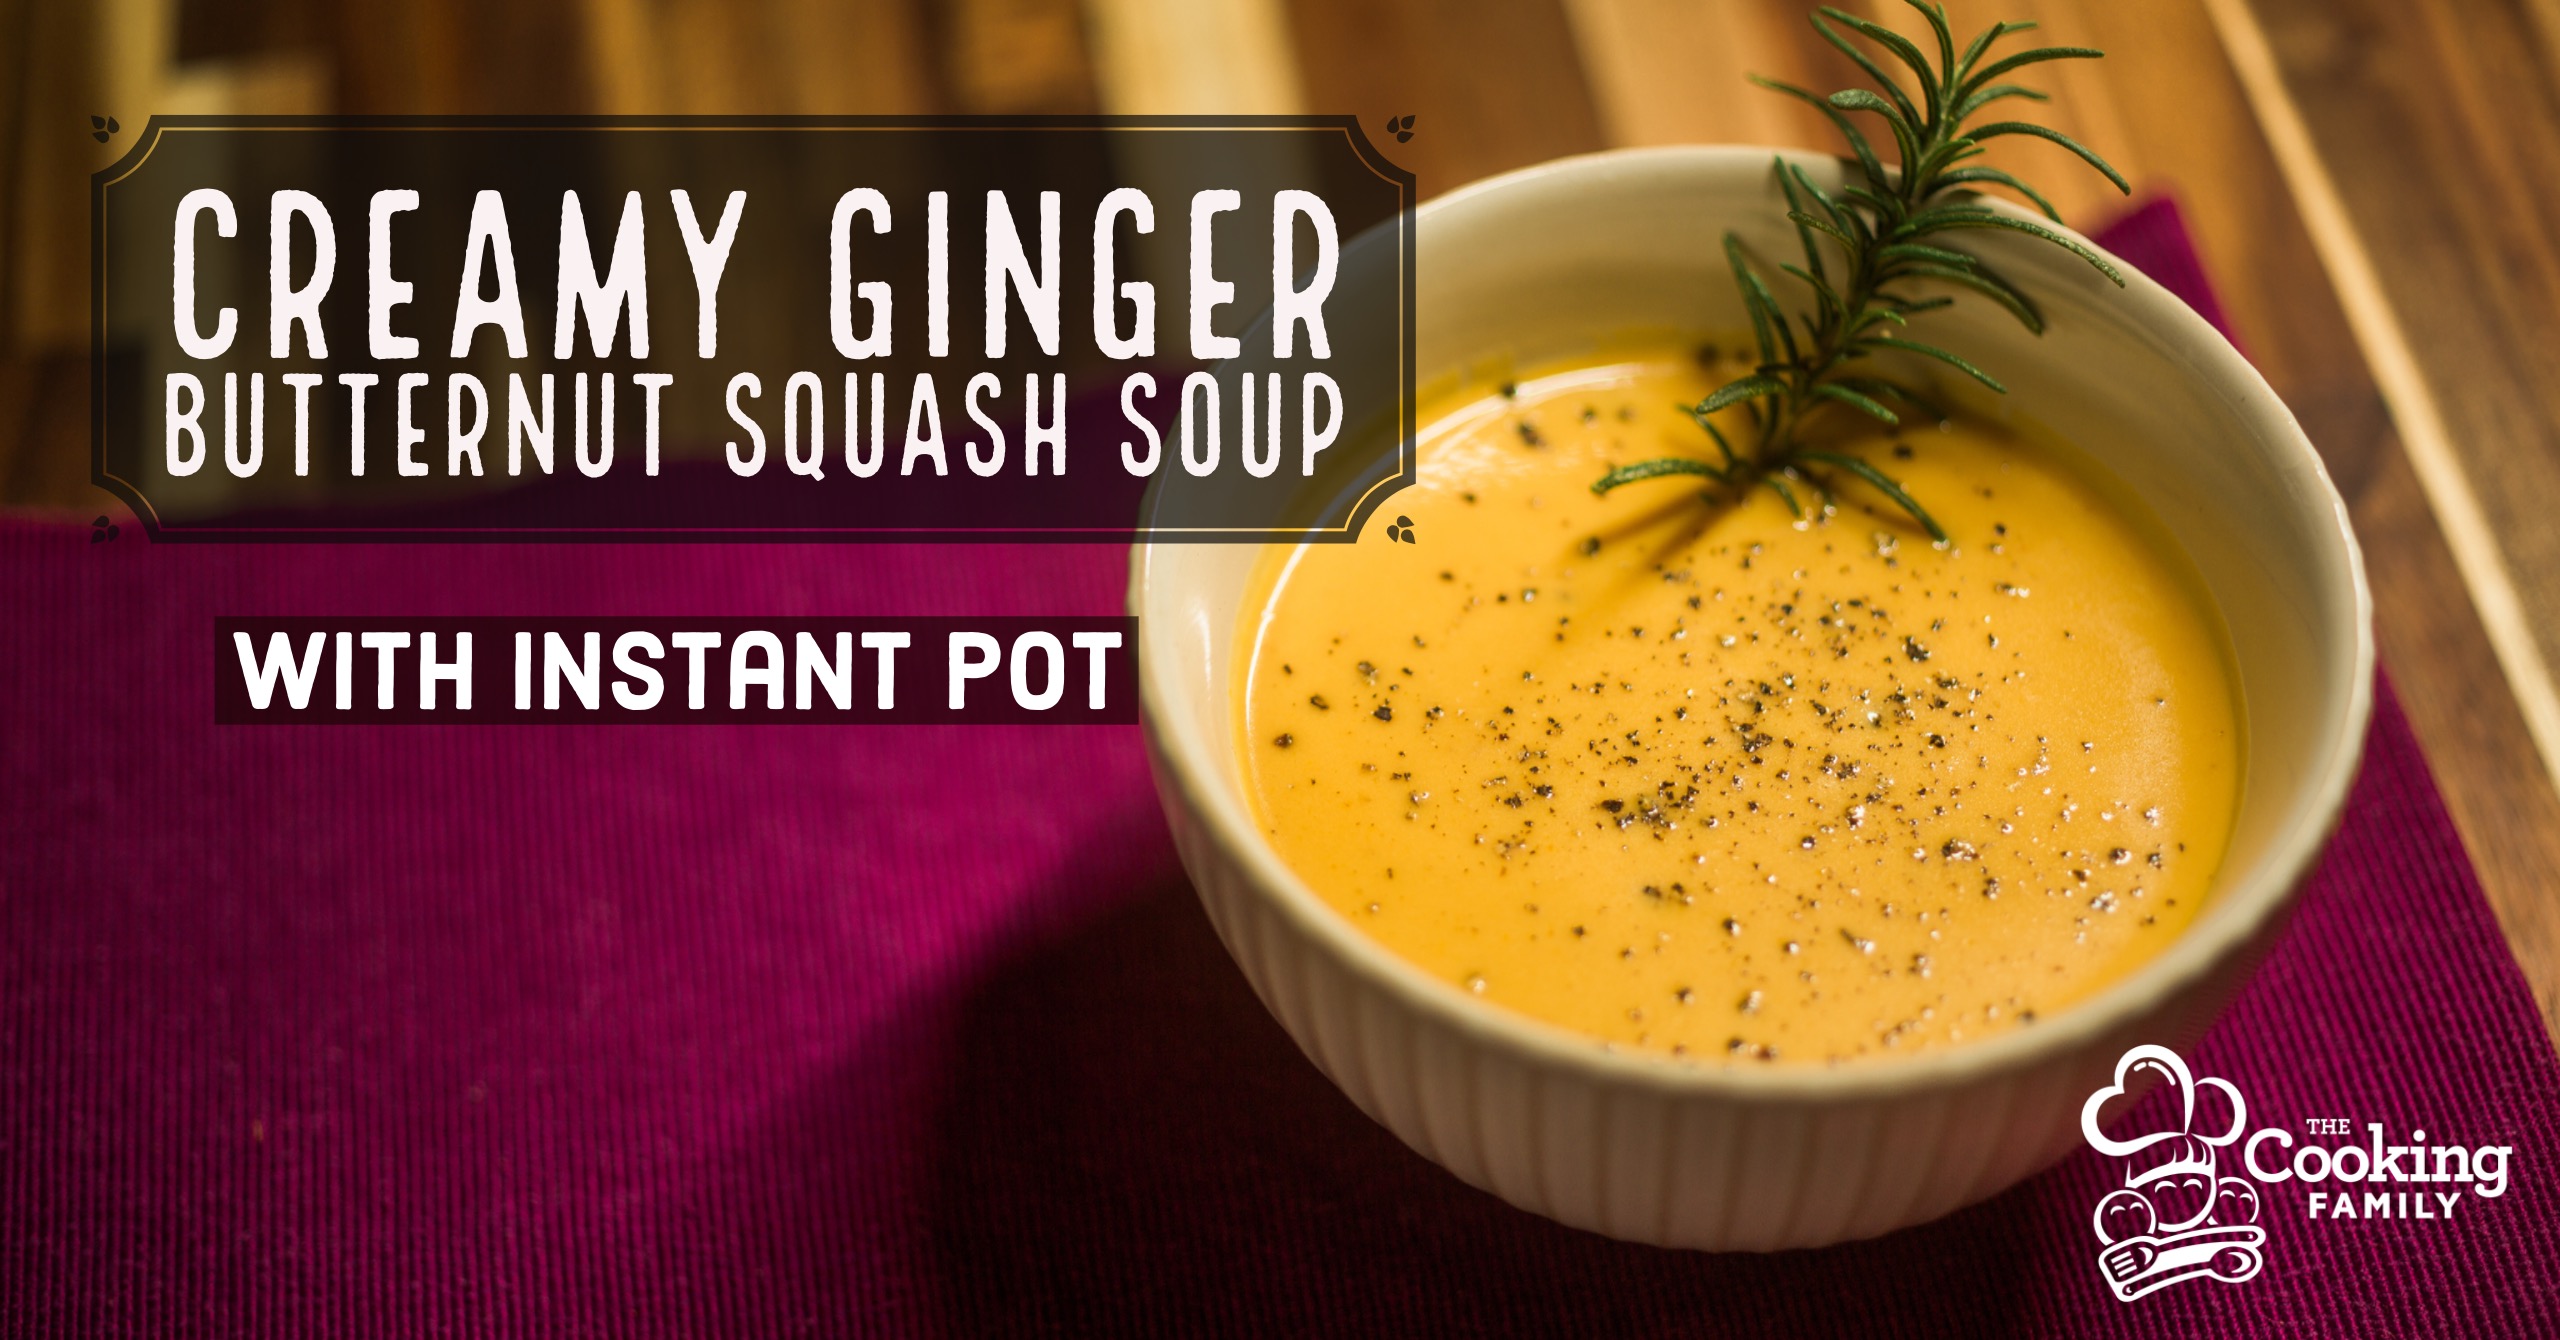
This is such a yummy comfort food, perfect for the fall season.  The combination of apples and squash, ginger and cream, makes a delicious blend of sweet and tart, warm spice and cool cream. You just have to try it!

Now, there are lots of ways to prepare your ingredients, but for me, when I see a recipe call for sliced, peeled butternut squash, it literally makes me cringe. That chore is one of my kitchen nightmares! Cutting up a butternut squash is hard!

So I don’t do it. Let me show you an easier way to “skin that cat” with an Instant Pot!

This is an involved recipe, so it’s lots of fun if the family joins in. Children can do lots of things to help in this recipe! …

Creamy Ginger Butternut Squash Soup in the Instant PotRead More

Filed Under: Freezer Meal, Gluten Free, Instant Pot, Kids in the Kitchen, Recipes, Soup Tagged With: Butternut Squash, Cooking, Cream, Dinner, family dinner, Freezer Meal, Ginger, Gluten Free, pressure cooker, recipe, side dish, Soup, Thanksgiving

Breakfast Casserole w/Roasted Veggies

December 3, 2022 by //  by Holly Leave a Comment

Print Recipe
No ratings yet

Breakfast Casserole w/Roasted Veggies

A baked egg and cheese casserole, loaded with savory roasted vegetables, this is easy to make and can be prepared ahead using leftover veggies! Great for serving guests or for a special breakfast. We also love prepping it ahead and having quick breakfasts ready all week.
Prep Time15 mins
Cook Time1 hr
Total Time1 hr 15 mins
Course: Breakfast, Breakfast for Dinner, Main Course
Cuisine: American, Farm-to-Table
Keyword: Eggs, Gluten-free options, Made from Scratch, Make-Ahead Breakfast, Prep-Ahead
Servings: 8
Calories: 794734kcal
Author: Holly
Cost: $10

Equipment

  • 1 Mixing bowl
  • 1 Whisk
  • 1 Blender or Food Processor
  • 1 9 x 13 Casserole Dish

Ingredients

  • 6-8 slices bread or a package of frozen hash brown potatoes
  • 3-4 cups roasted or cooked vegetables Some options: onion, peppers, broccoli, mushrooms, spinach, sun-dried tomatoes, sweet potatoes. Any cooked vegetables will work.
  • 2 c. or up to 1 lb of shredded Cheddar cheese or other cheese if you prefer
  • 8 eggs beaten well
  • 1½ c. milk
  • 1 tsp. salt
  • ¼ tsp. black pepper
  • 1¼ t. dry ground mustard

Just before baking top with:

  • 3 c. cornflakes, crushed crushed. Gluten free alternatives are: corn chex, rice chex, tortilla chips. Leave off for lower carb option.
  • ½ c. butter, melted

Instructions

  • Preheat oven to 300°F.
  • Grease baking dish.
    Tear bread into pieces and place into 9×13 greased pan. Or pour and spread out frozen hash browns in baking dish.
    Layer veggies and then cheese over bread or potatoes.
  • Beat eggs with milk, salt and mustard—blender or food processor works best for this.
    Pour mixture over bread, veggies, and cheese (make sure bread is well-covered).
  • Cover and chill 8 hours or overnight. (Optional–see notes.)
  • Uncover and sprinkle with cornflakes and then drizzle with melted butter.
    Bake at 300° for 60 minutes, or until set (bubbly).
  • Cut into squares and serve. We love serving with salsa, hot sauce, or chili garlic sauce at the table.

Notes

This casserole is best when made ahead and then just pop it in the oven when you’re ready to serve it. However, I’ve put this casserole together and baked it immediately many times and it still tastes fantastic. 

Nutrition

Calories: 794734kcal | Carbohydrates: 43979g | Protein: 40788g | Fat: 56679g | Saturated Fat: 3134g | Polyunsaturated Fat: 15767g | Monounsaturated Fat: 35201g | Trans Fat: 1g | Cholesterol: 301mg | Sodium: 22219mg | Potassium: 1153623mg | Fiber: 19066g | Sugar: 10622g | Vitamin A: 51337IU | Vitamin C: 11113mg | Calcium: 416163mg | Iron: 14419mg

Breakfast Casserole w/Roasted VeggiesRead More

Filed Under: Uncategorized

Italian Lentil Soup

December 2, 2022 by //  by Holly Leave a Comment

Print Recipe
No ratings yet

Italian Lentil Soup in the Instant Pot (Vegan)

Prep Time15 mins
Cook Time15 mins
Pressure Cooking Time15 mins
Total Time45 mins
Course: Main Course, Soup
Cuisine: American, Beans & Rice, Italian, Plant-Based, Vegan
Keyword: Budget-friendly, Dairy-free, Dinner, Gluten-free, Kid-Approved
Servings: 8
Calories: 284kcal
Author: Holly
Cost: $7

Equipment

  • Pressure Cooker

Ingredients

  • 2 tbsp olive oil
  • 1 cup onion diced (1 medium-sized onion equals about 1 cup diced)
  • 1 cup celery diced (2-3 stalks equal about 1 cup diced celery)
  • 1 cup carrots diced (2-3 whole carrots equal about 1 cup diced)
  • 1 cup bell pepper diced (1 medium bell pepper equals about 1 cup diced)
  • 2 tablespoons fresh garlic minced (1 clove garlic equals about 1 teaspoon minced)
  • 1 teaspoon oregano
  • 1 teaspoon basil
  • 1 teaspoon fennel
  • 1 lb. lentils sorted and rinsed (“sorting” means looking through the dried lentils and picking out any rocks or sticks that may have come from the field)
  • 14 ounces Diced tomatoes
  • 8 cups unsalted or low sodium vegetable stock
  • Salt to taste

Instructions

  • Turn on Instant Pot to [Sauté] mode to begin heating everything while you throw all the ingredients in the pot.
  • Sauté onions, carrots, and celery. Add about 1/2 teaspoon salt. Brown slightly for added flavor. Add remaining ingredients.
  • Cook on [Pressure Cook] or [Manual] or [Soup] setting/High pressure/15 min/10 min NR.

Detailed Newbie Instant Pot Instructions:

  • Close lid of Instant Pot. Check valve and make sure it is on [Sealing].
  • Turn off Instant Pot if it’s still on [Sauté] mode.
  • Turn Instant Pot ON to [Soup] program.
  • Adjust the time to 15 minutes at high pressure by pressing [+] or [-] on the front of your Instant Pot.
  • Allow Pot to Natural release for at least 10 minutes.
  • Stir well and taste. Add any needed salt and pepper to taste. A splash of Tabasco really hits the spot!

Nutrition

Calories: 284kcal | Carbohydrates: 46g | Protein: 16g | Fat: 4g | Saturated Fat: 1g | Polyunsaturated Fat: 1g | Monounsaturated Fat: 3g | Sodium: 1032mg | Potassium: 853mg | Fiber: 20g | Sugar: 8g | Vitamin A: 3948IU | Vitamin C: 34mg | Calcium: 73mg | Iron: 5mg

Italian Lentil SoupRead More

Filed Under: Uncategorized

Bacon & Onion Breakfast Casserole

December 2, 2022 by //  by Holly Leave a Comment

Print Recipe
No ratings yet

Bacon & Onion Breakfast Casserole

A baked egg and cheese casserole, this is easy to make and can be prepared ahead. Great for serving guests or for a special breakfast. We also love prepping it ahead and having quick breakfasts ready all week.
Prep Time15 mins
Cook Time1 hr
Total Time1 hr 15 mins
Course: Breakfast, Breakfast for Dinner, Main Course
Cuisine: American, Farm-to-Table
Keyword: Eggs, Gluten-free options, Made from Scratch, Make-Ahead Breakfast, Prep-Ahead
Servings: 8
Calories: 794734kcal
Author: Holly
Cost: $10

Equipment

  • 1 Mixing bowl
  • 1 Whisk
  • 1 Blender or Food Processor
  • 1 9 x 13 Casserole Dish

Ingredients

  • 1 onion
  • 4 tbsp butter
  • 6-8 slices bread or a package of frozen hash brown potatoes
  • 1 lb. bacon cooked and crumbled or diced
  • 2 c. or up to 1 lb of shredded Cheddar cheese or other cheese if you prefer
  • 8 eggs beaten well
  • 1½ c. milk
  • 1 tsp. salt
  • ¼ tsp. black pepper
  • 1¼ t. dry ground mustard

Just before baking top with:

  • 3 c. cornflakes, crushed crushed. Gluten free alternatives are: corn chex, rice chex, tortilla chips. Leave off for lower carb option.
  • ½ c. butter, melted

Instructions

  • Preheat oven to 300°F.
  • Caramelize onion by sautéing until browned. Use medium-high heat and stir infrequently.
  • Grease baking dish.
    Tear bread into pieces and place into 9×13 greased pan. Or pour and spread out frozen hash browns in baking dish.
    Layer bacon, onions, and then cheese over bread or potatoes.
  • Beat eggs with milk, salt and mustard—blender or food processor works best for this.
    Pour mixture over bread, meat, and cheese (make sure bread is well-covered).
  • Cover and chill 8 hours or overnight. (Optional–see notes.)
  • Uncover and sprinkle with cornflakes and then drizzle with melted butter.
    Bake at 300° for 60 minutes, or until set (bubbly).
  • Cut into squares and serve. We love serving with salsa, hot sauce, or chili garlic sauce at the table.

Notes

This casserole is best when made ahead and then just pop it in the oven when you’re ready to serve it. However, I’ve put this casserole together and baked it immediately many times and it still tastes fantastic. 

Nutrition

Calories: 794734kcal | Carbohydrates: 43979g | Protein: 40788g | Fat: 56679g | Saturated Fat: 3134g | Polyunsaturated Fat: 15767g | Monounsaturated Fat: 35201g | Trans Fat: 1g | Cholesterol: 301mg | Sodium: 22219mg | Potassium: 1153623mg | Fiber: 19066g | Sugar: 10622g | Vitamin A: 51337IU | Vitamin C: 11113mg | Calcium: 416163mg | Iron: 14419mg

Bacon & Onion Breakfast CasseroleRead More

Filed Under: Uncategorized

Make-Ahead Breakfast Casserole

December 2, 2022 by //  by Holly Leave a Comment

Print Recipe
No ratings yet

Make-Ahead Breakfast Casserole

A baked egg and cheese casserole, this is easy to make and can be prepared ahead. Great for serving guests or for a special breakfast. We also love prepping it ahead and having quick breakfasts ready all week.
Prep Time15 mins
Cook Time1 hr
Total Time1 hr 15 mins
Course: Breakfast, Breakfast for Dinner, Main Course
Cuisine: American, Farm-to-Table
Keyword: Eggs, Gluten-free options, Made from Scratch, Make-Ahead Breakfast, Prep-Ahead
Servings: 8
Calories: 794734kcal
Author: Holly
Cost: $10

Equipment

  • 1 Mixing bowl
  • 1 Whisk
  • 1 Blender or Food Processor
  • 1 9 x 13 Casserole Dish

Ingredients

  • 6-8 slices bread or a package of frozen hash brown potatoes
  • 1 lb. breakfast sausage or bacon or ham cooked and crumbled or diced
  • 2 c. or up to 1 lb of shredded Cheddar cheese or other cheese if you prefer
  • 8 eggs beaten well
  • 1½ c. milk
  • 1 tsp. salt
  • ¼ tsp. black pepper
  • 1¼ t. dry ground mustard

Just before baking top with:

  • 3 c. cornflakes, crushed crushed. Gluten free alternatives are: corn chex, rice chex, tortilla chips. Leave off for lower carb option.
  • ½ c. butter, melted

Instructions

  • Preheat oven to 300°F.
  • Cook sausage until no longer pink; drain well.
  • Grease baking dish.
    Tear bread into pieces and place into 9×13 greased pan. Or pour and spread out frozen hash browns in baking dish.
    Layer meat and then cheese over bread or potatoes.
  • Beat eggs with milk, salt and mustard—blender or food processor works best for this.
    Pour mixture over bread, meat, and cheese (make sure bread is well-covered).
  • Cover and chill 8 hours or overnight. (Optional–see notes.)
  • Uncover and sprinkle with cornflakes and then drizzle with melted butter.
    Bake at 300° for 60 minutes, or until set (bubbly).
  • Cut into squares and serve. We love serving with salsa, hot sauce, or chili garlic sauce at the table.

Notes

This casserole is best when made ahead and then just pop it in the oven when you’re ready to serve it. However, I’ve put this casserole together and baked it immediately many times and it still tastes fantastic. 

Nutrition

Calories: 794734kcal | Carbohydrates: 43979g | Protein: 40788g | Fat: 56679g | Saturated Fat: 3134g | Polyunsaturated Fat: 15767g | Monounsaturated Fat: 35201g | Trans Fat: 1g | Cholesterol: 301mg | Sodium: 22219mg | Potassium: 1153623mg | Fiber: 19066g | Sugar: 10622g | Vitamin A: 51337IU | Vitamin C: 11113mg | Calcium: 416163mg | Iron: 14419mg

Make-Ahead Breakfast CasseroleRead More

Filed Under: Uncategorized

Superfood Chili w/Sweet Potatoes, Quinoa, and Black Beans

November 19, 2022 by //  by Holly Leave a Comment

Print Recipe
No ratings yet

Superfood Chili w/Sweet Potatoes, Quinoa, and Black Beans

A hearty dinner that is packed with superfoods, this vegan Chili is sure to become a family favorite!
Prep Time30 mins
Pressure Cooking Time7 mins
Total Time37 mins
Course: Dinner, Main Course, Soup
Cuisine: American, Beans & Rice, Comfort Food, Health Food, Plant-Based, Real Food
Keyword: Dairy-free, Gluten-free, Made from Scratch, Meatless, Plant-Based, Superfood, Vegan, Vegetarian
Servings: 8
Calories: 236kcal
Author: Holly

Ingredients

  • 1 large onion, diced (about 2 cups)
  • 1 bell pepper, diced (about 1 cup)
  • 1/2 teaspoon salt
  • 6-8 cloves garlic minced
  • 4 Tablespoons ground cumin
  • 4 Tablespoons chili powder
  • 1 teaspoon oregano
  • 2 teaspoons brown sugar regular sugar can be substituted
  • 2 14-15 oz. cans diced tomatoes (undrained)
  • 1 28 oz can crushed tomatoes (undrained)
  • 3 cups cooked, rinsed black beans
  • 1 cup dried quinoa rinse well and drain before adding
  • 3 cups sweet potatoes, diced
  • 3 cups water

Instructions

Instant Pot Instructions

  • 7 Minutes High Pressure/Natural Release:
  • Turn Instant Pot on <Sauté>.
  • Brown onions and bell peppers. Add about 1/4 teaspoon salt to aromatics. Add garlic and cook for only one minute.
  • Add first can of tomatoes and stir, scraping the bottom of the pot to deglaze any remaining browning on bottom of pot.
  • Add remaining ingredients. Stir well.
  • Close lid. Check valve to make sure it is set on <Sealing>.
  • Set Instant Pot to <Bean/Chili> program and adjust the time to 7 minutes at <High> pressure.
  • When pressure cooking time is finished, allow pressure cooker to Natural Release (NR) for at least 5 minutes. Then Quick Release remaining pressure.

Stove Top Instructions:

  • Brown onions and bell peppers.
  • Add garlic, cumin, chili powder, and oregano and stir well for one minute.
  • Mix in beans (cooked, drained, and rinsed), quinoa (rinsed and drained), and diced sweet potatoes.
  • Stir in tomatoes and 3 cups of water.
  • Simmer on stove top for at least 20 minutes, but it’s better the longer it simmers.

Slow-Cooker Instructions:

  • Brown onions and bell peppers.
  • Add garlic, cumin, chili powder, and oregano and stir well for one minute.
  • Transfer this mixture to Slow Cooker insert.
  • Add remaining ingredients. Stir to combine.
  • Set on High for 4-6 hours or Low for 8-10 hours.
  • Taste for seasoning and adjust as desired.

Notes

1 15-ounce can of beans equals about 1 1/2 cups of beans.

Nutrition

Calories: 236kcal | Carbohydrates: 46g | Protein: 10g | Fat: 3g | Saturated Fat: 0.4g | Polyunsaturated Fat: 1g | Monounsaturated Fat: 1g | Sodium: 645mg | Potassium: 871mg | Fiber: 11g | Sugar: 7g | Vitamin A: 8486IU | Vitamin C: 26mg | Calcium: 137mg | Iron: 6mg

Superfood Chili w/Sweet Potatoes, Quinoa, and Black BeansRead More

Filed Under: Uncategorized

Classic Egg Salad

April 14, 2022 by //  by Holly Leave a Comment

Last updated on July 22nd, 2022 at 01:32 pm

Classic Egg Salad often reminds me of when I was a child, sitting at Grandma Vera’s kitchen table, eating an egg salad sandwich for lunch after spending the night at her house. It was such a special time!

This is a super easy recipe for kids to help with or make by themselves!

  • Hard-boiled eggs are a great food for children to begin learning knife skills, because they are so soft. They can even be cut with a butter knife by a pre-schooler.
  • This recipe is very forgiving and a great one for eyeballing the amounts. Kids can simply spoon or squirt the ingredients into the chopped eggs and stir them. Let them do a taste test and decide if they would like more salt or mayo. Then they can correct the seasoning and make it taste exactly like they want it. Theres no room for perfectionism here.

Age-appropriate Tasks for Children

Little Ones (ages 2-6)

  • Help carry ingredients to the food prep area.
  • Peel hard-boiled eggs cooked in the Instant Pot, alongside a parent or older child.
  • Chop hard-boiled eggs with a butter knife, alongside a parent or older child.
  • Stir egg salad mixture.

Middle Kiddos (ages 5-11)

  • Peel hard-boiled eggs independently.
  • Chop hard-boiled eggs with a steak knife or a chopper or an egg-slicer.
  • Gather ingredients to food prep area.
  • Measure and add egg salad ingredients to mixing bowl.
  • Stir egg salad mixture thoroughly.

Older Children and Teens (ages 12 and up)

  • Pressure cook hard-boiled eggs.
  • Follow recipe independently.
  • Make variations in recipe, depending on likes/dislikes.
  • Plan entire meal.
  • Make and serve sandwiches.
  • Make and serve entire meal.

Click here to see how we make Perfect Hard-Boiled Eggs in the Instant Pot.

Click here for Abraham’s Spicy Bacon Deviled Egg recipe. It’s sooo good!!

And in case you need to make a bunch of egg salad, we figured out how many eggs you can cook in the Instant Pot at a time.

Print Recipe
No ratings yet

Classic Egg Salad

Egg Salad makes a great prep-ahead sandwich filling, salad topper, or snack to eat right out of the bowl. Simple, quick, and delicious!
Prep Time5 mins
Cook Time7 mins
Pressure Cooking Time5 mins
Total Time17 mins
Course: Lunch
Cuisine: American
Keyword: Budget-friendly, Dairy-free, Eggs, Gluten-free, Incredible Egg, Instant Pot, Kid-Approved, Low Carb, Prep-Ahead, Real Food
Servings: 6
Calories: 225kcal
Author: Holly
Cost: $4

Equipment

  • 1 Electric Pressure Cooker
  • 1 Mixing bowl
  • 1 Knife or Egg Slicer

Ingredients

  • 12 hard-boiled eggs 5 min/LOW Pressure/Quick Release/Ice Bath https://thecookingfamily.com/perfect-hard-boiled-eggs-instant-pot/
  • 4 tablespoons mayonnaise
  • 2 tablespoons dill relish or sweet relish, your choice
  • 1 tablespoon apple cider vinegar or other vinegar
  • 2 teaspoons mustard any kind
  • Salt and pepper to taste
  • 1-3 dashes Tabasco sauce to taste (optional)

Instructions

  • Chop or dice eggs into small pieces.
  • Add remaining ingredients. Stir well. Taste and correct seasoning.
  • Serve as sandwiches, on crackers, or on a bed of greens.

Notes

Make a large batch for a large family or to prep cook and use during the week for quick lunches and snacks. Or cut recipe in half for a smaller batch.
Make it Super: Add crumbled bacon and finely chopped jalapeños to kick this egg salad up another notch. 

Nutrition

Calories: 225kcal | Carbohydrates: 2g | Protein: 13g | Fat: 18g | Saturated Fat: 4g | Polyunsaturated Fat: 6g | Monounsaturated Fat: 6g | Trans Fat: 1g | Cholesterol: 377mg | Sodium: 261mg | Potassium: 136mg | Fiber: 1g | Sugar: 1g | Vitamin A: 536IU | Vitamin C: 1mg | Calcium: 52mg | Iron: 1mg

Classic Egg SaladRead More

Filed Under: Uncategorized

Cheesy Sausage and Potato Soup

January 27, 2022 by //  by Holly Leave a Comment

Last updated on February 17th, 2022 at 09:38 pm

A bowl of Cheesy Sausage and Potato Soup
Print Recipe
5 from 1 vote

Cheesy Sausage and Potato Soup

This hearty and simple stew combines sausage and potatoes with cheese to make a comforting soup.
Prep Time10 mins
Cook Time20 mins
Pressure Cooking Time5 mins
Total Time35 mins
Course: Soup
Cuisine: American
Keyword: Bone Broth, Budget-friendly, Cheese, Comfort Food, Gluten-free, Potatoes, Sausage, Soup
Servings: 8
Calories: 593kcal
Author: Holly
Cost: $10

Equipment

  • 1 Pressure Cooker
  • 1 Chef's Knife
  • 1 Cutting Board
  • 1 Immersion blender

Ingredients

  • 1 cup Onion, diced
  • 1.5 pounds Carrots, chopped
  • 2.5 pounds Potatoes, chopped
  • 14 ounces Smoked Sausage, diced
  • 2 cups Chicken, cooked and diced
  • 8 cups Chicken broth low sodium or no sodium (Bone Broth Recipe here)
  • 1 teaspoon Salt omit salt if using Velveeta

CHOOSE Only ONE type of Cheese:

    The Cheesy Part–Real Food Choice–Easy

    • 16 ounces Cream Cheese
    • 1 teaspoon Ground mustard
    • 1/2 teaspoon Paprika
    • 1/2 teaspoon Salt

    OR–The Cheesy Part–Convenient Choice–Easier

    • 16 ounces Velveeta Cheese

    Instructions

    • Turn Instant Pot on to Sauté mode.
    • Pour broth into pot and add all chopped veggies and meat.
    • Place lid on Instant Pot. Check to make sure Pressure Release Valve is set to <Sealing>.
    • Set Instant Pot to Pressure Cook on High Pressure for 5 minutes. Press <Start> or wait for Instant Pot to beep, signaling that cooking has begun.
    • While soup is cooking, allow cream cheese OR Velveeta to warm to room temperature.
    • When pressure cooking time is finished, release the pressure from the pot by turning the Pressure Release Valve to <Venting>. Stay near the pot to close the valve if soup comes out the top.

    The Creamy, Cheesy Part

    • After pressure is completely released from the Instant Pot, open the lid carefully.
    • If you're using Cream Cheese, remove about 2 ½ cups of hot broth from pot into a heat-safe glass bowl. Add cream cheese, ground mustard, paprika, and salt. Blend carefully with the immersion blender. Pour back into soup pot. Stir well. Taste and serve!
    • If you're using Velveeta or another brand of melting cheese loaf, cut 16oz. of the cheese into 1-inch cubes. After the broth, veggies, and meat are cooked and lid is opened, carefully place cheese pieces into the pot. Close lid for about two minutes. Come back and stir well until the soup is smooth and creamy. Taste and serve!

    Nutrition

    Calories: 593kcal | Carbohydrates: 41g | Protein: 27g | Fat: 37g | Saturated Fat: 17g | Polyunsaturated Fat: 3g | Monounsaturated Fat: 13g | Cholesterol: 124mg | Sodium: 1204mg | Potassium: 1358mg | Fiber: 6g | Sugar: 8g | Vitamin A: 15049IU | Vitamin C: 34mg | Calcium: 124mg | Iron: 3mg

    Cheesy Sausage and Potato SoupRead More

    Filed Under: Uncategorized

    Bourbon Honey Pecan Pie

    November 24, 2021 by //  by Holly Leave a Comment

    Last updated on December 30th, 2021 at 10:05 pm

    Print Recipe
    No ratings yet

    Bourbon Honey Pecan Pie

    The flavors of honey and bourbon take pecan pie from delicious to out-of-this-world!
    Prep Time20 mins
    Cook Time1 hr 10 mins
    Total Time1 hr 30 mins
    Course: Dessert
    Cuisine: American, Southern
    Keyword: Bourbon, Dessert, Fall, Holiday, Honey, Pecan Pie, Pie, Texas Honey, Thanksgiving
    Servings: 8
    Calories: 498kcal
    Author: Holly

    Equipment

    • Pie plate
    • Mixing bowl

    Ingredients

    • 1 cup sugar
    • 3 tablespoons brown sugar
    • 1/2 teaspoon salt
    • 1/2 cup light corn syrup
    • 1/4 cup honey
    • 1/3 cup salted butter melted
    • 3 eggs beaten
    • 4 tablespoons bourbon
    • 1 cup pecans chopped
    • 1 pie crust unbaked, see note
    • whipped cream optional, for serving

    Instructions

    • Preheat oven to 350 degrees Fahrenheit.
    • Place chopped pecans into the prepared pie crust.
    • In a medium mixing bowl, place sugar, brown sugar, salt, corn syrup, honey, melted butter, eggs, and bourbon. Stir well until all are combined well.
    • Pour honey bourbon mixture over pecans in pie plate.
    • Bake at 350 for 1 hour to 1 hour to 1 hour and 10 minutes. When pie is done, the pecans will become slightly browned on top. Note: cover the pie crust with foil when it begins to turn golden brown.

    Notes

    Note on pie crust: One of my biggest inner conflicts in cooking is Pie Crust. I am a foodie purist and I love making food from scratch. But pie crust has been a challenge for me. We have found a recipe that we love, and it is loaded with real butter and lard!
    So, even though I continue to try to make real pie dough at least once a year, I have found the store-bought rolled out pie crust to be a pretty darn good substitute and certainly is much easier and less likely to mess up the pie. Plus it’s a lot faster, and you can make a yummy pie in less than twenty minutes!
    The rolled out pie crust usually comes in a box of two in the refrigerated section of the grocery store,  near the refrigerated biscuit dough in the pop-open cans.

    Nutrition

    Serving: 1slice | Calories: 498kcal | Carbohydrates: 67g | Protein: 5g | Fat: 24g | Saturated Fat: 8g | Cholesterol: 82mg | Sodium: 338mg | Potassium: 106mg | Fiber: 2g | Sugar: 55g | Vitamin A: 332IU | Vitamin C: 1mg | Calcium: 31mg | Iron: 1mg

    Bourbon Honey Pecan PieRead More

    Filed Under: Dessert, Holiday, Kids in the Kitchen, Recipes Tagged With: Bourbon, Christmas, Dessert, Holiday, Honey, Pecan, Pie, Texas, Thanksgiving

    Garlic Rosemary Focaccia Bread

    November 8, 2021 by //  by Holly Leave a Comment

    Print Recipe
    No ratings yet

    Garlic Rosemary Focaccia Bread

    The crisp garlic and rosemary-infused crust on this rustic Italian bread is sure to delight your tastebuds (and your family's if you decide to share)!!
    Prep Time20 mins
    Proofing Time plus additional Rising time1 hr 15 mins
    Total Time1 hr 35 mins
    Course: Dinner, Lunch
    Cuisine: Italian
    Keyword: Budget-friendly, Dairy-free, Dinner, Fall, Instant Pot, Kid-Approved, Pantry, Vegetarian
    Servings: 12
    Calories: 334kcal
    Author: Holly
    Cost: $2

    Equipment

    • Instant Pot or other electric pressure cooker
    • Conventional Oven
    • Stand Mixer (like a KitchenAid), optional

    Ingredients

    • ½ cup extra virgin olive oil
    • 4 cloves garlic, minced
    • 2 tbsp fresh rosemary, chopped (1 tablespoon fresh herbs equals about 1 teaspoon dried)
    • 2 cups warm water (105 to 110 degrees)
    • 4 ½ teaspoons active dry yeast (one pkg. of yeast equals about 2 ¼ teaspoons)
    • 2 tablespoons sugar or honey
    • 6 cups all-purpose flour, divided use Bread flour would also be great!
    • 1 ½ teaspoons salt

    Instructions

    Herb-Infused Oil

    • Place garlic, rosemary, and olive oil in a cold skillet on the stove.
    • Gently heat oil in skillet until garlic begins to bubble. After about 30 seconds, remove from heat and turn off stove. Allow to cool completely before adding part of oil to the dough.

    Bread Dough

    • Place yeast, sugar, and warm (not hot) water in bowl of KitchenAid Mixer. Using whisk attachment, stir together well. Allow to sit for five minutes, and watch it bubble up. (If it doesn't bubble up, stir again and wait a few more minutes. Your yeast is no good if it doesn't bubble up by this point.)
    • Stir two cups of the flour into the bubbly yeast mixture. Add about half (¼ cup) of the infused herb oil and the salt. Incorporate well.
    • If using a KitchenAid, switch to paddle attachment. With mixer on the lowest speed, stir in remaining flour, one cup at a time.
    • Switch mixer attachment to dough hook, and turn on mixer to knead for 1-2 minutes.
    • Dough should be forming into a cohesive ball and not sticking to the sides of the bowl.
    • Form dough into a ball with your hands and knead it on a floured surface about 4-5 times.
    • Drizzle Instant Pot stainless steel inner pot with olive oil. Place dough in oil, top side down, then turn so the ball of dough is well-covered with oil. Then place dough ball in inner pot, right side up. Place insert into Instant Pot.
    • Set inner pot to Proof dough by pressing [Yogurt] button. Then press [Adjust] or just press [Yogurt] button repeatedly to cycle through [Less], [Normal], and [More] settings. To do a normal rise time, you want to choose [Less]. For a rapid rise, which cuts rising time down, but may result in a slightly lower quality result, choose [Normal]. Do not choose [More] because this will turn the pot on and cause it to burn the bottom of your dough.
    • Cover pot with a glass lid and allow dough to rise until it has doubled in size.
    • After dough has risen, punch down dough.
    • Split dough into 2 or 3 balls, depending on how large you want your flatbread. You could even split into enough for every member of your family to have their own flatbread.
    • Preheat oven to 450°F. On a parchment paper-lined baking sheet, place dough ball and spread it out with your fingertips, until it is about 1/2 inch thick, creating lots of dimples in the dough. Brush garlic and rosemary infused olive oil all over the top of the focaccia.
    • Bake at 450°F for 18-20 minutes, or until the top is slightly golden brown.

    Nutrition

    Calories: 334kcal | Carbohydrates: 53g | Protein: 8g | Fat: 10g | Saturated Fat: 1g | Polyunsaturated Fat: 1g | Monounsaturated Fat: 7g | Sodium: 297mg | Potassium: 118mg | Fiber: 3g | Sugar: 3g | Vitamin A: 11IU | Vitamin C: 1mg | Calcium: 15mg | Iron: 3mg

    Garlic Rosemary Focaccia BreadRead More

    Filed Under: Uncategorized

    Southern Collards in the Instant Pot

    March 31, 2021 by //  by Holly Leave a Comment

    Print Recipe
    No ratings yet

    Southern Collards in the Instant Pot

    Collard Greens cook to perfection in a fraction of the time in the Instant Pot.
    Prep Time10 mins
    Cook Time10 mins
    Pressure Cooking Time5 mins
    Total Time25 mins
    Course: Side Dish
    Cuisine: Southern
    Keyword: Budget-friendly, Dinner, Gluten-free, Homemade, Instant Pot, Low Carb, Made from Scratch
    Servings: 6
    Author: Holly

    Ingredients

    • 1 lb collard greens ripped or chopped into small pieces
    • 1 about 1 cup onion diced,
    • 3 Tbsp olive oil
    • 2 tsp apple cider vinegar
    • 1/4 tsp sugar
    • 1/2 lb ham
    • 1/2 tsp Magic Flavor Dust https://thecookingfamily.com/magic-flavor-dust/
    • 1 cup water

    Instructions

    • Set Instant Pot on Saute and drizzle in the olive oil.
    • Dice the onion and add to pot when oil is shimmering. Saute for five minutes, or until onions are translucent.
    • While the onion sautes, wash and tear the collards. Each piece should be about one inch square. They will shrink up while cooking.
    • When the onions are ready, add the ham, vinegar, sugar, Magic Flavor Dust, and collards.
    • Stir all together as best you can, then pour the water on top.
    • Secure the lid on the Instant Pot. Ensure the valve is on Sealing. Select the Manual button, and set to five minutes at High Pressure. Either wait for it the display to read 'on,' or press the start button, depending on your model.
    • Turn the valve to 'Venting' as soon as the timer goes off. This is called Quick Release.
    • Remove the lid, stir, taste for salt and pepper, and serve!

    Southern Collards in the Instant PotRead More

    Filed Under: Uncategorized

    Homemade Peppermint Bark

    December 23, 2020 by //  by Holly Leave a Comment

    This is one of our favorite Christmas season treats. It’s easy to make, and so fun to make with kids. And if you make it yourself, it’s much cheaper than that fancy kitchen store!

    It makes a great gift also. Try it out yourself!

    Print Recipe
    No ratings yet

    Peppermint Bark

    This rich and minty combination of white and dark chocolate with peppermint makes a festive treat at holiday parties and is a wonderful gift for the person who has everything.
    Prep Time20 mins
    Cooling Time2 hrs
    Total Time2 hrs 20 mins
    Course: Dessert
    Cuisine: American, Holiday
    Keyword: Gluten-free, Holiday, Kid-Approved, Kid-Friendly
    Servings: 24
    Calories: 190kcal
    Author: Holly
    Cost: $9

    Equipment

    • Offset Spatula
    • Parchment Paper
    • Microwave
    • 2 small microwave-safe mixing bowls
    • 2 spoons for stirring
    • Kitchen mallet
    • Ziptop bag

    Ingredients

    • 3 ounces peppermint hard candy crushed (About 6 or 7 candy canes)
    • 14 ounces dark chocolate chips or broken into pieces. I prefer 60% cacao or higher.
    • 12 ounces white chocolate broken into pieces. Look for a product that actually says "chocolate" on the package or lists cocoa butter in the ingredients.
    • 12-20 drops Peppermint oil to taste. (Roughly ten drops in each kind of chocolate.)

    Instructions

    • Using a kitchen mallet, crush peppermint candy in a ziptop bag. Set aside.
    • Lay out parchment paper on a flat surface or a cookie sheet.
    • Use the microwave to melt dark chocolate in 30-second increments at Cook Power 6 and stir well in between. Avoid hot spots that can burn your chocolate. Also, avoid getting any water or other moisture in the chocolate. This should take 3-4 increments of 30 seconds each.
    • Add about 10 drops of peppermint oil, to taste. See note. Stir well.
    • With an offset spatula, spread dark chocolate on parchment paper to about 1/8 inch thickness. Try not to spread it too thin on the edges. Your sheet of chocolate will be about the size of a standard sheet of paper. Reserve about a 1/4 cup of dark chocolate to drizzle on top of the white chocolate.
    • Use the microwave to melt white chocolate in 30-second increments at Cook Power 6 and stir well in between. Avoid hot spots that can burn your chocolate. Also, avoid getting any water or other moisture in the chocolate. This should take 3-4 increments of 30 seconds each.
    • Add about 10 drops of peppermint oil, to taste. See note. Stir well.
    • Wait until dark chocolate layer has lost its gloss and developed a matte look and hardened slightly. This will take longer if your kitchen is hot or if your counter is warm, such as above a running dishwasher or next to a hot oven. If this is the case, move cooling chocolate to a cooler place, if possible. Or do something else while you wait.
    • Carefully spread white chocolate onto dark chocolate layer. Avoid pulling dark chocolate up into white chocolate layer by having a gentle touch. If marbling does occur, it's ok! You won't even notice once you have the dark chocolate drizzle and crushed peppermint candy on top.
    • Check reserved dark chocolate to make sure it's still melted. If not, melt in microwave as before for 30 seconds at cook power 6. Stir well.
    • Drizzle dark chocolate over white chocolate layer. See video for demonstration.
    • Sprinkle crushed peppermint candy over all. Allow to harden completely before breaking into pieces. Store in an airtight container. Enjoy!

    Notes

    Note on Peppermint Oil: Use the full amount if you like to really taste that cool pop of mint. If you don’t have peppermint oil, use 1/2 to 1 teaspoon of peppermint extract. You’ll need to sample the melted chocolate, because different peppermint extracts vary in their intensity.

    Nutrition

    Calories: 190kcal | Carbohydrates: 19g | Protein: 2g | Fat: 12g | Saturated Fat: 7g | Cholesterol: 3mg | Sodium: 16mg | Potassium: 159mg | Fiber: 2g | Sugar: 15g | Vitamin A: 11IU | Vitamin C: 1mg | Calcium: 40mg | Iron: 2mg

    Homemade Peppermint BarkRead More

    Filed Under: Dessert, Recipes Tagged With: Chocolate, Christmas Candy, Cooking with Kids, Dessert, Peppermint, White Chocolate

    Southern Skillet Cornbread

    October 16, 2020 by //  by Holly 1 Comment

    Last updated on November 4th, 2022 at 05:06 pm

    This soul-warming cornbread goes together very quickly and pairs perfectly with a bowl of simmering soup. The crisp bottom will melt in your mouth. Just add butter!

    Print Recipe
    5 from 2 votes

    Southern Skillet Cornbread

    This soul-warming cornbread goes together very quickly and pairs perfectly with a bowl of simmering soup. The crisp bottom will melt in your mouth. Just add butter!
    Course: Bread
    Cuisine: Southern
    Keyword: Budget-friendly, Comfort Food, Homemade, Made from Scratch, Pantry
    Servings: 8
    Author: Holly

    Equipment

    • Cast Iron Skillet
    • Large mixing bowl
    • Wooden Spoon or Rubber Spatula
    • Oven

    Ingredients

    Dry Ingredients

    • 1 3/4 cups cornmeal stone ground or regular
    • 3/4 cup all-purpose flour
    • 2 teaspoons baking powder
    • 3/4 teaspoon baking soda
    • 1 1/4 teaspoon salt

    Wet Ingredients

    • 2 eggs
    • 1 1/4 cups buttermilk can substitute by placing 1 tablespoon plus 1 teaspoon vinegar or lemon juice and filling measuring cup with remaining milk to make 1 1/4 cups total
    • 1/2 cup oil any vegetable oil or bacon grease for the daring who love bacon

    Instructions

    • Preheat oven to 425 degrees Fahrenheit.
    • Stir dry ingredients (cornmeal, flour, baking powder, baking soda, and salt) together in a large mixing bowl.
    • In a separate bowl, whisk eggs and then add buttermilk, stirring together well.
    • Pour the oil into cast-iron skillet and place in oven.
    • Just before the oil is hot, add the wet ingredients to the dry ingredients and mix just until incorporated. Do not overstir.
    • Remove hot skillet from oven. Carefully pour half the oil into the batter. Stir the oil in with 12 strokes. It's okay that it won't be completely mixed.
    • Pour the batter into the hot, oiled skillet.
    • Place skillet into oven and bake for 18-20 minutes, until toothpick inserted into middle comes out clean.
    • Cut into slices, serve immediately with plenty of fresh butter!
    • Do not hope for leftovers. The cornbread becomes stale the next day anyway.

    Southern Skillet CornbreadRead More

    Filed Under: Recipes

    Honey Walnut Vinaigrette

    October 1, 2020 by //  by Holly 2 Comments

    Print Recipe
    5 from 1 vote

    Honey Walnut Vinaigrette

    Perfect for fall, this homemade salad dressing recipe is delicious, budget-friendly, and super easy to make!
    Prep Time5 mins
    Total Time5 mins
    Course: Salad
    Cuisine: American, Health Food, Real Food
    Keyword: Budget-friendly, Dairy-free, Gluten-free, Made from Scratch, Real Food
    Servings: 8
    Calories: 111kcal
    Author: Holly
    Cost: $1

    Equipment

    • Measuring spoons
    • Glass jar with a lid

    Ingredients

    • 2 tablespoons toasted walnut oil
    • 4 tablespoons extra virgin olive oil
    • 1 tablespoon balsamic vinegar
    • 1 tablespoon apple cider vinegar
    • 2 tablespoons honey
    • 1 teaspoon Dijon mustard
    • 1/4 teaspoon salt
    • Fresh cracked black pepper

    Instructions

    • Pour all ingredients into a jar and shake well. Serve over your favorite salad greens.

    Notes

    Experiment with your own combination of oils and vinegars to try different salad dressings, using the 3 parts oil to 1 part vinegar ratio.
    We love this dressing on a bed of greens with chopped apples, chopped toasted walnuts, and grated white cheddar cheese.

    Nutrition

    Calories: 111kcal | Carbohydrates: 5g | Protein: 1g | Fat: 11g | Saturated Fat: 1g | Sodium: 81mg | Sugar: 5g | Iron: 1mg

    Honey Walnut VinaigretteRead More

    Filed Under: Uncategorized

    Crème Brûlée

    September 17, 2020 by //  by Holly Leave a Comment

    Print Recipe
    No ratings yet

    Crème Brûlée

    Prep Time15 mins
    Cook Time10 mins
    Pressure Cooking Time13 mins
    Total Time28 mins
    Servings: 8 Servings
    Calories: 411kcal
    Author: Holly

    Equipment

    • Handheld Propane Torch
    • Ramekins
    • Pressure Cooker

    Ingredients

    • 3 cups cream
    • 5 egg yolks
    • ⅔ cup sugar divided use
    • 1 pinch salt
    • 1 ½ tsp vanilla divided use

    Instructions

    • Combine cream, egg yolks, ⅓ cup of the sugar, salt, and 1 tsp of the vanilla with a whisk.
    • Divide the cream mixture evenly into the ramekins.
    • Pour 1 cup of water into the pressure cooker.
    • Cover each ramekin tightly with aluminum foil. Place the ramekins in your pressure cooker on a trivet.
    • Close the lid. Set the steam release valve to [Sealing].
    • Choose the [Manual] or [Pressure Cook] function. Change the pressure to [Low Pressure]. Use the [+] and [-] buttons or turn the dial to set the time to 13 minutes.
    • Once the cook time is ended, let the pressure cooker naturally release for 10 minutes.
    • After 10 minutes, set the steam release valve to [Venting]. When the float valve has dropped, open the lid.
    • Combine remaining sugar and vanilla in small bowl.
    • Put ramekins in fridge for 1 hour.
    • Remove foil from ramekins and sprinkle 1 tbsp of the sugar mixture on each ramekin.
    • Turn on the propane torch. Holding a ramekin in one hand, torch the sugar until brown and carmelized. Repeat for each ramekin.
    • Eat and enoy!

    Nutrition

    Calories: 411kcal | Carbohydrates: 20g | Protein: 4g | Fat: 36g | Saturated Fat: 22g | Cholesterol: 244mg | Sodium: 44mg | Potassium: 79mg | Sugar: 17g | Vitamin A: 1474IU | Vitamin C: 1mg | Calcium: 73mg | Iron: 1mg

    Crème BrûléeRead More

    Filed Under: Uncategorized

    Barbecue Ribs in the Instant Pot

    September 2, 2020 by //  by Holly Leave a Comment

    Barbecue Ribs make a super special meal with the family, and it’s easy to make them at home in your electric pressure cooker!

    Serve them with Tom’s Super Potato Salad for a great holiday gathering! And don’t forget the napkins!

    Print Recipe
    No ratings yet

    Barbecue Ribs in the Instant Pot

    Tender, juicy ribs become an easy yet special meal to make at home in the Instant Pot.
    Prep Time10 mins
    Cook Time25 mins
    Pressure Cooking Time23 mins
    Total Time58 mins
    Course: Dinner, Main Course
    Cuisine: American, Real Food, Southern
    Keyword: Dairy-free, Dinner, Gluten-free, Homemade, Restaurant Food at Home
    Servings: 4
    Calories: 661kcal
    Author: Holly

    Equipment

    • Electric Pressure Cooker

    Ingredients

    • 1 rack ribs One rack weighs about 3 pounds. Pork babyback or spare ribs or Beef ribs would work great.

    Dry Spice Rub

    • 1 tablespoon kosher or other coarse salt
    • 1 tablespoon paprika
    • 2 teaspoons garlic powder
    • 2 teaspoons onion powder
    • 2 teaspoons chili powder
    • 1 teaspoon dry mustard
    • 1 teaspoon ground black pepper
    • 1½ teaspoons ground cumin
    • 1½ teaspoons brown sugar

    Cooking Liquid

    • 1/2 cup apple cider vinegar
    • 1 tablespoon liquid smoke
    • 1/2 cup water

    Instructions

    For the Dry Rub

    • Measure and mix all spices together in a small glass bowl.

    For the Ribs

    • Rinse ribs and pat dry with a paper towel. Place on a baking sheet. If ribs still have membrane intact, remove it by inserting a knife underneath and pulling upward. Rub spice mix over all sides of the meat.
    • Place trivet in stainless steel insert of Instant Pot. Pour cooking liquid into pot. Place rack of ribs on trivet, standing up and forming a circle.
    • Place lid on Instant Pot and close it. Check steam release valve to make sure it is set to [Sealing] for pressure cooking.
    • Set pressure cooking program to [Pressure Cook] or [Manual] or [Meat/Stew].
    • Adjust Pressure Level to [High] pressure.
    • Set pressure cooking time to 23 minutes by pressing the [+] or [-] buttons. When pressure cooking time is finished, allow pressure to naturally release for 10-15 minutes. Then release any remaining pressure by turning the Steam Release Valve to [Venting].
    • Set oven to Broil at 500°F. Open lid of pot and remove ribs and place on a broiler pan. Brush with your favorite barbecue sauce. Place ribs under broiler and crisp for 3-5 minutes. Do not take your eyes off the ribs while they are broiling. Remove from heat when sauce is bubbly and slightly crisped. Cut into serving-sized pieces and enjoy!

    Nutrition

    Calories: 661kcal | Carbohydrates: 5g | Protein: 36g | Fat: 54g | Saturated Fat: 17g | Cholesterol: 182mg | Sodium: 1951mg | Potassium: 633mg | Fiber: 1g | Sugar: 2g | Vitamin A: 412IU | Vitamin C: 5mg | Calcium: 48mg | Iron: 3mg

    Barbecue Ribs in the Instant PotRead More

    Filed Under: Uncategorized

    Tuscan Sunset Soup

    August 26, 2020 by //  by Holly Leave a Comment

    Also known as Italian Sausage Soup with White Beans, Kale, and Sun-dried Tomatoes, this soup received raved reviews at our dinner table this evening! Lots of “OOOOOH, Mommy! This is good!” “You need to write down this recipe!” and “Can I have more??”

    I loved it because I threw all the ingredients in the Instant Pot, set it to cook, and we all went for a walk/bike ride at the neighborhood playground. When we came home, a delicious dinner was there waiting for us. This is truly my favorite thing about the Instant Pot—the ability to walk away while dinner is cooking, and not have to be there to tend to it.

    There are so many ways the kids can help put together this quick soup too!

    Here are some age-appropriate ways for kids to help with this easy, delicious dinner.

    Toddlers:

    • Help sort dried beans.
    • Carry canned beans from the pantry to the kitchen counter.
    • Carry onion from pantry to kitchen counter.
    • Learn vocabulary—“This is an onion. This is a knife. These are white beans.”


    Middle kiddos:

    • Help or make chicken broth.
    • Help with making beans or cook them independently.
    • Brown Italian sausage.
    • Chop and measure garlic, using a food chopper.
    • Measure sun-dried tomatoes.
    • Learn knife safety skills by watching you chop food, and talking about ways to hold the food and how to handle a knife. Or take a course in knife skills together. 


    Older children (pre-teens and teens):

    • Make chicken broth on their own.
    • Put on a pot of beans independently.
    • Chop onion.
    • Put together entire recipe, start to finish.
    • Plan the week’s family meals.
    Print Recipe
    No ratings yet

    Tuscan Sunset Soup

    Also known as Italian Sausage Soup with Sundried Tomatoes, White Beans, and Kale. So much flavor is packed into this delightful soup!
    Prep Time15 mins
    Cook Time20 mins
    Pressure Cooking Time5 mins
    Total Time40 mins
    Course: Dinner, Soup
    Cuisine: Italian, Mediterranean
    Keyword: Budget-friendly, Dairy-free, Dinner, Gluten-free, Homemade, Instant Pot, Made from Scratch, Soup
    Servings: 8
    Author: Holly

    Equipment

    • Electric Pressure Cooker

    Ingredients

    • 1 lb. Italian sausage
    • 1 cup onion diced
    • 1 tablespoon garlic powder or 2 tablespoons fresh minced garlic
    • 1 quart 4 cups chicken broth
    • 1 bunch kale chopped; can also use frozen kale (6-8 oz.)
    • 6 cups cooked white beans 1 (15 oz) can of cooked beans equals about 1½ cups of cooked beans
    • 4 tablespoons sun-dried tomatoes diced
    • salt to taste
    • 1 tablespoon Balsamic vinegar

    Instructions

    • Instructions:
    • Brown Italian sausage on [Sauté] mode in the Instant Pot. Add diced onion and sauté for a minute or two. Throw in the garlic and cook for 1 minute. Scrape off all the browned bits from the bottom of the pot, and deglaze with 1 cup of the broth. Make sure there is nothing stuck to the bottom of the pot.
    • Pour remaining chicken broth into the pot. Add salt and balsamic vinegar. Float chopped kale on top of chicken broth and pour white beans on top of kale. Finally, top with sun-dried tomatoes. Avoid stirring.
    • Set Instant Pot to [Pressure Cook] or [Manual] or [Soup/Broth] for 5 minutes on High Pressure. Natural release for at least 10 minutes before manually releasing the remaining pressure.
      Enjoy!

    Tuscan Sunset SoupRead More

    Filed Under: Uncategorized Tagged With: Cooking with Kids, Dairy Free, Dinner, Gluten Free, Homemade, Instant Pot, Italian, Soup, Tuscan Sunset Soup

    Creamy Salsa Chicken Rice Bowl

    August 5, 2020 by //  by Holly Leave a Comment

    This dish is one you’ll want to add to the regular rotation. It’s tasty. It’s simple. It’s fast.

    And it’s perfect for dressing up with crisp Romaine Lettuce, diced fresh tomatoes, shredded cheddar cheese, and sour cream. Or not. It is so yummy, you can simply serve it over rice and enjoy!

    You can even make this Creamy Salsa Chicken with frozen chicken! Just add two extra minutes to the pressure cooking time and a last-minute dinner is on the way.

    This recipe calls for Magic Flavor Dust. It is simply our “house” seasoning that we use on practically everything. Make yourself up a batch for a little magic in the kitchen! Here’s where you’ll find the recipe.

    Print Recipe
    5 from 1 vote

    Creamy Salsa Chicken Rice Bowl

    A fast, easy, and delicious dinner that the whole family will love!
    Prep Time5 mins
    Cook Time20 mins
    Pressure Cooking Time10 mins
    Total Time35 mins
    Course: Dinner, Main Course
    Cuisine: Mexican, Tex-Mex
    Keyword: Budget-friendly, Dinner, Gluten-free, Kid-Friendly
    Servings: 8
    Calories: 392kcal
    Author: Holly

    Equipment

    • Electric Pressure Cooker
    • Extra pot that fits inside the inner pot for rice
    • Pressure Cooker Trivet

    Ingredients

    Creamy Salsa Chicken

    • 1½ pounds chicken pieces I prefer boneless, skinless thighs for this.
    • 1½ cups salsa medium or mild, depending on your family's tastes
    • 1 cup onion, sliced 1 medium onion equals about 1 cup, sliced
    • 1 tablespoon Magic Flavor Dust
    • 3 tablespoons chili powder
    • 3 tablespoons ground cumin
    • 1 cup water or low-sodium chicken broth
    • 1 cup sour cream or plain Greek yogurt

    Pot-In-Pot Rice

    • 2 cups white rice
    • 2 cups water or low-sodium chicken broth
    • 1 teaspoon salt
    • 1 teaspoon butter

    Optional Rice Bowl Toppings

    • Romaine Lettuce, chopped
    • Fresh Tomatoes, chopped
    • Onion, finely diced
    • Shredded Cheddar Cheese
    • Sour Cream
    • Fresh Cilantro, chopped

    Instructions

    Creamy Salsa Chicken Instructions

    • Place chicken thighs or pieces into Instant Pot insert. Add 1 cup of water.
    • Sprinkle Magic Flavor Dust, chili powder, and ground cumin over chicken. Add sliced onion. Pour salsa on top of everything.
    • If adding Pot-in-Pot rice, place it in pressure cooker at this point. See below for instructions.
    • Close lid of pressure cooker.
      Check steam release valve to make sure it is set to [Sealing] for pressure cooking.
      Set Instant Pot program to [Pressure Cook] or [Manual] or [Poultry].
      Adjust Pressure Level to [High] pressure for chicken thighs or legs or [Low] pressure for chicken breasts.
      Set pressure cooking time to 10 minutes by pressing the [+] or [-] buttons. Add two minutes to pressure cooking time if your meat is frozen.
      Press [Start] or simply wait for 10 seconds for your Instant Pot to beep and begin heating up.
      Pressure cooker will heat up, come to pressure, count down pressure cooking time, and then beep when finished.
      Allow a ten-minute natural release of pressure before releasing remaining pressure.
    • Using tongs, remove chicken pieces and place on a plate. Transfer each one to a cutting board and dice meat into bite-sized pieces. Return chicken to pot and stir well. Serve over rice with your choice of fixin's as described above. Enjoy!

    Pot-In-Pot Rice

    • Add rice, water, salt, and butter to a pot or bowl that fits inside the pressure cooker insert.
    • Use a trivet or sling under this inner pot so you can pull the piping hot bowl of rice out when it is done cooking.
    • Place inner pot over chicken and salsa mixture. May be placed directly on food or on a trivet on top of the food.
    • Proceed with pressure cooking instructions above.

    Nutrition

    Calories: 392kcal | Carbohydrates: 45g | Protein: 16g | Fat: 16g | Saturated Fat: 6g | Cholesterol: 60mg | Sodium: 763mg | Potassium: 470mg | Fiber: 3g | Sugar: 4g | Vitamin A: 1428IU | Vitamin C: 4mg | Calcium: 103mg | Iron: 3mg

    Creamy Salsa Chicken Rice BowlRead More

    Filed Under: Uncategorized

    Indian Butter Chicken in the Instant Pot

    July 30, 2020 by //  by Holly Leave a Comment

    Also known as Murgh Makhani, Indian Butter Chicken sounded like a dish I wanted to try. I mean, you had me at “butter!”

    Making this dish at home is a fantastic culinary experience, because the smells of all the different spices take you and your family to a place far away–a market in India, where all the spices are on display for the senses to enjoy!

    Tools you may need for this recipe are:

    Steamer Basket for Pot-in-Pot Rice

    Immersion Blender

    Coffee grinder/spice grinder

    Vitamix Blender

    Instant Pot Duo 6-quart

    Instant Pot Duo EVO

    Print Recipe
    No ratings yet

    Indian Butter Chicken in the Instant Pot

    Rich, creamy spice takes the entire family to exotic places!
    Prep Time15 mins
    Cook Time20 mins
    Pressure Cooking Time10 mins
    Total Time45 mins
    Course: Dinner, Main Course
    Cuisine: Indian
    Keyword: Dinner, Gluten-free, Instant Pot, Made from Scratch, Real Food, Restaurant Food at Home
    Servings: 8
    Calories: 579kcal
    Author: Holly
    Cost: $10

    Equipment

    • Pressure Cooker
    • Blender
    • Immersion Blender (optional)
    • Inner Pot

    Ingredients

    • 2 lbs. boneless, skinless chicken thighs
    • 28 ounces diced tomatoes
    • 10 cloves garlic
    • 3 tablespoons fresh ginger
    • 1 jalapeño, diced optional, to taste
    • 2 teaspoons garam masala see recipe for homemade version
    • 2 teaspoons ground cumin
    • 2 teaspoons ground turmeric
    • 1/4 teaspoon cayenne powder optional, depending on your spice level
    • 2 teaspoons paprika
    • 1 ½ teaspoons salt

    Add after pressure cooking

    • 1 cup heavy cream
    • ½ cup butter (1 stick)
    • 2 teaspoons garam masala
    • ½ cup fresh chopped cilantro

    Basmati Rice

    • 2 cups basmati rice or any kind of white rice
    • 2 cups water
    • 1 teaspoon salt
    • 1 teaspoon butter

    Garam Masala

    • 2 teaspoons cardamom seeds not pods
    • 2 tablespoons coriander seeds
    • 1 tablespoon cumin seeds
    • 1 tablespoon black peppercorns
    • ½ teaspoon whole cloves
    • 1 teaspoon freshly grated nutmeg
    • 1 cinnamon stick broken in half
    • 2 bay leaves dried
    • ¼ teaspoon crushed red pepper flakes optional

    Instructions

    • Place chicken in pressure cooker insert. Frozen is fine.
    • Pour diced tomatoes over chicken. Add garlic, ginger, jalapeño (if using), and spices. Stir spices gently into tomatoes.
    • If making Pot-in-Pot rice, place rice pot on top of food at this point. See Instructions below.
    • Place lid on Instant Pot or electric pressure cooker.
    • Check Steam Release Valve to make sure it is set to [Sealing].
    • Choose [Pressure Cook] or [Manual] or [Poultry] program by pressing one of these buttons.
    • Set pressure level to [High] pressure if using chicken thighs, [Low] pressure for chicken breasts.
    • Adjust pressure cooking time to 10 minutes by pressing [+] or [-].
    • Depending on your pressure model, either press [Start] (Ultra, EVO, Max) or simply pause and wait for the Instant Pot to begin cooking (DUO, Lux).

    After Pressure Cooking

    • Allow pressure to naturally release for 10 minutes before manually releasing remaining pressure and removing lid.
    • If you made pot-in-pot rice, carefully remove the rice pot and set it on a plate, hot pad, or trivet.
    • Remove cooked chicken pieces with tongs and place on a plate or cutting board.
    • Stir together sauce ingredients and blend, either in the pot with an immersion blender or in a regular blender. Be careful, this mixture is HOT. Pour mixture back into pot.
    • Add cream and stir to incorporate well. Add butter and stir again.
    • Place chicken on a cutting board and dice into bite-sized pieces.
    • Place chicken pieces back into pot with sauce and stir well. Garnish with fresh cilantro. Serve over rice or sauteéd veggies for a delightful dinner!

    Pot-in-Pot Rice

    • Add rice, water, salt, and butter to a pot or bowl that fits inside the pressure cooker.
    • Use a trivet or sling under inner pot so you can pull the piping hot bowl out when it is done cooking.
    • Place inner pot over chicken and tomato mixture. May be placed directly on food or on a trivet on top of the food.
    • Proceed with pressure cooking instructions above.

    Garam Masala

    • Place all spice ingredients in a blender or spice grinder. Pulse and blend well until all pieces are ground thoroughly. Allow dust to settle inside blender before opening the lid and smelling the wonder inside!

    Nutrition

    Calories: 579kcal | Carbohydrates: 52g | Protein: 29g | Fat: 29g | Saturated Fat: 16g | Cholesterol: 180mg | Sodium: 1088mg | Potassium: 797mg | Fiber: 5g | Sugar: 5g | Vitamin A: 1317IU | Vitamin C: 21mg | Calcium: 160mg | Iron: 5mg

    Indian Butter Chicken in the Instant PotRead More

    Filed Under: Uncategorized

    No-Chop Spaghetti Squash in the Instant Pot

    July 23, 2020 by //  by Holly Leave a Comment

    Cutting up hard winter squash to roast is my nemesis! In the Instant Pot, you can cook it whole, with ease!

    Spaghetti Squash is fabulous as a side dish on its own, but because it has a neutral flavor, you can serve it with tons of different toppings and flavors!

    We love it plain, with butter, salt, and pepper, or topped with our Texas Chili or Spaghetti Sauce.

    Print Recipe
    No ratings yet

    No-Chop Spaghetti Squash in the Instant Pot

    Use this shortcut way to cook delicious Spaghetti Squash in your electric pressure cooker.
    Prep Time1 min
    Cook Time20 mins
    Total Time21 mins
    Course: Dinner, Main Course, Side Dish
    Keyword: Dairy-free, Gluten-free, Keto, Low Carb, Paleo, THM-S, Whole 30
    Servings: 5
    Calories: 60kcal
    Author: Holly
    Cost: $3

    Equipment

    • Electric Pressure Cooker

    Ingredients

    • 1 Spaghetti Squash
    • 1-2 cups water

    Instructions

    • Remove any produce stickers from outside of spaghetti squash and rinse outside of spaghetti squash.
    • Place trivet in the pressure cooker insert.
    • Place whole spaghetti squash on top of the trivet.
    • Pour water into pot.
    • Check that the sealing ring is secure, and place lid on Instant Pot or other electric pressure cooker.
    • Make sure steam release valve is set to [Sealing].
    • Press [Pressure Cook] or [Manual] to select cooking program.
    • Check pressure level and adjust to [High Pressure], if applicable. (Some pressure cookers have High and Low pressure settings, some only have one setting.)
    • Set pressure cooking time to 20 minutes by pressing the [+] or [-] buttons to adjust the time.
    • Start Instant Pot by waiting ten seconds for your pot to beep, turn on and start heating up. ~OR~ Some machines have a [Start] button which you have to press to start the machine.
    • When the pressure cooking time ends, you can either Quick Release the pressure or allow the pressure to naturally release.
      Note: The squash will continue to cook while naturally releasing, and will be more "done" than if you quick release the pressure manually. This is a matter of preference on how you like your spaghetti squash; some like it more on the crunchy side, some prefer it softer. If it is more crunchy than you like, you can always place it back in the pressure cooker and cook for another few minutes.
    • Using hot pads, carefully pull the cooked spaghetti squash out of the Instant Pot and place on a cutting board.
    • With a large, sharp knife, cut the spaghetti squash in half. I usually cut vertically, through the stem, but if you want your strands to be longer, you can cut horizontally through the equator.
    • Scoop out the seeds and pulp from the middle and discard.
    • Next, scoop out the cooked spaghetti squash. Season with butter, salt, and parmesan cheese and enjoy. Or use in another dish like One Pot Faux-getti Pasta.

    Notes

    I use cooked spaghetti squash as a side dish, seasoned with butter, salt, pepper, and parmesan cheese. It is also fabulous topped with salsa and cooked, diced chicken. This versatile veggie can also be substituted for pasta or rice for a low-carb version of your favorite entree or casserole.

    Nutrition

    Calories: 60kcal | Carbohydrates: 13g | Protein: 1g | Fat: 1g | Saturated Fat: 1g | Sodium: 35mg | Potassium: 209mg | Fiber: 3g | Sugar: 5g | Vitamin A: 232IU | Vitamin C: 4mg | Calcium: 44mg | Iron: 1mg

    No-Chop Spaghetti Squash in the Instant PotRead More

    Filed Under: Uncategorized

    Homemade Yogurt in the Instant Pot

    July 16, 2020 by //  by Holly Leave a Comment

    Last updated on March 17th, 2021 at 10:56 am

    Yogurt. Delicious, creamy, and nutritious, loaded with beneficial bacteria and good protein.

    But the stuff you buy in the store can also be loaded with unwanted thickeners and sweeteners. Some packaged products do not even contain the live and active cultures that yogurt is known for, and you have to be a careful package reader to know for sure!

    Not to mention grocery store prices that are often around 25 cents per ounce, compared to 2 or 3 cents per ounce for the cost of milk.

    So why not try your hand at making yogurt at home with your Instant Pot?

    Homemade yogurt tastes so much fresher than store-bought! And you know exactly what is in it. You get to control the sweetness level and flavor. And you know without a doubt that the cultures are live and active because those little guys just produced that creamy, tangy yogurt in your own kitchen!

    Although it can seem complicated, making yogurt at home is really a simple process once you understand what’s happening in each step. And you can even make yogurt in your sleep!

    The Science of Yogurt

    The first thing to understand is that fresh milk from a cow is loaded with beneficial bacteria and enzymes. However, it can easily become contaminated with dangerous pathogens if it is mishandled. Therefore, store-bought milk is pasteurized by heating it up to varying temperatures to ensure it is safe for people to drink and use. Most milk is pasteurized to a standard temperature of 161 degrees Fahrenheit and held for at least 15 seconds to kill off much of the bacteria in the milk. Then when milk is properly refrigerated under 45 degrees, it will remain tasty and food-safe for 12-21 days.

    Some milk is pasteurized at even higher temperatures (280 degrees Fahrenheit), thus rendering it completely sterile. This is called Ultra-Pasteurization (UP) or Ultra-High Temperature Pasteurization (UHT). This kills all good and bad bacteria in the milk and allows it to be shelf-stable for months without refrigeration until it is opened.

    When you’re making yogurt at home, you are creating an environment that is ideal for the growth of the good yogurt-producing bacteria in your milk. The problem is that this is also the environment for bad bacteria to grow. Therefore, you want to inhibit all the other bacteria in your milk before “planting” those good yogurt bacteria into your milk.

    The way to do this is by pasteurizing your milk by heating it up to 180 degrees Fahrenheit to eliminate non-yogurt bacteria right before culturing so the desired yummy, healthy yogurt bacteria are the ones that grow and multiply. You will want a kitchen thermometer like this one for this job.

    Then you cool the milk back down to the culturing temperature of between 105-115 degrees.

    Next, you add the yogurt starter, which is simply regular, plain yogurt that contains live and active cultures. The fresher this yogurt starter is, the better the result will be.

    We use 2 Tablespoons of starter yogurt for every half-gallon of milk or 1/4 cup of starter for a gallon of milk.

    Now, maintain the culturing temperature at between 105-115 degrees Fahrenheit for 6-12 hours, depending on how tangy you like your yogurt. This easily done in an Instant Pot or other electric pressure cooker with a Yogurt setting.

    Finally, chill the yogurt to allow it to set properly by placing it in the refrigerator for at least 4-6 hours. Sweeten and add toppings like honey, jam, granola, and fresh fruit. Enjoy!

    A bowl of creamy Greek Yogurt topped with golden honey

    If you’d like to make your yogurt even more thick and creamy, you can strain it and make Greek Yogurt. Use a cheesecloth and mesh strainer, or this Greek Yogurt maker is fantastic!

    Simply place your finished yogurt in the strainer and allow whey to drain off for 10-24 hours, or until it reaches the thickness you prefer. You can always stir some whey back in to thin it out if it gets too thick.

    Print Recipe
    No ratings yet

    Homemade Yogurt in the Instant Pot

    Fresh, creamy, delicious yogurt is easily made at home in the electric pressure cooker.
    Prep Time15 hrs
    Total Time15 hrs
    Course: Breakfast
    Cuisine: American, Health Food, Real Food
    Keyword: Budget-friendly, Gluten-free, Homemade, Make-Ahead Breakfast, Real Food
    Servings: 8
    Calories: 147kcal
    Author: Holly
    Cost: $1.50

    Equipment

    • Electric Pressure Cooker with Yogurt setting
    • Kitchen Thermometer
    • Whisk

    Ingredients

    • ½ gallon milk whole is best, non-fat is not ideal
    • 2 tablespoons plain yogurt that contains live and active cultures

    Instructions

    Pasteurize the Milk

    • Pour milk into cold insert.
    • On the Instant Pot, choose the Yogurt program and select "More" to heat the milk to 180°F.
    • Whisk milk frequently avoiding scraping the bottom of the p to allow it to heat evenly.
    • It should take about 30 minutes for the milk to reach 180°F.

    Cool the Milk

    • Remove insert from Instant Pot and place it in an ice bath in the sink or a large bowl. Whisk the milk while avoiding scraping the bottom of the pot. Allow the temperature to drop to between 105-115°F.

    Add the Yogurt Starter Culture

    • Place the yogurt starter in a small bowl.
      Ladle some warm milk (105-115°) into the starter and whisk to combine.
    • Pour starter and milk back into the pot and whisk thoroughly in fully incorporate starter.

    Maintain Culturing Temperature

    • Dry off outside of inner pot and place it back into Instant Pot and cover.
    • Select Yogurt Program again. This time, select "Normal" setting. The display should read 8:00. The Instant Pot will automatically keep the temperature between 105-110°F.
    • To adjust the time, press [+] or [-]. More time will result in a tangier yogurt.

    Chill Yogurt to Set

    • When culturing time is completed, remove lid and insert a knife or spoon into yogurt to make sure it has thickened and cultured properly. A knife should be able to separate the thick yogurt and come out fairly clean. Don't stir yet.
    • Place a lid or plastic wrap over the pot and place it in the refrigerator for at least 4-6 hours.
    • Remove from refrigerator and stir well for a creamier consistency. Some people enjoy eating without stirring.
    • Serve with fruit, berries, honey, sweetener, jam, or granola. Enjoy!

    To make Greek Yogurt or Strained Yogurt

    • Place chilled yogurt into a mesh strainer, lined with cheesecloth. Place over a bowl that is deep enough to keep the bottom of the mesh strainer out of the whey that will drain off the yogurt. Or use this Greek Yogurt Maker to strain your yogurt.

    Nutrition

    Calories: 147kcal | Carbohydrates: 12g | Protein: 8g | Fat: 8g | Saturated Fat: 5g | Cholesterol: 24mg | Sodium: 104mg | Potassium: 320mg | Sugar: 12g | Vitamin A: 383IU | Calcium: 273mg | Iron: 1mg

    Homemade Yogurt in the Instant PotRead More

    Filed Under: Breakfast, Instant Pot, Recipes Tagged With: Instant Pot, recipe, Yogurt

    • Go to page 1
    • Go to page 2
    • Go to page 3
    • Go to Next Page »

    Primary Sidebar

    Search for Recipes

    Recent Posts

    • Breakfast Casserole w/Roasted Veggies
    • Italian Lentil Soup
    • Bacon & Onion Breakfast Casserole
    • Make-Ahead Breakfast Casserole
    • Superfood Chili w/Sweet Potatoes, Quinoa, and Black Beans

    Follow the Fun on Facebook

    Categories

    • Breakfast
    • Dairy Free
    • Dessert
    • Dinner Accomplished
    • Freezer Meal
    • Gluten Free
    • Holiday
    • Instant Pot
    • Keto
    • Kids in the Kitchen
    • Kitchen Survival
    • Kitchen Tools
    • Recipes
    • Soup
    • Uncategorized

    Get Social With Us!

    • Facebook
    • Instagram
    • Pinterest
    • Twitter
    • YouTube

    Recent Comments

    • Abigail on Southern Skillet Cornbread
    • mary on Instant Pot Ham ‘n’ Beans
    • Instant Pot Texas Chili – Easy Instant Pot Recipes on Instant Pot Texas Chili
    • Kathy on Magic Flavor Dust
    • Holly on Magic Flavor Dust

    Footer

    Affiliate Disclosure

    The Cooking Family is a participant in the Amazon Services LLC Associates Program, an affiliate advertising program designed to provide a means for sites to earn advertising fees by advertising and linking to amazon.com. Click Here for our full disclosure and privacy policy.

    Recent Posts

    • Breakfast Casserole w/Roasted Veggies
    • Italian Lentil Soup
    • Bacon & Onion Breakfast Casserole
    • Make-Ahead Breakfast Casserole
    • Superfood Chili w/Sweet Potatoes, Quinoa, and Black Beans

    Join Us!

    • Facebook
    • Instagram
    • Pinterest
    • Twitter
    • YouTube

    Search Form

    • Home
    • About
    • Blog
    • Contact

    © 2023 The Cooking Family