• Menu
  • Skip to right header navigation
  • Skip to main content
  • Skip to secondary navigation
  • Skip to primary sidebar
  • Skip to footer

Before Header

  • Facebook
  • Instagram
  • Pinterest
  • Twitter
  • YouTube

The Cooking Family

Your Family Can Cook and Enjoy Great Meals Together!

  • Home
  • Recipes
  • School
  • Blog
  • About
  • Contact
  • Home
  • Recipes
  • School
  • Blog
  • About
  • Contact

Instant Pot

You are here: Home / Archives for Instant Pot

Homemade Yogurt in the Instant Pot

July 16, 2020 by //  by Holly Leave a Comment

Last updated on March 17th, 2021 at 10:56 am

Yogurt. Delicious, creamy, and nutritious, loaded with beneficial bacteria and good protein.

But the stuff you buy in the store can also be loaded with unwanted thickeners and sweeteners. Some packaged products do not even contain the live and active cultures that yogurt is known for, and you have to be a careful package reader to know for sure!

Not to mention grocery store prices that are often around 25 cents per ounce, compared to 2 or 3 cents per ounce for the cost of milk.

So why not try your hand at making yogurt at home with your Instant Pot?

Homemade yogurt tastes so much fresher than store-bought! And you know exactly what is in it. You get to control the sweetness level and flavor. And you know without a doubt that the cultures are live and active because those little guys just produced that creamy, tangy yogurt in your own kitchen!

Although it can seem complicated, making yogurt at home is really a simple process once you understand what’s happening in each step. And you can even make yogurt in your sleep!

The Science of Yogurt

The first thing to understand is that fresh milk from a cow is loaded with beneficial bacteria and enzymes. However, it can easily become contaminated with dangerous pathogens if it is mishandled. Therefore, store-bought milk is pasteurized by heating it up to varying temperatures to ensure it is safe for people to drink and use. Most milk is pasteurized to a standard temperature of 161 degrees Fahrenheit and held for at least 15 seconds to kill off much of the bacteria in the milk. Then when milk is properly refrigerated under 45 degrees, it will remain tasty and food-safe for 12-21 days.

Some milk is pasteurized at even higher temperatures (280 degrees Fahrenheit), thus rendering it completely sterile. This is called Ultra-Pasteurization (UP) or Ultra-High Temperature Pasteurization (UHT). This kills all good and bad bacteria in the milk and allows it to be shelf-stable for months without refrigeration until it is opened.

When you’re making yogurt at home, you are creating an environment that is ideal for the growth of the good yogurt-producing bacteria in your milk. The problem is that this is also the environment for bad bacteria to grow. Therefore, you want to inhibit all the other bacteria in your milk before “planting” those good yogurt bacteria into your milk.

The way to do this is by pasteurizing your milk by heating it up to 180 degrees Fahrenheit to eliminate non-yogurt bacteria right before culturing so the desired yummy, healthy yogurt bacteria are the ones that grow and multiply. You will want a kitchen thermometer like this one for this job.

Then you cool the milk back down to the culturing temperature of between 105-115 degrees.

Next, you add the yogurt starter, which is simply regular, plain yogurt that contains live and active cultures. The fresher this yogurt starter is, the better the result will be.

We use 2 Tablespoons of starter yogurt for every half-gallon of milk or 1/4 cup of starter for a gallon of milk.

Now, maintain the culturing temperature at between 105-115 degrees Fahrenheit for 6-12 hours, depending on how tangy you like your yogurt. This easily done in an Instant Pot or other electric pressure cooker with a Yogurt setting.

Finally, chill the yogurt to allow it to set properly by placing it in the refrigerator for at least 4-6 hours. Sweeten and add toppings like honey, jam, granola, and fresh fruit. Enjoy!

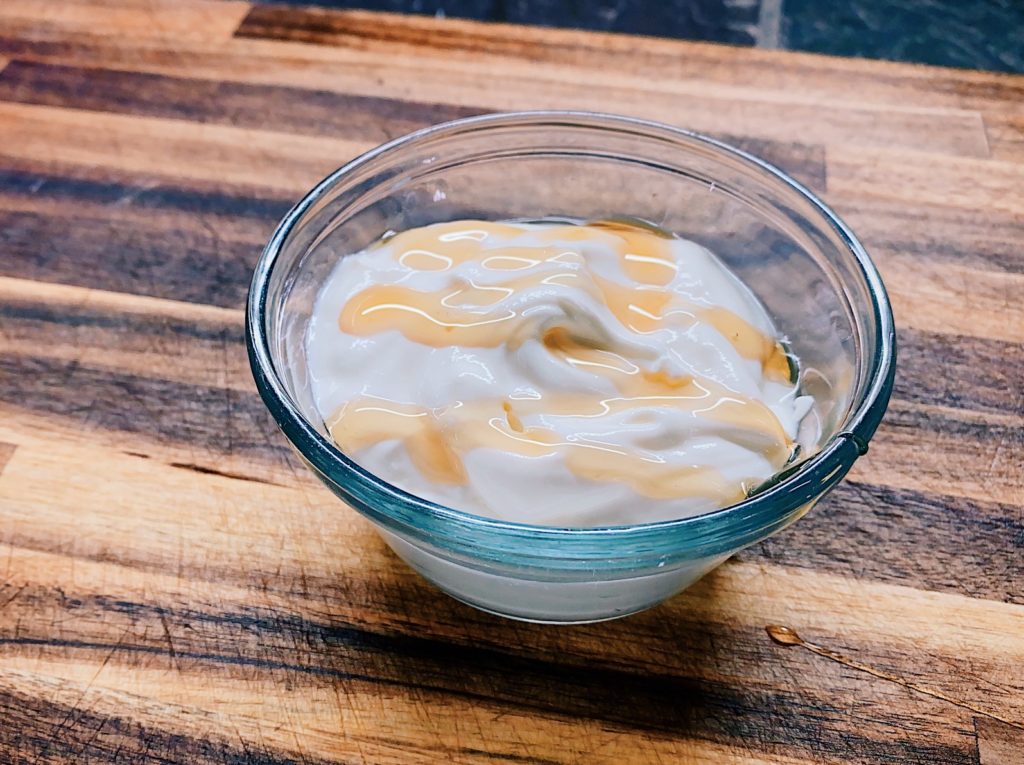
A bowl of creamy Greek Yogurt topped with golden honey

If you’d like to make your yogurt even more thick and creamy, you can strain it and make Greek Yogurt. Use a cheesecloth and mesh strainer, or this Greek Yogurt maker is fantastic!

Simply place your finished yogurt in the strainer and allow whey to drain off for 10-24 hours, or until it reaches the thickness you prefer. You can always stir some whey back in to thin it out if it gets too thick.

Print Recipe
No ratings yet

Homemade Yogurt in the Instant Pot

Fresh, creamy, delicious yogurt is easily made at home in the electric pressure cooker.
Prep Time15 hours hrs
Total Time15 hours hrs
Course: Breakfast
Cuisine: American, Health Food, Real Food
Keyword: Budget-friendly, Gluten-free, Homemade, Make-Ahead Breakfast, Real Food
Servings: 8
Calories: 147kcal
Author: Holly
Cost: $1.50

Equipment

  • Electric Pressure Cooker with Yogurt setting
  • Kitchen Thermometer
  • Whisk

Ingredients

  • ½ gallon milk whole is best, non-fat is not ideal
  • 2 tablespoons plain yogurt that contains live and active cultures

Instructions

Pasteurize the Milk

  • Pour milk into cold insert.
  • On the Instant Pot, choose the Yogurt program and select "More" to heat the milk to 180°F.
  • Whisk milk frequently avoiding scraping the bottom of the p to allow it to heat evenly.
  • It should take about 30 minutes for the milk to reach 180°F.

Cool the Milk

  • Remove insert from Instant Pot and place it in an ice bath in the sink or a large bowl. Whisk the milk while avoiding scraping the bottom of the pot. Allow the temperature to drop to between 105-115°F.

Add the Yogurt Starter Culture

  • Place the yogurt starter in a small bowl.
    Ladle some warm milk (105-115°) into the starter and whisk to combine.
  • Pour starter and milk back into the pot and whisk thoroughly in fully incorporate starter.

Maintain Culturing Temperature

  • Dry off outside of inner pot and place it back into Instant Pot and cover.
  • Select Yogurt Program again. This time, select "Normal" setting. The display should read 8:00. The Instant Pot will automatically keep the temperature between 105-110°F.
  • To adjust the time, press [+] or [-]. More time will result in a tangier yogurt.

Chill Yogurt to Set

  • When culturing time is completed, remove lid and insert a knife or spoon into yogurt to make sure it has thickened and cultured properly. A knife should be able to separate the thick yogurt and come out fairly clean. Don't stir yet.
  • Place a lid or plastic wrap over the pot and place it in the refrigerator for at least 4-6 hours.
  • Remove from refrigerator and stir well for a creamier consistency. Some people enjoy eating without stirring.
  • Serve with fruit, berries, honey, sweetener, jam, or granola. Enjoy!

To make Greek Yogurt or Strained Yogurt

  • Place chilled yogurt into a mesh strainer, lined with cheesecloth. Place over a bowl that is deep enough to keep the bottom of the mesh strainer out of the whey that will drain off the yogurt. Or use this Greek Yogurt Maker to strain your yogurt.

Nutrition

Calories: 147kcal | Carbohydrates: 12g | Protein: 8g | Fat: 8g | Saturated Fat: 5g | Cholesterol: 24mg | Sodium: 104mg | Potassium: 320mg | Sugar: 12g | Vitamin A: 383IU | Calcium: 273mg | Iron: 1mg

Homemade Yogurt in the Instant PotRead More

Filed Under: Breakfast, Instant Pot, Recipes Tagged With: Instant Pot, recipe, Yogurt

Savory Egg Bites in the Instant Pot

June 25, 2020 by //  by Holly Leave a Comment

Print Recipe
5 from 1 vote

Egg Bites in the Instant Pot

A yummy and quick breakfast that you can make ahead and take anywhere.
Prep Time10 minutes mins
Cook Time13 minutes mins
Pressure Cooking Time5 minutes mins
Total Time28 minutes mins
Course: Breakfast, Snack
Cuisine: American
Keyword: Budget-friendly, Gluten-free, Instant Pot, Keto, Kid-Friendly, Low Carb, Made from Scratch, Make-Ahead Breakfast
Servings: 5
Calories: 244kcal
Author: Holly

Equipment

  • Pressure Cooker
  • Silicone Egg Bite Molds or Muffin Cups that can fit in an Instant Pot
  • Blender

Ingredients

  • 7 eggs
  • 4 ounces cream cheese
  • 4 ounces heavy cream
  • ½ teaspoon salt
  • 1 tablespoon mix-ins, such as crumbled bacon, shredded cheese, sauteéd veggies, caramelized onions, etc.

Instructions

  • Butter eggbite molds to keep the eggbites from sticking.
  • Add mix-ins to each egg cup.
  • Place eggs, cream cheese, cream, and salt into blender and blend until smooth.
  • Pour mixture evenly into prepared egg cups. If too foamy, allow to settle for a few minutes.
  • Place trivet and 1 to 1½ cups water in Instant Pot insert.
  • Set eggbite molds on top of trivet. The molds can be stacked, but for best results, make sure top mold is off-set and not covering lower mold. Alternatively, use a taller trivet for the second silicone mold.
  • Close lid of Instant Pot and make sure steam release valve is set to [Sealing].
  • Choose the Pressure Cook program and select [Egg] setting.
  • Adjust pressure level to [Low] pressure by pressing the Pressure Level button or selecting the Pressure Level on the dial.
  • Adjust pressure cooking time to 5 minutes by pressing [+] or [-] OR by selecting pressure cooking time with the knob and turning to select the desired time.
  • Press [Start] or wait for pot to beep and begin heating up.
  • When pressure cooking time is over, allow eggbites to naturally release for 3 minutes and then release remaining pressure while keeping hands and face away from steam.
  • Remove lid carefully, allowing steam to go away from your face and avoiding allowing condensation from the lid dripping onto eggbites.
  • Serve hot or refrigerate to enjoy later!

Nutrition

Calories: 244kcal | Carbohydrates: 2g | Protein: 10g | Fat: 22g | Saturated Fat: 12g | Cholesterol: 285mg | Sodium: 401mg | Potassium: 133mg | Sugar: 1g | Vitamin A: 971IU | Calcium: 71mg | Iron: 1mg

Savory Egg Bites in the Instant PotRead More

Filed Under: Breakfast, Gluten Free, Instant Pot, Keto, Recipes

Quick Carnitas in the Instant Pot

June 3, 2020 by //  by Holly Leave a Comment

Print Recipe
No ratings yet

Quick Carnitas

Savory, tender morsels of meat in a fraction of the time!
Course: Dinner, Main Course
Cuisine: Mexican, Taco Night, Tex-Mex
Keyword: Budget-friendly, Dairy-free, Instant Pot, Keto, Kid-Approved, Low Carb, THM-S
Servings: 6
Calories: 326kcal
Author: Holly

Ingredients

  • 3 lbs pork butt steaks or beef chuck steaks
  • 1 cup onion, sliced thin 1 medium onion equals about 1 cup sliced onion
  • 10 cloves garlic can substitute jarred minced garlic or garlic powder
  • 1 tablespoon oregano
  • 1 tablespoon ground cumin
  • 1 tablespoon coriander seeds can substitute 1 teaspoon ground coriander
  • 2 teaspoons salt
  • 1 tablespoon Magic Flavor Dust can substitute this for fresh onion and garlic, for ultra quick option.

Instructions

  • Place steaks into inner pot. Sprinkle onions, garlic, cumin, oregano, coriander, and salt over all the steaks.
  • Add one cup of water to Instant Pot.
  • Check the lid to make sure ring is securely in place and close the lid.
  • Make sure the steam release valve is set to [Sealing].
  • Set pressure cooking program to [Meat/Stew] or [Pressure Cook] or [Manual].
  • Set pressure level to High pressure by pressing the [Pressure] button.
  • Adjust the pressure cooking time to 20 minutes by pressing the [+] or [-] buttons.
  • Wait for the Instant Pot to beep and turn on or press [Start] to turn it on, depending on your pressure cooker model.
  • Once Instant Pot reaches pressure, cooks for 20 minutes and then beeps indicating pressure cooking time is finished, allow the meat to Naturally Release pressure for at least 10 minutes before manually releasing remaining pressure. At this point, you can safely leave the meat in the pot for up to 10 hours on the Keep Warm setting.
  • Pull steaks out and place them on a cutting board. Remove bones and excess fat. Chop up meat and place in a serving dish.
  • Serve in tacos, tostadas, burrito bowls, on a salad, or with the broth over rice. We love serving with all the fixin's–diced tomatoes, cilantro, salsa, sour cream, cheese, etc.

Nutrition

Calories: 326kcal | Carbohydrates: 6g | Protein: 43g | Fat: 13g | Saturated Fat: 5g | Cholesterol: 136mg | Sodium: 927mg | Potassium: 867mg | Fiber: 1g | Sugar: 1g | Vitamin A: 27IU | Vitamin C: 4mg | Calcium: 75mg | Iron: 4mg

Quick Carnitas in the Instant PotRead More

Filed Under: Dinner Accomplished, Gluten Free, Instant Pot, Keto, Recipes

Bacon Cheddar Mashed Potatoes

May 28, 2020 by //  by Holly Leave a Comment

Last updated on April 3rd, 2021 at 12:14 pm

Potatoes don’t have to be boring. With just a few simple ingredients and an Instant Pot, you’ll have a mouth-watering side dish!

Better make a big batch, they’ll go fast!

Print Recipe
No ratings yet

Bacon Cheddar Mashed Potatoes

Mashed Potatoes become extraordinary with the addition of bacon and shredded cheddar cheese!
Prep Time10 minutes mins
Pressure Cooking Time12 minutes mins
Total Time22 minutes mins
Course: Dinner, Side Dish
Cuisine: American, Comfort Food
Keyword: Budget-friendly, Dinner, Gluten-free
Servings: 8
Calories: 294kcal
Author: Holly

Equipment

  • Pressure Cooker
  • Potato Masher
  • Cheese Shredder
  • Measuring Cup

Ingredients

  • 3 pounds potatoes I prefer red potatoes, but any kind will work.
  • 1½ teaspoons Magic Flavor Dust https://thecookingfamily.com/magic-flavor-dust/
  • 1 cup cooked, crumbled bacon 1 pound of bacon, cooked yields about 1 cup cooked, crumbled bacon.
  • 1 cup shredded cheddar cheese 4 ounces equals about 1 cup of shredded cheese
  • 1 cup sour cream
  • 1-2 green onions, finely chopped optional, but recommended

Instructions

Cook the Potatoes in the Instant Pot

  • Place potatoes in the Instant Pot insert.
  • Add 1 cup of water.
  • After checking the silicon ring, close lid.
  • Make sure the valve is set to [Sealing].
  • Select the [Pressure Cook] or [Manual] program.
  • Make sure pressure level is set to [High] pressure.
  • Adjust pressure cooking time to 12-15 minutes, depending on the size of the individual potatoes.

Make the Mashed Potatoes

  • Allow potatoes to Natural Release for 3-5 minutes.
  • Release any remaining pressure from the pot and open the lid facing away from you, avoiding hot steam reaching your face.
  • Sprinkle Magic Flavor Dust over the potatoes and mash with potato masher. No need to drain the cooking liquid, as it will all be absorbed by the potatoes.
  • Add bacon and stir while mashing more.
  • Add cheddar cheese and incorporate into potatoes.
  • Mix in sour cream.
  • Taste and adjust seasoning by adding additional salt and pepper, if needed.
  • Garnish with chopped green onions and serve.

Nutrition

Calories: 294kcal | Carbohydrates: 31g | Protein: 14g | Fat: 14g | Saturated Fat: 8g | Cholesterol: 50mg | Sodium: 545mg | Potassium: 770mg | Fiber: 4g | Sugar: 2g | Vitamin A: 336IU | Vitamin C: 34mg | Calcium: 154mg | Iron: 1mg

Bacon Cheddar Mashed PotatoesRead More

Filed Under: Instant Pot, Recipes Tagged With: Cooking, Cooking Potatoes, Instant Pot, Potatoes, pressure cooker, Pressure Cooking, Reds Potatoes

Rosemary Garlic Chicken

May 28, 2020 by //  by Holly 2 Comments

Chicken doesn’t have to be boring. These simple herbs and seasonings will add delicious flavor to dinner!

Print Recipe
5 from 1 vote

Rosemary Garlic Chicken

Savory herbs–Rosemary and Garlic–come together to make ordinary chicken extraordinary!
Cook Time10 minutes mins
Total Time10 minutes mins
Course: Dinner
Cuisine: American
Keyword: Budget-friendly, Dairy-free, Dinner, Gluten-free, Keto, Paleo, THM-S
Servings: 8
Calories: 257kcal
Author: Holly

Equipment

  • Pressure Cooker
  • Oven Broiler or CrispLid for Instant Pot

Ingredients

  • 6-8 Chicken Thighs I prefer bone-in, skin-on.
  • 3 sprigs Rosemary
  • 12 cloves Garlic
  • 1 tbsp Magic Flavor Dust

Instructions

  • Place Chicken Thighs in bottom of pressure cooker insert.
  • Smash garlic cloves with meat mallet. Peel and break into pieces.
  • Season with Magic Flavor Dust, rosemary, and garlic pieces.
  • Add 1 cup of water to pressure cooker insert.
  • Close lid of Instant Pot and make sure pressure release valve is set to [Sealing].
  • Set pressure cooker to cook on Pressure Cook mode at High Pressure.
  • Adust pressure cooking time to 12-15 minutes by pressing the [+] or [-] buttons. Choose time based on size of chicken pieces and also whether the meat is frozen. More time for larger pieces or pieces that are frozen.
  • Press [Start] or allow pressure cooker to start on its own, depending on your model.
  • When pressure cooking is finished, allow pot to Natural Release for at least 5 minutes before releasing the remaining pressure.

Notes

See recipe for Magic Flavor Dust.

Nutrition

Calories: 257kcal | Carbohydrates: 2g | Protein: 19g | Fat: 19g | Saturated Fat: 5g | Cholesterol: 111mg | Sodium: 88mg | Potassium: 256mg | Fiber: 1g | Sugar: 1g | Vitamin A: 88IU | Vitamin C: 2mg | Calcium: 20mg | Iron: 1mg

Rosemary Garlic ChickenRead More

Filed Under: Gluten Free, Instant Pot, Keto, Recipes Tagged With: Chicken, Entree, Instant Pot, pressure cooker, Pressure Cooking, recipe

Egg Roll in a Bowl in the Instant Pot

April 30, 2020 by //  by Holly Leave a Comment

We love having this taste of Asia for dinner. It’s a great meal for kids to help out on, because there’s plenty of chopping.

If you don’t have lots of helpful hands, a food processor is great for making quick work of the cabbage and carrots.

Print Recipe
No ratings yet

Egg Roll in a Bowl

Asian flavors come to life in this yummy one dish meal. Using convenient shredded cole slaw mix makes it super fast and easy!
Prep Time15 minutes mins
Cook Time10 minutes mins
Pressure Cooking Time0 minutes mins
Total Time25 minutes mins
Course: Dinner, Main Course
Cuisine: Asian
Keyword: Budget-friendly, Dairy-free, Gluten-free options, Keto, Low Carb, THM-S
Servings: 6
Calories: 232kcal
Author: Holly

Equipment

  • Electric Pressure Cooker
  • Food processor, optional

Ingredients

  • 1 lb ground meat (chicken, turkey, pork, or beef)
  • 2 lbs cabbage shredded (1 head)
  • 1 cup carrots shredded or julienned
  • 1 cup onion sliced in thin wedges (frenched)
  • 8 cloves garlic fresh, minced
  • 2 inches ginger fresh, minced
  • 2 tbsp peanut oil
  • ¼ cup soy sauce or coconut aminos
  • 1 teaspoon toasted sesame oil
  • 1 cup water

To Serve:

  • chili garlic sauce
  • soy sauce
  • toasted sesame oil
  • oyster sauce

Instructions

  • Turn Instant Pot on to [Sauté] function. Brown ground meat while breaking it into pieces.
  • Add peanut oil to stainless steel inner pot.
  • Add onion and sauté for one minute, then add garlic and ginger to pot and sauté for one more minute.
  • Next add shredded cabbage and carrots (or cole slaw mix) to the pot.
  • Give it all a quick stir to incorporate the flavors.
  • Drizzle soy sauce over the cabbage mixture.
  • Pour in water.
  • Check lid and make sure silicone seal is in place. Close lid of Instant Pot.
  • Set Steam Release Valve to [Sealing] position.
  • Press [Cancel] to turn off [Sauté] function.
  • Press [Pressure Cook] or [Manual] to select pressure cooking program.
  • Press [Pressure Level] or [Adjust] to switch pressure level to LOW pressure. If your machine only has one pressure level, that's ok, but I prefer cooking cabbage on low pressure, if possible.
  • Press [+] or [-] buttons to adjust pressure cooking time to 0 minutes. That's right, ZERO! (Don't worry, all your cooking with take place as the pot heats up, comes just to pressure, and then releases pressure.
  • Wait ten seconds for Instant Pot to beep and begin heating up. If your Instant Pot has a Start button, like the Ultra, go ahead and press [Start].
  • Because cabbage can be easily overcooked, you will want to Quick Release the pressure immediately after the timer shows 0 minutes and beeps indicating the pressure cooking time has ended.
    Keep your face and hands away from the pot and turn the Steam Release Valve to [Venting]. Hot steam will begin pouring out. When the float valve drops, open your pot.
  • Drizzle toasted sesame oil over the egg-roll-in-a-bowl. Stir to incorporate all the ingredients. Taste test and add more soy sauce, if needed.

Notes

Keto Version

To make this a yummy Keto meal, just use Coconut Oil instead of Peanut Oil, and leave out the carrots. Done!

Meal Prep Shortcuts

Use a food processor to speed up the slicing of cabbage and onions, shredding of carrots, and mincing of ginger and garlic. 
OR if you need quick and easy and don’t mind spending a little more and sacrificing just a touch on the texture of the finished cabbage, use pre-shredded Cole slaw mix.
You can also purchase ginger-garlic paste or separate pre-minced garlic and ginger. I prefer the taste of the fresh over these convenience items, but when time is short, it can be worth the sacrifice!
Finally, any ground meat (chicken, turkey, beef, pork) could be used here in place of cooked, diced chicken. Just brown it in the pot before proceeding with the rest of the sautéing.

Nutrition

Calories: 232kcal | Carbohydrates: 16g | Protein: 18g | Fat: 12g | Saturated Fat: 3g | Cholesterol: 65mg | Sodium: 641mg | Potassium: 839mg | Fiber: 5g | Sugar: 7g | Vitamin A: 3712IU | Vitamin C: 60mg | Calcium: 87mg | Iron: 2mg

Egg Roll in a Bowl in the Instant PotRead More

Filed Under: Gluten Free, Instant Pot, Keto, Kids in the Kitchen, Recipes Tagged With: Cabbage, Instant Pot, Keto, pressure cooker, Pressure Cooking

Browned Butter Chicken Noodle Soup in the Instant Pot

January 23, 2020 by //  by Holly 2 Comments

Nourishing and delicious, Chicken Noodle Soup is so simple to make, I often can’t believe it. I usually ask my older children to chop up an onion, carrots, and a few stalks of celery. 

One thing that makes this soup so easy is one of my favorite time-saving food prep steps! Every few weeks, I have my sweet hubby bring home 2 to 4 rotisserie chickens 🍗🍗🍗 from Sam’s or Costco.

The kids and I have a quick “chicken pickin’” session around the table when he gets home. We take all the meat off the bones, chop it up, put it in freezer bags and freeze the yummy chicken for quick meal prep in a soup like Chicken Noodle. 

Quick tip: Don’t forget to label your bags with a permanent marker, because it’s really hard to tell what exactly that frozen hunk is several weeks later. 😉

We also freeze the bones from these chickens, and pull them out to make Homemade Bone Broth in the Instant Pot, which we make at least once per week. It’s ridiculously easy and delicious as a base for so many soups, such as hearty Italian Sausage Lentil Soup and zesty Chicken Tortilla Soup.

Check out our video here of exactly how we make broth in the Instant Pot.

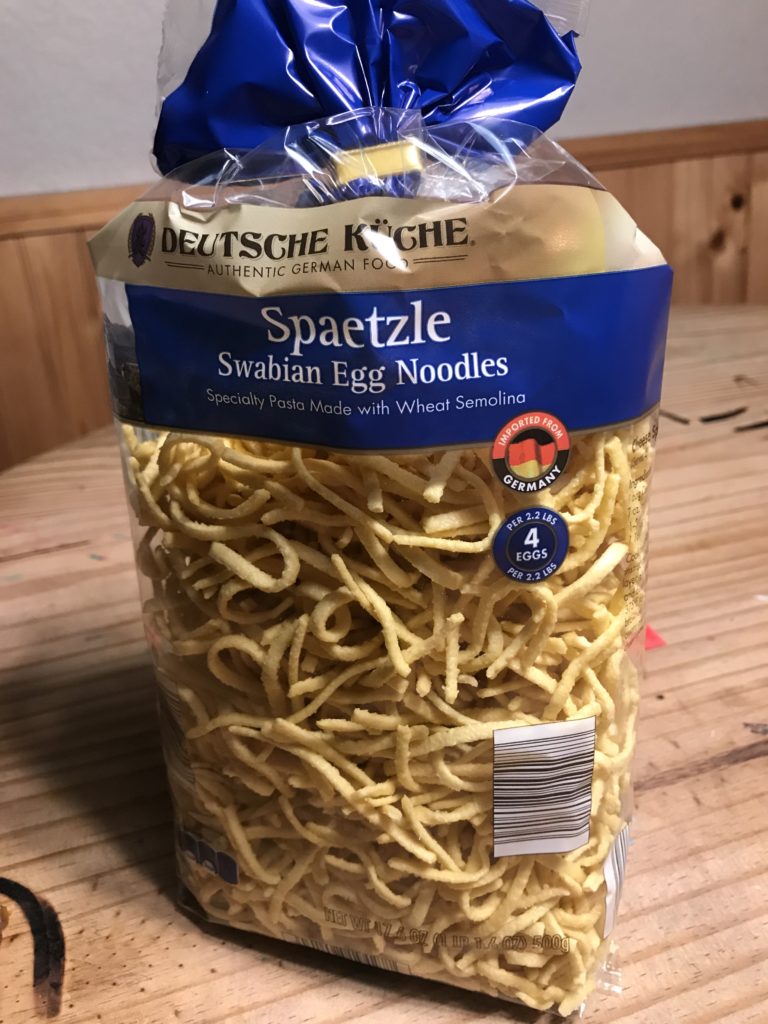
My favorite noodles for this soup are the Egg Spaetzle noodles found in the German food section at Aldi. They are the most delicious and budget-friendly egg noodles I’ve found and they hold up well and don’t get mushy in this soup.

My favorite noodles for soup

When you make this soup in the Instant Pot, you simply brown the butter—don’t skip this step— on the Sauté mode, add everything else, and let it start!

When it’s time to make the Chicken Noodle Soup on a stove top, all we have to do is lightly brown some butter, which gives the soup a deep caramel flavor.

Add the aromatic veggies and give them a little sauté. Then pour in the broth, noodles, and chicken and let it simmer until the noodles are cooked through. Don’t forget to taste test for salt. 

It’s so nice to be able to walk away from the pot and go for a walk or play a game with the kids or even clean up the kitchen before dinner’s ready!

Print Recipe
5 from 3 votes

Browned Butter Chicken Noodle Soup in the Instant Pot

This delicious and nourishing soup is true comfort food for the body and soul. One of its beauties is how simple it is to make!
Prep Time20 minutes mins
Cook Time15 minutes mins
Total Time35 minutes mins
Course: Dinner, Lunch, Main Course, Soup
Cuisine: American
Keyword: Budget-friendly, Comfort Food, Dairy-free, Dinner, Gluten-free, Gluten-free options, Kid-Friendly, Wellness
Servings: 8
Calories: 269kcal
Author: Holly
Cost: $8

Ingredients

  • 3 tablespoons butter Use olive oil or coconut oil for dairy-free. Ghee is also delicious.
  • 1 1/2 cups onion diced (1 large onion)
  • 1 1/2 cup celery diced (2-3 stalks and leaves)
  • 1 1/2 cup carrots sliced (2-3 whole carrots)
  • 2-3 cloves garlic minced OR 1 teaspoon garlic powder
  • 8 oz. egg noodles Gluten-free noodles or pasta can be substituted. Rice can also be used instead of noodles.
  • 4 cups chicken cooked and diced
  • 8 cups 64 oz. or 2 qts. chicken bone broth https://thecookingfamily.com/bone-broth-instant-pot/
  • Salt and black pepper to taste

Instructions

  • Turn Instant Pot to [Sauté] mode. Add butter to pot, allow to melt, foam up, subside, and just begin to brown. Watch it carefully or it could burn. As soon as butter starts to turn a caramel brown, add onions, carrots, and celery. Sauté veggies for one minute, then add garlic and sauté for one more minute. (Seriously, set a timer or count.)
  • Pour in one cup of the broth and scrape off any browned bits from the bottom of the pot.
  • Add egg noodles, then chicken, and pour broth over all. Submerge noodles into liquid.
  • Next, press [Cancel] to turn OFF Instant Pot from sautéing.
  • Check lid to make sure seal is seated well and all parts are in place.
  • Place lid on pot and turn until it locks in place. You can hear a beep when it is closed properly.
  • Turn Release Valve (black knob on top of machine) to [Sealing].
  • Set Program by pressing [Soup] (or [Pressure Cook] or [Manual]).
  • Set Pressure level to [High Pressure].
  • Adjust Time by pressing the [+] or [-] buttons to desired time.
    NOTE: Your desired cooking time is based on your noodles. Check the instructions on the bag. Find the number of minutes. Choose the lowest number and cut that in half. Round down if this number is a half. For example, if your noodles say boil 7-9 minutes, cut the 7 in half (3.5 minutes) round down to 3 minutes. Set your pressure cooking time to just 3 minutes.
  • Start your pressure cooker.
    For Newbies: If you have the DUO or the LUX, Pause for 10 seconds and the IP turns on automatically. To turn on the Ultra or the MAX, press Start. The Instant Pot will beep when it starts heating up. It should say ON in the display. The pot and soup are heating up and coming to pressure during this time. When it reaches pressure, the float valve (small silver or red circle on top) will sputter, and within a minute or two should pop up and stop sputtering. Next, the display should switch over to your cooking time and begin to count down. When it is finished cooking, it will beep.
  • Quick Release the Pressure:
    With noodles and pasta, you should Quick Release to stop the cooking process so your noodles don’t get overcooked. Carefully, keeping your hand to the side and your face back, turn Release Valve (black knob) to Venting. Hot steam will immediately begin shooting out like a steam locomotive. Your dog will bark and your children will shout! When the float valve drops, your pot is no longer under pressure and it can be safely opened.
    Noodles and Pasta are starchy foods, and sometimes starch can come spewing out of the Steam Release Valve. Should this happen to you, quickly and carefully close the valve. You can use your hand, a wooden spoon, or a towel. But be careful to reach around the side, not over the top of the valve where the liquid and steam are spewing from. Wait about 5 minutes and try again. You may end up having to release the steam in short, controlled spurts until the starch stops coming out.
  • Carefully taste for seasoning and add salt, if necessary.

Notes

NOTE: Your desired cooking time is based on your noodles. Check the instructions on the bag. Find the number of minutes. Choose the lowest number and cut that in half. Round down if this number is a half. For example, if your noodles say boil 7-9 minutes, cut the 7 in half (3.5 minutes) round down to 3 minutes. Set your pressure cooking time to just 3 minutes.

Nutrition

Serving: 2cups | Calories: 269kcal | Carbohydrates: 29g | Protein: 15g | Fat: 11g | Saturated Fat: 5g | Cholesterol: 55mg | Sodium: 166mg | Potassium: 493mg | Fiber: 2g | Sugar: 4g | Vitamin A: 4281IU | Vitamin C: 5mg | Calcium: 47mg | Iron: 1mg

Browned Butter Chicken Noodle Soup in the Instant PotRead More

Filed Under: Dinner Accomplished, Instant Pot, Kids in the Kitchen, Recipes, Soup Tagged With: cold weather, Dinner, Instant Pot, Soup, winter dinner

Super-Simple Steel Cut Oats in the Instant Pot

August 10, 2019 by //  by Holly Leave a Comment

Last updated on December 30th, 2021 at 10:16 pm

Ah, oatmeal; the staple hot breakfast for so many of us. Who can forget that old dude with white hair and a grim smile, a smile that says “you’re about to eat a blob of mush, and you’ll LIKE it, kid!” Even worse was the Instant Oatmeal in the microwave.

But then…I found out about Steel Cut Oats. I haven’t had a bite of the mushy stuff in ages.

Steel Cut Oats make a fantastic breakfast because oats are high in protein and fiber. They don’t spike your blood sugar like other starchy breakfasts can. I love the texture of steel cut oats over regular old-fashioned rolled oats because they are chewy, and the oats have form and structure and don’t feel mushy.

The only problem: They take forever to cook on the stovetop!

When my family first started eating steel cut oats, we would stand watch over the stove, stirring and stirring and stirring them for about 30 minutes, making sure the pot didn’t boil over and the oats didn’t stick to the bottom. 

Enter the Instant Pot. GAME CHANGER!

We just throw them in, add water and oil, and press Start. Then we walk away and come back to perfectly cooked Steel Cut Oats in about 20-25 minutes. I love that we can be getting ready for our day while they are practically cooking themselves!

Also, I have discovered that steel cut oats re-heat perfectly! So that means you can have breakfast ready for the week or even cook and freeze the portions in baggies or jars to have a quick breakfast at hand anytime.

Here is how we make a batch of steel cut oats:

Pressure Cook for 10 minutes at High Pressure, then Natural Release for 5 to 10 minutes
Water Ratio: 1 part steel cut oats to 1 2/3 parts water. This is how you can adapt the size of your batch of oatmeal. Any container can be your measuring device. Just use the same one for both the oats and the water.
Add 1 teaspoon of oil per cup of oats to prevent foaming.

Ingredients for a huge batch:

  • 1 tablespoon coconut oil, ghee, or butter
  • 1 30oz. container of Steel Cut Oats. I buy these from Aldi for about $2.99. If you prefer to measure, this is about 5 cups of oats.
  • 1 2/3 empty oatmeal canisters of water. I use the empty canister to measure the water, then pitch it—no extra measuring devices needed!
  • 1/4 teaspoon salt

OR

Ingredients for a smaller batch:

  • 1 teaspoon coconut oil, ghee, or butter
  • 1 cup of Steel Cut Oats
  • 1 2/3 cups of water
  • 1 pinch of salt

Instructions:

  • Turn Instant Pot ON by pressing [Sauté].
  • Add oil, ghee, or butter to Instant Pot and allow to melt on the bottom to help prevent sticking.
  • Pour in steel cut oats.
  • Measure water into pot. 
  • Check the Instant Pot to make sure the sealing ring and other parts are in place and close the lid.
  • Turn steam release valve to [Sealing] position.
  • Turn Instant Pot OFF by pressing [Cancel/Keep Warm] Button.
  • Set cooking program. [Pressure Cook], [Manual], or [Porridge] will all work well.
  • Make sure your Instant Pot is on HIGH pressure by pressing the [Pressure] button until it cycles to HIGH pressure. The LUX model of Instant Pot only has High pressure, so you can skip this step.
  • Set pressure cooking time to 10 minutes by pressing the [+] or [-] button.
  • Pause for 10 seconds while you wait for the Instant Pot to start. Or Press [Start] if you have a model, such as Ultra or Max, that has a Start button.
  • Instant Pot will heat up, come up to pressure, and display countdown while pressure cooking for 10 minutes. 
  • Allow pot to Natural Release for 5 minutes before manually releasing the remaining pressure from the pot.
  • Open the Instant Pot and add salt.
  • You will notice that there is a lot of liquid at the top, and the bottom of the pot has very thick oatmeal. This is normal. Stir the oatmeal well, scraping the bottom and mixing in the liquid from the top.
  • Serve oatmeal with any toppings you like. We enjoy getting creative by adding nuts, dried fruit, peanut butter, cocoa, bananas, blueberries, honey, maple syrup, brown sugar, and milk or cream.

Notes: 

If you like your oatmeal thinner, add more water before cooking. 

IMPORTANT: Remember that the water doesn’t evaporate when pressure cooking as it does when you are cooking on the stovetop, so the recipe on the package of oats will call for lots more water than needed in the pressure cooker. Ignore the stove top instructions on the package.

Starchy foods like oatmeal tend to foam in the pressure cooker. Adding oil helps to keep foaming to a minimum. Don’t skip this ingredient.

Tip: The night before, place oats, water, and oil in Instant Pot and set timer to Delay cooking until 45 minutes to an hour before you want breakfast. Your oatmeal will be ready and waiting for you when you and your family wake up!

Print Recipe
No ratings yet

Super Simple Steel Cut Oats in the Instant Pot

Hot and Hearty Steel Cut Oats made easy in the Instant Pot
Prep Time3 minutes mins
Pressure Cook Time10 minutes mins
Total Time20 minutes mins
Course: Breakfast
Cuisine: American
Keyword: Budget-friendly, Dairy-free, Gluten-free, Kid-Friendly, Make-Ahead Breakfast, THM-E
Servings: 4
Calories: 163kcal
Author: Holly
Cost: $0.60

Equipment

  • Pressure Cooker

Ingredients

  • 1 teaspoon coconut oil, ghee, or butter Use your preferred oil or fat
  • 1 cup steel cut oats
  • 1 2/3 cups water
  • 1 pinch salt

Instructions

  • Turn Instant Pot ON by pressing [Sauté].
  • Add oil, ghee, or butter to Instant Pot and allow to melt on the bottom to help prevent sticking.
  • Pour in steel cut oats.
  • Measure water into pot.
  • Check the Instant Pot to make sure the sealing ring and other parts are in place and close the lid.
  • Turn steam release valve to [Sealing] position.
  • Turn Instant Pot OFF by pressing [Cancel/Keep Warm] Button.
  • Set cooking program. [Pressure Cook], [Manual], or [Porridge] will all work well.
  • Make sure your Instant Pot is on HIGH pressure by pressing the [Pressure] button until it cycles to HIGH pressure. The LUX model of Instant Pot only has High pressure, so you can skip this step.
  • Set pressure cooking time to 10 minutes by pressing the [+] or [-] button.
  • Pause for 10 seconds while you wait for the Instant Pot to start. Or Press [Start] if you have a model, such as Ultra or Max, that has a Start button.
  • Instant Pot will heat up, come up to pressure, and display countdown while pressure cooking for 10 minutes.
  • Allow pot to Natural Release for 5 minutes before manually releasing the remaining pressure from the pot.
  • Open the Instant Pot and add salt. You will notice that there is a lot of liquid at the top, and the bottom of the pot has very thick oatmeal. This is normal. Stir the oatmeal well, scraping the bottom and mixing in the liquid from the top.
  • Serve oatmeal with any toppings you like. We enjoy getting creative by adding nuts, dried fruit, peanut butter, cocoa, bananas, blueberries, honey, maple syrup, brown sugar, and milk or cream.

Notes

If you like your oatmeal thinner, add more water before cooking.
IMPORTANT: Remember that the water doesn’t evaporate when pressure cooking as it does when you are cooking on the stovetop, so the recipe on the package of oats will call for lots more water than needed in the pressure cooker. Ignore the stove top instructions on the package.
Starchy foods like oatmeal tend to foam in the pressure cooker. Adding oil helps to keep foaming to a minimum, so don’t skip this ingredient.
Tip: The night before, place oats, water, and oil in Instant Pot and set timer to Delay cooking until 45 minutes to an hour before you want breakfast. Your oatmeal will be ready and waiting for you when you and your family wake up!

Nutrition

Calories: 163kcal | Carbohydrates: 26g | Protein: 6g | Fat: 4g | Saturated Fat: 1g | Sodium: 15mg | Fiber: 4g | Calcium: 23mg | Iron: 2mg

Super-Simple Steel Cut Oats in the Instant PotRead More

Filed Under: Breakfast, Dairy Free, Freezer Meal, Gluten Free, Instant Pot, Kids in the Kitchen, Recipes Tagged With: Breakfast, Instant Pot, Oatmeal, Oats

Hoppin’ John (New Year’s Black-eyed Peas with Bacon)

January 2, 2019 by //  by Holly Leave a Comment

Last updated on January 1st, 2022 at 03:17 pm

These southern black-eyed peas are so yummy—warm and hearty for New Year’s or delicious any day of the year!

Ingredients

  • 1 lb. bacon, diced
  • 1 cup onion, diced (about 1 medium onion)
  • 6 cups (4 15 oz. cans) cooked black-eyed peas, not drained (1 pound of dried black-eyed peas, cooking instructions follow)
  • 10 oz. can diced tomatoes with green chilies (Ro-tel tomatoes)
  • 1/2 t. Garlic powder
  • 1/2 t. Onion powder
  • 1/4 t. Salt
  • 1/4 t. Pepper
  • 4 cups cooked rice

Instructions

  1. In a large skillet, sauté bacon pieces until browned.
  2. Turn off heat. Remove from pan to a paper towel-lined plate. Set aside.
  3. Pour off all but 2-3 tablespoons bacon grease into a heat-proof glass container (pyrex or canning jar).
  4. Return skillet to heat. Add onion and sauté until onion is clear.
  5. Pour in black-eyed peas with their liquid, tomatoes, and seasonings. Simmer for 5-10 minutes.
  6. Add cooked rice. Stir well. Heat through.
  7. Taste and correct seasoning. Add a little water if it gets too thick.

Black-Eyed Peas in the Instant Pot

To cook one pound (16 ounces) dried black-eyed peas in the Instant Pot, sort and rinse dried peas. Place them in the insert. Cover with water level 2 inches above peas. Add a few tablespoons of diced onion, bay leaf, a tablespoon of olive oil, and a teaspoon of salt. Cook on High Pressure for 25 minutes and allow to natural release. Proceed with recipe.

If you have time to soak the peas, sort and rinse them. Cover with water by about an inch. Even if you only have 20 to 30 minutes to let these soak, they will turn out better and cook more evenly in the end. After soaking, add a few tablespoons of diced onion, a bay leaf or two, a tablespoon of olive oil, and a teaspoon of salt. Then cook on High Pressure for 20 minutes and allow to natural release. The cook time goes down the longer you can soak. If these were soaked fully, you could decrease the cook time to 15 minutes at High pressure.

Kids in the Kitchen

Little Ones (2-5)

  • Can help carry cans from the pantry to the kitchen counter.
  • Can help sort black-eyed peas, if you cook from dried beans.

Medium Kiddos (6-10)

  • Can open cans with a can opener.
  • Can measure spices with adult help.
  • Can help put on a pot of rice.

Older Children and Teens (11-15)

  • Dice onion.
  • Dice bacon.
  • Sauté bacon and onion.
  • Follow recipe and put entire dish together.
  • *Note: An adult should help remove excess bacon grease, as hot grease can be very dangerous.
Print Recipe
No ratings yet

Hoppin’ John

These southern black-eyed peas are a fabulous dish—warm and hearty for New Year’s or delicious any day of the year!
Prep Time10 minutes mins
Cook Time20 minutes mins
Total Time30 minutes mins
Course: Main Course, Side Dish
Cuisine: American, Beans & Rice, Southern
Keyword: Budget-friendly, Dairy-free, Gluten-free, Kid-Approved, Kid-Friendly
Servings: 6
Calories: 665254kcal
Author: Holly

Ingredients

  • 1 lb. bacon diced
  • 1 cup onion diced (about 1 medium onion)
  • 6 cups cooked black-eyed peas, not drained about 4 (15oz.) cans or 1 lb. cooked dried black-eyed peas
  • 10 oz. diced tomatoes with green chilies Ro-tel tomatoes
  • 1/2 t. Garlic powder
  • 1/2 t. Onion powder
  • 1/4 t. Salt
  • 1/4 t. Pepper
  • 4 cups cooked rice
US Customary – Metric

Instructions

  • In a large skillet, sauté bacon pieces until browned. Turn off heat. Remove bacon from pan to a paper towel-lined plate. Set aside.  
  • Pour off all but 2-3 tablespoons bacon grease into a heat-proof glass container (pyrex or canning jar). 
  • Return skillet to heat. Add onion and sauté until onion is clear.
  • Pour in black-eyed peas with their liquid, tomatoes, and seasonings. Simmer for 5-10 minutes. 
  • Add cooked rice. Stir well. Heat through. Taste and correct seasoning. Add a little water if it gets too thick.

Notes

To cook one pound (16 ounces) dried black-eyed peas in the Instant Pot, sort and rinse dried peas. Place them in the insert. Cover with water level 2 inches above peas. Add a few tablespoons of diced onion, bay leaf, a tablespoon of olive oil, and a teaspoon of salt. Cook on High Pressure for 25 minutes and allow to natural release. Proceed with recipe.
If you have time to soak the peas, sort and rinse them. Cover with water by about an inch. Even if you only have 20 to 30 minutes to let these soak, they will turn out better and cook more evenly in the end. After soaking, add a few tablespoons of diced onion, a bay leaf or two, a tablespoon of olive oil, and a teaspoon of salt. Then cook on High Pressure for 20 minutes and allow to natural release. The cook time goes down the longer you can soak. If these were soaked fully, you could decrease the cook time to 15 minutes at High pressure.

Nutrition

Calories: 665254kcal | Carbohydrates: 153258g | Protein: 26822g | Fat: 2865g | Saturated Fat: 980g | Cholesterol: 50mg | Sodium: 16268848mg | Potassium: 2372876mg | Fiber: 30721g | Sugar: 7825g | Vitamin A: 228026IU | Vitamin C: 20507mg | Calcium: 580493mg | Iron: 12147mg

Hoppin’ John (New Year’s Black-eyed Peas with Bacon)Read More

Filed Under: Dairy Free, Dinner Accomplished, Freezer Meal, Gluten Free, Instant Pot, Kids in the Kitchen, Recipes, Uncategorized

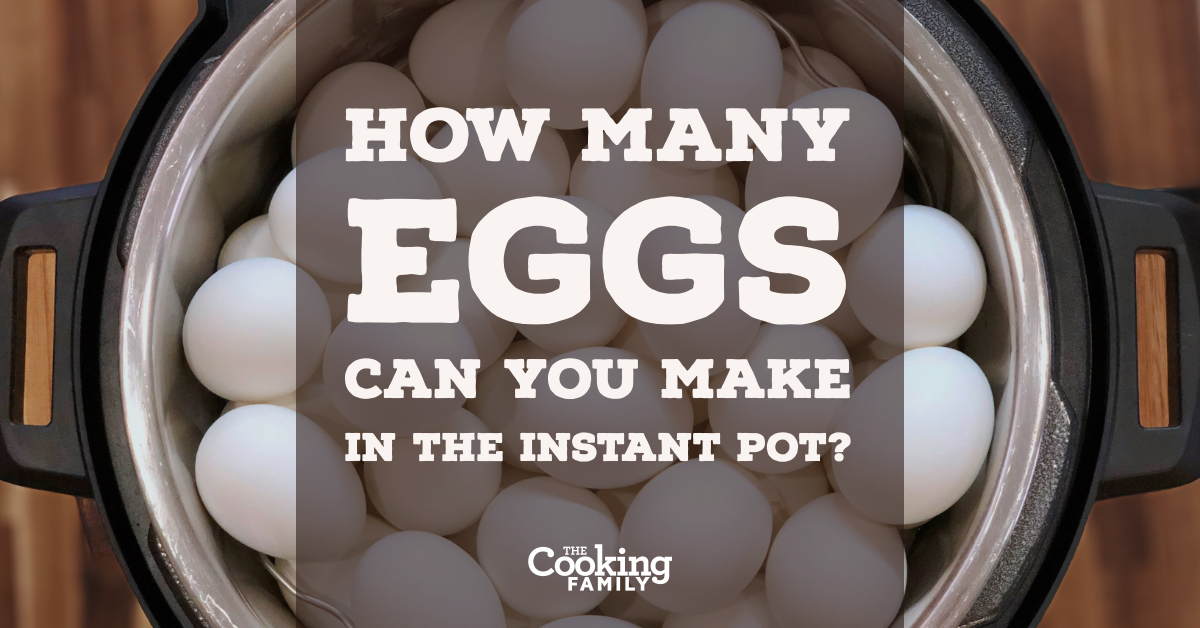
How Many Eggs Can You Make in the Instant Pot?

March 29, 2018 by //  by Holly 40 Comments

Last updated on November 25th, 2021 at 10:49 am

Who among us has never asked this timeless question?

You know, you’re getting ready to make another batch of Perfect Hard Boiled Eggs in your Instant Pot, and you look at your dozen eggs neatly arranged on the trivet at the bottom.

Then you notice ALL that extra space, just sitting there, going to waste.

And you ponder…”I wonder…exactly just how many eggs I can do at one time???”


So we decided to find an answer. You know, for posterity.

Here’s what we found out:

…

How Many Eggs Can You Make in the Instant Pot?Read More

Filed Under: Instant Pot, Keto, Kitchen Tools Tagged With: 5 Minutes, Cooking, eggs, Food And Drink, Hard Boiled Eggs, hard cooked eggs, Instant Pot, pressure cooker

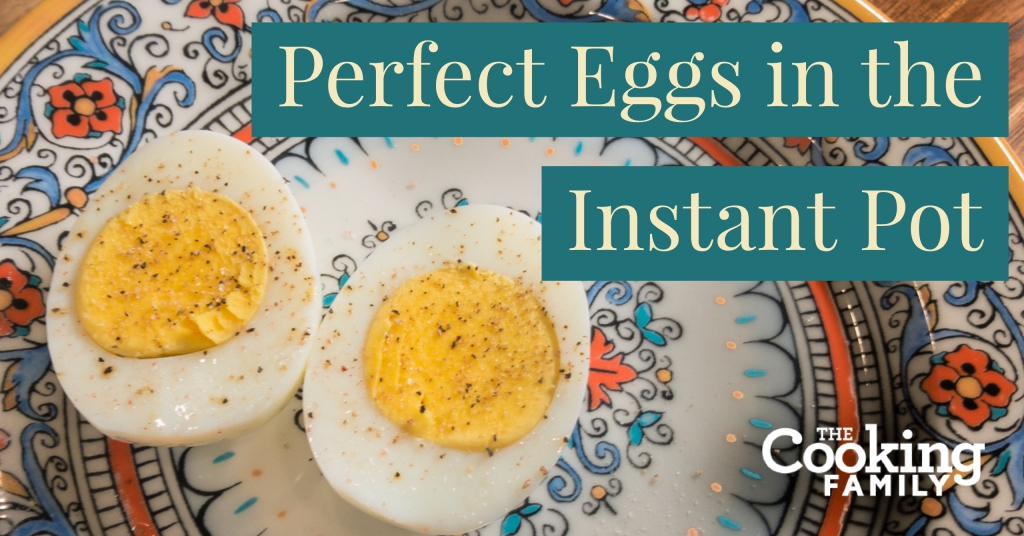
Perfect Hard Boiled Eggs in the Instant Pot

March 26, 2018 by //  by Holly 11 Comments

Last updated on July 28th, 2019 at 09:33 pm

What is the perfect recipe for hard boiled eggs in an Instant Pot? Many friends have become mortal enemies debating this issue, so we’re going to clear it up for you right now.

I’m going to give you…The Perfect…recipe for hard boiled eggs. Are you ready? Do you have something to write this down?

Here it is: …

Perfect Hard Boiled Eggs in the Instant PotRead More

Filed Under: Instant Pot, Keto, Kitchen Tools, Recipes Tagged With: 5 Minutes, Cooking, eggs, Food And Drink, Gluten Free, Hard Boiled Eggs, Instant Pot, Kitchen Tools, pressure cooker, real food, recipe, Super Easy

Instant Pot Minestrone…Instastrone?

January 23, 2018 by //  by Holly 3 Comments

Last updated on January 23rd, 2019 at 08:20 am

If Instastrone isn’t a real word, it will be after you try this amazing dish! Minestrone is a wonderful Italian vegetable soup, thick and hearty. In restaurants it’s often served with pasta, but it’s not a necessity. We prefer ours with only yummy veggies!

This recipe requires a bit of chopping, but then you just throw the ingredients in and wait for some delicious soup! But you’ll only have to wait for 4 minutes of cook time! That’s why it’s Instastrone!

And it really is very delicious!

Ingredients

…

Instant Pot Minestrone…Instastrone?Read More

Filed Under: Dinner Accomplished, Freezer Meal, Gluten Free, Instant Pot, Kids in the Kitchen, Kitchen Survival, Recipes, Soup Tagged With: 5 Minutes, beans, Cooking, Dinner, family dinner, Food And Drink, Instant Pot, Kids, Meal, pressure cooker, real food, Soup, tabasco, vegetables, Vegetarian, veggies

Instant Pot Texas Chili

January 17, 2018 by //  by Holly 12 Comments

Last updated on January 1st, 2019 at 11:18 pm

This is the second best chili recipe I’ve ever made.

The best pot of chili I’ve ever made was 20 years ago. Read to the end if you want to see a really sweet story about that special pot of chili.

Note: There’s lots of debate about different types of chili. The conventional wisdom is that Texas Chili has no beans. But we really like the beans in ours. And we’re from Texas. So it’s still Texas Chili. 🤠

On a more practical note, adding beans makes it about $3 cheaper per batch (depending on ground beef prices in your area.) That amount adds up over a few meals. …

Instant Pot Texas ChiliRead More

Filed Under: Dinner Accomplished, Freezer Meal, Gluten Free, Instant Pot, Keto, Kids in the Kitchen, Kitchen Survival, Kitchen Tools, Recipes, Soup Tagged With: Cooking, Dinner, family, family dinner, Freezer Meal, Gluten Free, Instant Pot, Kids, Kitchen Tools, Meal, pressure cooker, recipe, Soup, Super Easy

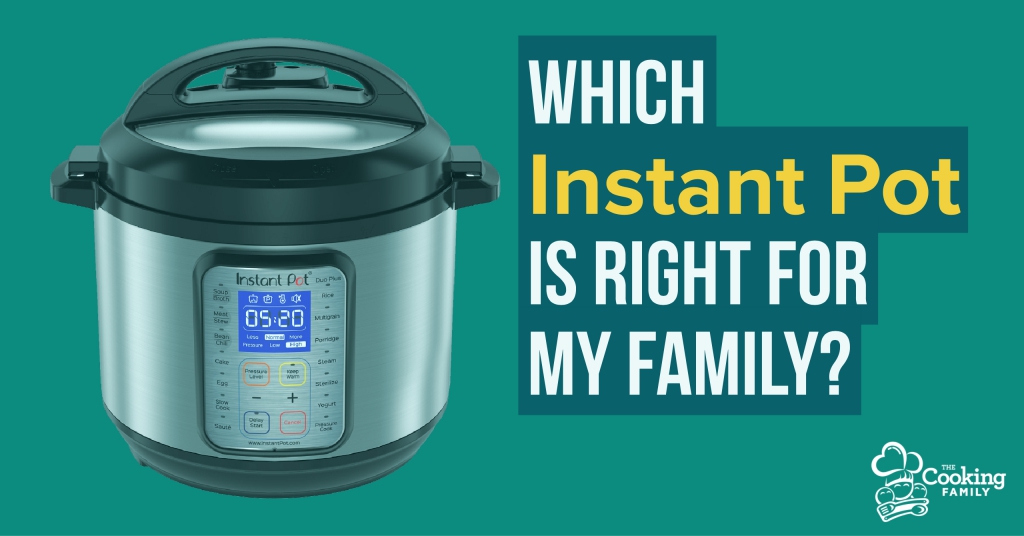
Which Instant Pot is Right For My Family? (Updated with Max)

November 27, 2017 by //  by Holly 44 Comments

Last updated on December 26th, 2018 at 12:56 pm

The Instant Pot is more than a “craze” now. Everywhere you turn, you see talk-show hosts and news anchors doing segments on this “new device” that’s “sweeping the nation!” And with good reason.

People are just now starting to hear about the benefits of pressure-cooking as a way to cook delicious and healthy meals without having to stand over a stove. You’ve probably heard from more than one friend about how much they love their “Instapot.”

But the truth is, the Instant Pot has been around a few years, and pressure cooking for ages. But this ain’t your grandma’s pressure cooker! The Instant Pot is a safe, easy cooking method, and the company is constantly refining and improving the technology and releasing new models.

But that’s creating confusion for new customers shopping for an Instant Pot, and probably why you’re here to read this article!

There are several sizes and lots of variations in features among the different models, and even non-pressure cooker products now. So the question I see most often right now is, “I have a family of ____, which Instant Pot should I get?”

The answer really comes down to two simple questions.
…

Which Instant Pot is Right For My Family? (Updated with Max)Read More

Filed Under: Instant Pot, Kitchen Survival, Kitchen Tools Tagged With: Cooking, family dinner, Freezer Meal, Instant Pot, Kitchen Tools, pressure cooker

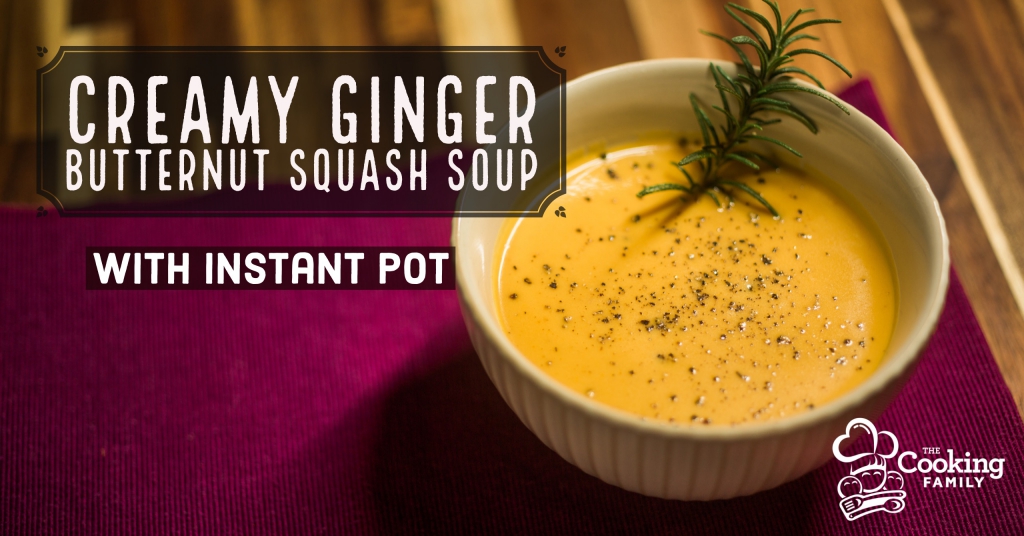
Creamy Ginger Butternut Squash Soup in the Instant Pot

November 19, 2017 by //  by Holly 6 Comments

Last updated on October 1st, 2020 at 01:49 pm

This is such a yummy comfort food, perfect for the fall season.  The combination of apples and squash, ginger and cream, makes a delicious blend of sweet and tart, warm spice and cool cream. You just have to try it!

Now, there are lots of ways to prepare your ingredients, but for me, when I see a recipe call for sliced, peeled butternut squash, it literally makes me cringe. That chore is one of my kitchen nightmares! Cutting up a butternut squash is hard!

So I don’t do it. Let me show you an easier way to “skin that cat” with an Instant Pot!

This is an involved recipe, so it’s lots of fun if the family joins in. Children can do lots of things to help in this recipe! …

Creamy Ginger Butternut Squash Soup in the Instant PotRead More

Filed Under: Freezer Meal, Gluten Free, Instant Pot, Kids in the Kitchen, Recipes, Soup Tagged With: Butternut Squash, Cooking, Cream, Dinner, family dinner, Freezer Meal, Ginger, Gluten Free, pressure cooker, recipe, side dish, Soup, Thanksgiving

Homemade Chicken Bone Broth in the Instant Pot

November 6, 2017 by //  by Holly 2 Comments

Last updated on July 28th, 2019 at 09:50 pm

Prep Time: 5 Minutes
Under Pressure: 120 Minutes
Quick Release or Natural Pressure Release, your call!
If you’ve got 5 minutes, old chicken bones, leftover veggies, and an Instant Pot, you can have homemade bone broth all the time! Sometimes called Chicken Stock, this commonly used ingredient is the basis for so many recipes! We use it for soups, casseroles, sauces, and gravies. We even sometimes use it for making rice and pasta, instead of water. Here are a few of our recipes that use this delicious broth as a base ingredient:
One Pot Pasta
Chicken Tortilla Soup
Italian Sausage Lentil Soup
Jambalaya
Creamy Ginger Butternut Squash Soup in the Instant Pot
 
Using store-bought chicken broth is easy, but it isn’t necessarily cheap, and the truth is, you don’t actually know what’s in that can or box or jar.
When I went gluten free and was forced to begin reading every label, I was shocked at the ingredient lists right in front of my face that I had been ignoring! Ingredients such as:

…

Homemade Chicken Bone Broth in the Instant PotRead More

Filed Under: Dinner Accomplished, Freezer Meal, Gluten Free, Instant Pot, Kids in the Kitchen, Kitchen Survival, Kitchen Tools, Recipes, Soup Tagged With: 5 Minutes, Cooking, Dinner, family dinner, Gluten Free, Instant Pot, pressure cooker, recipe, Soup

Instant Pot Ham ‘n’ Beans

October 13, 2017 by //  by Holly 35 Comments

Last updated on April 9th, 2020 at 10:10 am

The only thing I love more than the taste of this recipe is how simple it is to throw together. It’s so easy, it feels like cheating to even call this a “recipe.”

Here’s all you need for this super easy recipe:

Tools Used

  • Instant Pot 6qt duo
  • Instant Pot 6qt Ultra
  • Instant Pot 8qt duo
  • Large 18 x 14 Bamboo Cutting Board
  • Wüsthof 7” Santoku Knife
  • Cut Glove
  • My Favorite Wooden Spoon

Ingredients

  • a spiral-sliced ham or leftover ham bone
  • a bag of dried beans. A two-pound bag of Great Northern beans is what I used to make this in an 8qt., but any kind of beans would be great cooked this way–pintos, navy, black beans–use whatever you have and whatever you like.
  • An onion

…

Instant Pot Ham ‘n’ BeansRead More

Filed Under: Dinner Accomplished, Freezer Meal, Gluten Free, Instant Pot, Kids in the Kitchen, Kitchen Survival, Recipes, Soup Tagged With: beans, Cooking, Dinner, family dinner, ham, ham and beans, Instant Pot, Meal, pressure cooker, recipe, Soup

Instant Pot Italian Sausage Lentil Soup

October 3, 2017 by //  by Holly 4 Comments

Last updated on November 4th, 2022 at 04:49 pm

Several years ago, we were at Carrabba’s and I had their Sausage Lentil Soup. It was so good! I’ve spent the last few years trying to re-create it, and I think we’ve finally got it really close! I love working up recipes because I get to eat the results. 😉

This is a hearty and nutritious dinner for the whole family. Lentils provide lots of protein, fiber, iron, and B vitamins!  And it’s delicious! Everyone in our family gobbles up the first bowl and wants seconds, including the toddler! In the Old Testament of the Bible, Esau sold his birthright for a bowl of Lentil stew—so you know it must be good!

…

Instant Pot Italian Sausage Lentil SoupRead More

Filed Under: Dinner Accomplished, Freezer Meal, Gluten Free, Instant Pot, Kids in the Kitchen, Kitchen Survival, Kitchen Tools, Recipes, Soup Tagged With: 30 Minutes, carrabbas, Cooking, Dinner, family dinner, Food And Drink, Freezer Meal, Gluten Free, Instant Pot, Kids, Meal, Soup, Super Easy

Instant Pot Jambalaya

July 6, 2017 by //  by Holly 2 Comments

Last updated on May 7th, 2020 at 09:11 am

My husband’s family has a long and rich heritage in south Louisiana, so cajun dishes are frequently enjoyed at family gatherings. Now, authentic cajun fare is usually a bit too spicy for my younger kids, so I adapted this recipe to give us all the yummy ingredients without the kick.

Traditional Jambalaya is typically cooked with rice combined with all the ingredients. I like to cook my rice separately for a couple of reasons:

…

Instant Pot JambalayaRead More

Filed Under: Dinner Accomplished, Freezer Meal, Gluten Free, Instant Pot, Kids in the Kitchen, Kitchen Survival, Recipes Tagged With: cajun, Cooking, Dinner, family, family dinner, Food And Drink, hot sauce, Instant Pot, Kids, Meal, south louisiana, tabasco

Tom’s Super Potato Salad

July 3, 2017 by //  by Holly Leave a Comment

Last updated on September 4th, 2020 at 09:03 pm

TCF Tom's Salad FB

This is a special family recipe to me. That’s because it comes from a special man.

Tom.

IMG_1645-2

Tom is my dad, and I think he’s just about the best guy ever. I got my kitchen improvisational spirit from him, and this recipe is a perfect example. He spent years analyzing and tweaking the proportions to arrive at this delicious recipe. We’ve made it for years, arriving at parties and BBQ’s with a giant bowl and leaving with it licked clean. We hope you like it as much as we (and our friends) do.

…

Tom’s Super Potato SaladRead More

Filed Under: Gluten Free, Instant Pot, Kids in the Kitchen, Kitchen Tools, Recipes Tagged With: 30 Minutes, Cooking Potatoes, Dill, Food And Drink, Instant Pot, Potato, Potato Salads, Reds Potatoes

  • Page 1
  • Page 2
  • Go to Next Page »

Primary Sidebar

Search for Recipes

Recent Posts

  • Breakfast Casserole w/Roasted Veggies
  • Italian Lentil Soup
  • Bacon & Onion Breakfast Casserole
  • Make-Ahead Breakfast Casserole
  • Superfood Chili w/Sweet Potatoes, Quinoa, and Black Beans

Follow the Fun on Facebook

Categories

  • Breakfast
  • Dairy Free
  • Dessert
  • Dinner Accomplished
  • Freezer Meal
  • Gluten Free
  • Holiday
  • Instant Pot
  • Keto
  • Kids in the Kitchen
  • Kitchen Survival
  • Kitchen Tools
  • Recipes
  • Soup
  • Uncategorized

Get Social With Us!

  • Facebook
  • Instagram
  • Pinterest
  • Twitter
  • YouTube

Recent Comments

  • Greg on Instant Pot Ham ‘n’ Beans
  • Liberty Kellogg on Creamy Ginger Butternut Squash Soup in the Instant Pot
  • Rebecca on How Many Eggs Can You Make in the Instant Pot?
  • thebangalore dhaba on Creamy Ginger Butternut Squash Soup in the Instant Pot
  • Linda on Southern Collards in the Instant Pot

Footer

Affiliate Disclosure

The Cooking Family is a participant in the Amazon Services LLC Associates Program, an affiliate advertising program designed to provide a means for sites to earn advertising fees by advertising and linking to amazon.com. Click Here for our full disclosure and privacy policy.

Recent Posts

  • Breakfast Casserole w/Roasted Veggies
  • Italian Lentil Soup
  • Bacon & Onion Breakfast Casserole
  • Make-Ahead Breakfast Casserole
  • Superfood Chili w/Sweet Potatoes, Quinoa, and Black Beans

Join Us!

  • Facebook
  • Instagram
  • Pinterest
  • Twitter
  • YouTube

Search Form

  • Home
  • About
  • Blog
  • Contact

© 2025 The Cooking Family

Rate This Recipe

Your vote:


A rating is required
A name is required
An email is required