• Menu
  • Skip to right header navigation
  • Skip to main content
  • Skip to secondary navigation
  • Skip to primary sidebar
  • Skip to footer

Before Header

  • Facebook
  • Instagram
  • Pinterest
  • Twitter
  • YouTube

The Cooking Family

Your Family Can Cook and Enjoy Great Meals Together!

  • Home
  • Recipes
  • School
  • Blog
  • About
  • Contact
  • Home
  • Recipes
  • School
  • Blog
  • About
  • Contact

Archives for 2020

You are here: Home / Archives for 2020

Homemade Peppermint Bark

December 23, 2020 by //  by Holly Leave a Comment

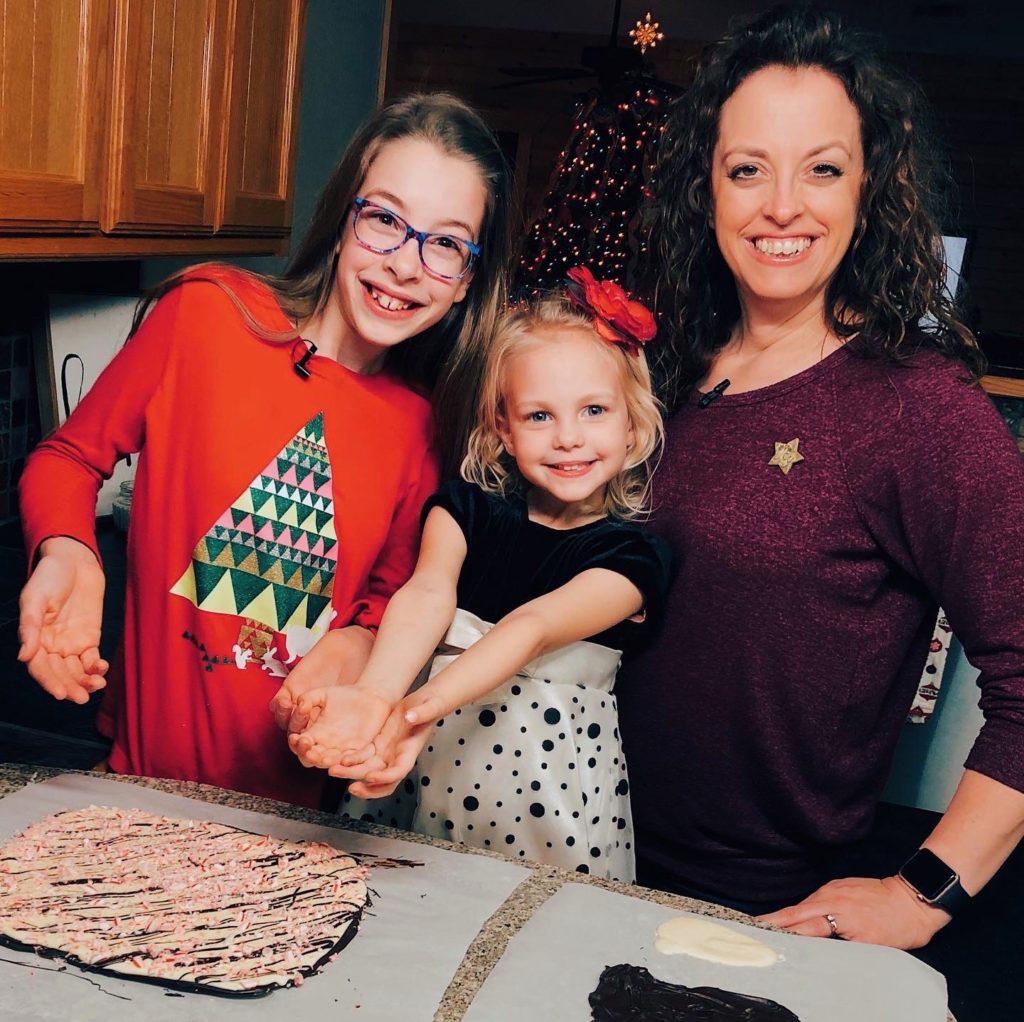
This is one of our favorite Christmas season treats. It’s easy to make, and so fun to make with kids. And if you make it yourself, it’s much cheaper than that fancy kitchen store!

It makes a great gift also. Try it out yourself!
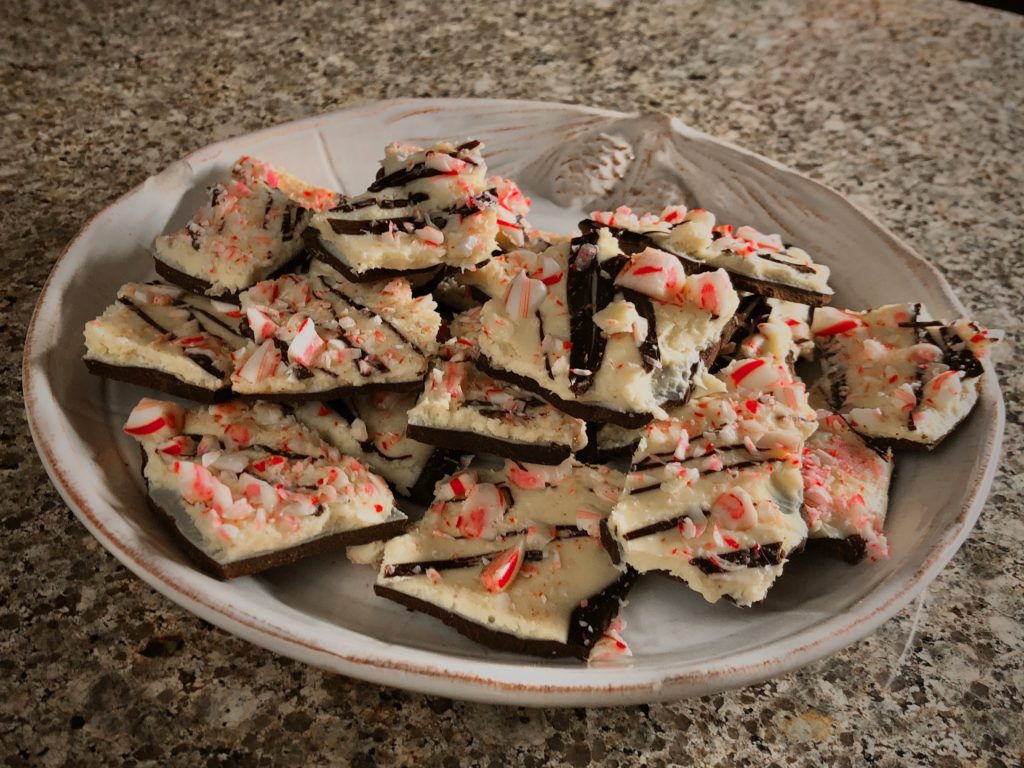
Print Recipe
No ratings yet

Peppermint Bark

This rich and minty combination of white and dark chocolate with peppermint makes a festive treat at holiday parties and is a wonderful gift for the person who has everything.
Prep Time20 minutes mins
Cooling Time2 hours hrs
Total Time2 hours hrs 20 minutes mins
Course: Dessert
Cuisine: American, Holiday
Keyword: Gluten-free, Holiday, Kid-Approved, Kid-Friendly
Servings: 24
Calories: 190kcal
Author: Holly
Cost: $9

Equipment

  • Offset Spatula
  • Parchment Paper
  • Microwave
  • 2 small microwave-safe mixing bowls
  • 2 spoons for stirring
  • Kitchen mallet
  • Ziptop bag

Ingredients

  • 3 ounces peppermint hard candy crushed (About 6 or 7 candy canes)
  • 14 ounces dark chocolate chips or broken into pieces. I prefer 60% cacao or higher.
  • 12 ounces white chocolate broken into pieces. Look for a product that actually says "chocolate" on the package or lists cocoa butter in the ingredients.
  • 12-20 drops Peppermint oil to taste. (Roughly ten drops in each kind of chocolate.)

Instructions

  • Using a kitchen mallet, crush peppermint candy in a ziptop bag. Set aside.
  • Lay out parchment paper on a flat surface or a cookie sheet.
  • Use the microwave to melt dark chocolate in 30-second increments at Cook Power 6 and stir well in between. Avoid hot spots that can burn your chocolate. Also, avoid getting any water or other moisture in the chocolate. This should take 3-4 increments of 30 seconds each.
  • Add about 10 drops of peppermint oil, to taste. See note. Stir well.
  • With an offset spatula, spread dark chocolate on parchment paper to about 1/8 inch thickness. Try not to spread it too thin on the edges. Your sheet of chocolate will be about the size of a standard sheet of paper. Reserve about a 1/4 cup of dark chocolate to drizzle on top of the white chocolate.
  • Use the microwave to melt white chocolate in 30-second increments at Cook Power 6 and stir well in between. Avoid hot spots that can burn your chocolate. Also, avoid getting any water or other moisture in the chocolate. This should take 3-4 increments of 30 seconds each.
  • Add about 10 drops of peppermint oil, to taste. See note. Stir well.
  • Wait until dark chocolate layer has lost its gloss and developed a matte look and hardened slightly. This will take longer if your kitchen is hot or if your counter is warm, such as above a running dishwasher or next to a hot oven. If this is the case, move cooling chocolate to a cooler place, if possible. Or do something else while you wait.
  • Carefully spread white chocolate onto dark chocolate layer. Avoid pulling dark chocolate up into white chocolate layer by having a gentle touch. If marbling does occur, it's ok! You won't even notice once you have the dark chocolate drizzle and crushed peppermint candy on top.
  • Check reserved dark chocolate to make sure it's still melted. If not, melt in microwave as before for 30 seconds at cook power 6. Stir well.
  • Drizzle dark chocolate over white chocolate layer. See video for demonstration.
  • Sprinkle crushed peppermint candy over all. Allow to harden completely before breaking into pieces. Store in an airtight container. Enjoy!

Notes

Note on Peppermint Oil: Use the full amount if you like to really taste that cool pop of mint. If you don’t have peppermint oil, use 1/2 to 1 teaspoon of peppermint extract. You’ll need to sample the melted chocolate, because different peppermint extracts vary in their intensity.

Nutrition

Calories: 190kcal | Carbohydrates: 19g | Protein: 2g | Fat: 12g | Saturated Fat: 7g | Cholesterol: 3mg | Sodium: 16mg | Potassium: 159mg | Fiber: 2g | Sugar: 15g | Vitamin A: 11IU | Vitamin C: 1mg | Calcium: 40mg | Iron: 2mg

Homemade Peppermint BarkRead More

Filed Under: Dessert, Recipes Tagged With: Chocolate, Christmas Candy, Cooking with Kids, Dessert, Peppermint, White Chocolate

Southern Skillet Cornbread

October 16, 2020 by //  by Holly 1 Comment

Last updated on November 4th, 2022 at 05:06 pm

This soul-warming cornbread goes together very quickly and pairs perfectly with a bowl of simmering soup. The crisp bottom will melt in your mouth. Just add butter!

Print Recipe
5 from 2 votes

Southern Skillet Cornbread

This soul-warming cornbread goes together very quickly and pairs perfectly with a bowl of simmering soup. The crisp bottom will melt in your mouth. Just add butter!
Course: Bread
Cuisine: Southern
Keyword: Budget-friendly, Comfort Food, Homemade, Made from Scratch, Pantry
Servings: 8
Author: Holly

Equipment

  • Cast Iron Skillet
  • Large mixing bowl
  • Wooden Spoon or Rubber Spatula
  • Oven

Ingredients

Dry Ingredients

  • 1 3/4 cups cornmeal stone ground or regular
  • 3/4 cup all-purpose flour
  • 2 teaspoons baking powder
  • 3/4 teaspoon baking soda
  • 1 1/4 teaspoon salt

Wet Ingredients

  • 2 eggs
  • 1 1/4 cups buttermilk can substitute by placing 1 tablespoon plus 1 teaspoon vinegar or lemon juice and filling measuring cup with remaining milk to make 1 1/4 cups total
  • 1/2 cup oil any vegetable oil or bacon grease for the daring who love bacon

Instructions

  • Preheat oven to 425 degrees Fahrenheit.
  • Stir dry ingredients (cornmeal, flour, baking powder, baking soda, and salt) together in a large mixing bowl.
  • In a separate bowl, whisk eggs and then add buttermilk, stirring together well.
  • Pour the oil into cast-iron skillet and place in oven.
  • Just before the oil is hot, add the wet ingredients to the dry ingredients and mix just until incorporated. Do not overstir.
  • Remove hot skillet from oven. Carefully pour half the oil into the batter. Stir the oil in with 12 strokes. It's okay that it won't be completely mixed.
  • Pour the batter into the hot, oiled skillet.
  • Place skillet into oven and bake for 18-20 minutes, until toothpick inserted into middle comes out clean.
  • Cut into slices, serve immediately with plenty of fresh butter!
  • Do not hope for leftovers. The cornbread becomes stale the next day anyway.

Southern Skillet CornbreadRead More

Filed Under: Recipes

Honey Walnut Vinaigrette

October 1, 2020 by //  by Holly 2 Comments

Print Recipe
5 from 1 vote

Honey Walnut Vinaigrette

Perfect for fall, this homemade salad dressing recipe is delicious, budget-friendly, and super easy to make!
Prep Time5 minutes mins
Total Time5 minutes mins
Course: Salad
Cuisine: American, Health Food, Real Food
Keyword: Budget-friendly, Dairy-free, Gluten-free, Made from Scratch, Real Food
Servings: 8
Calories: 111kcal
Author: Holly
Cost: $1

Equipment

  • Measuring spoons
  • Glass jar with a lid

Ingredients

  • 2 tablespoons toasted walnut oil
  • 4 tablespoons extra virgin olive oil
  • 1 tablespoon balsamic vinegar
  • 1 tablespoon apple cider vinegar
  • 2 tablespoons honey
  • 1 teaspoon Dijon mustard
  • 1/4 teaspoon salt
  • Fresh cracked black pepper

Instructions

  • Pour all ingredients into a jar and shake well. Serve over your favorite salad greens.

Notes

Experiment with your own combination of oils and vinegars to try different salad dressings, using the 3 parts oil to 1 part vinegar ratio.
We love this dressing on a bed of greens with chopped apples, chopped toasted walnuts, and grated white cheddar cheese.

Nutrition

Calories: 111kcal | Carbohydrates: 5g | Protein: 1g | Fat: 11g | Saturated Fat: 1g | Sodium: 81mg | Sugar: 5g | Iron: 1mg

Honey Walnut VinaigretteRead More

Filed Under: Uncategorized

Crème Brûlée

September 17, 2020 by //  by Holly Leave a Comment

Print Recipe
No ratings yet

Crème Brûlée

Prep Time15 minutes mins
Cook Time10 minutes mins
Pressure Cooking Time13 minutes mins
Total Time28 minutes mins
Servings: 8 Servings
Calories: 411kcal
Author: Holly

Equipment

  • Handheld Propane Torch
  • Ramekins
  • Pressure Cooker

Ingredients

  • 3 cups cream
  • 5 egg yolks
  • ⅔ cup sugar divided use
  • 1 pinch salt
  • 1 ½ tsp vanilla divided use

Instructions

  • Combine cream, egg yolks, ⅓ cup of the sugar, salt, and 1 tsp of the vanilla with a whisk.
  • Divide the cream mixture evenly into the ramekins.
  • Pour 1 cup of water into the pressure cooker.
  • Cover each ramekin tightly with aluminum foil. Place the ramekins in your pressure cooker on a trivet.
  • Close the lid. Set the steam release valve to [Sealing].
  • Choose the [Manual] or [Pressure Cook] function. Change the pressure to [Low Pressure]. Use the [+] and [-] buttons or turn the dial to set the time to 13 minutes.
  • Once the cook time is ended, let the pressure cooker naturally release for 10 minutes.
  • After 10 minutes, set the steam release valve to [Venting]. When the float valve has dropped, open the lid.
  • Combine remaining sugar and vanilla in small bowl.
  • Put ramekins in fridge for 1 hour.
  • Remove foil from ramekins and sprinkle 1 tbsp of the sugar mixture on each ramekin.
  • Turn on the propane torch. Holding a ramekin in one hand, torch the sugar until brown and carmelized. Repeat for each ramekin.
  • Eat and enoy!

Nutrition

Calories: 411kcal | Carbohydrates: 20g | Protein: 4g | Fat: 36g | Saturated Fat: 22g | Cholesterol: 244mg | Sodium: 44mg | Potassium: 79mg | Sugar: 17g | Vitamin A: 1474IU | Vitamin C: 1mg | Calcium: 73mg | Iron: 1mg

Crème BrûléeRead More

Filed Under: Uncategorized

Barbecue Ribs in the Instant Pot

September 2, 2020 by //  by Holly Leave a Comment

Barbecue Ribs make a super special meal with the family, and it’s easy to make them at home in your electric pressure cooker!

Serve them with Tom’s Super Potato Salad for a great holiday gathering! And don’t forget the napkins!

Print Recipe
No ratings yet

Barbecue Ribs in the Instant Pot

Tender, juicy ribs become an easy yet special meal to make at home in the Instant Pot.
Prep Time10 minutes mins
Cook Time25 minutes mins
Pressure Cooking Time23 minutes mins
Total Time58 minutes mins
Course: Dinner, Main Course
Cuisine: American, Real Food, Southern
Keyword: Dairy-free, Dinner, Gluten-free, Homemade, Restaurant Food at Home
Servings: 4
Calories: 661kcal
Author: Holly

Equipment

  • Electric Pressure Cooker

Ingredients

  • 1 rack ribs One rack weighs about 3 pounds. Pork babyback or spare ribs or Beef ribs would work great.

Dry Spice Rub

  • 1 tablespoon kosher or other coarse salt
  • 1 tablespoon paprika
  • 2 teaspoons garlic powder
  • 2 teaspoons onion powder
  • 2 teaspoons chili powder
  • 1 teaspoon dry mustard
  • 1 teaspoon ground black pepper
  • 1½ teaspoons ground cumin
  • 1½ teaspoons brown sugar

Cooking Liquid

  • 1/2 cup apple cider vinegar
  • 1 tablespoon liquid smoke
  • 1/2 cup water

Instructions

For the Dry Rub

  • Measure and mix all spices together in a small glass bowl.

For the Ribs

  • Rinse ribs and pat dry with a paper towel. Place on a baking sheet. If ribs still have membrane intact, remove it by inserting a knife underneath and pulling upward. Rub spice mix over all sides of the meat.
  • Place trivet in stainless steel insert of Instant Pot. Pour cooking liquid into pot. Place rack of ribs on trivet, standing up and forming a circle.
  • Place lid on Instant Pot and close it. Check steam release valve to make sure it is set to [Sealing] for pressure cooking.
  • Set pressure cooking program to [Pressure Cook] or [Manual] or [Meat/Stew].
  • Adjust Pressure Level to [High] pressure.
  • Set pressure cooking time to 23 minutes by pressing the [+] or [-] buttons. When pressure cooking time is finished, allow pressure to naturally release for 10-15 minutes. Then release any remaining pressure by turning the Steam Release Valve to [Venting].
  • Set oven to Broil at 500°F. Open lid of pot and remove ribs and place on a broiler pan. Brush with your favorite barbecue sauce. Place ribs under broiler and crisp for 3-5 minutes. Do not take your eyes off the ribs while they are broiling. Remove from heat when sauce is bubbly and slightly crisped. Cut into serving-sized pieces and enjoy!

Nutrition

Calories: 661kcal | Carbohydrates: 5g | Protein: 36g | Fat: 54g | Saturated Fat: 17g | Cholesterol: 182mg | Sodium: 1951mg | Potassium: 633mg | Fiber: 1g | Sugar: 2g | Vitamin A: 412IU | Vitamin C: 5mg | Calcium: 48mg | Iron: 3mg

Barbecue Ribs in the Instant PotRead More

Filed Under: Uncategorized

Tuscan Sunset Soup

August 26, 2020 by //  by Holly Leave a Comment

Also known as Italian Sausage Soup with White Beans, Kale, and Sun-dried Tomatoes, this soup received raved reviews at our dinner table this evening! Lots of “OOOOOH, Mommy! This is good!” “You need to write down this recipe!” and “Can I have more??”

I loved it because I threw all the ingredients in the Instant Pot, set it to cook, and we all went for a walk/bike ride at the neighborhood playground. When we came home, a delicious dinner was there waiting for us. This is truly my favorite thing about the Instant Pot—the ability to walk away while dinner is cooking, and not have to be there to tend to it.

There are so many ways the kids can help put together this quick soup too!

Here are some age-appropriate ways for kids to help with this easy, delicious dinner.

Toddlers:

  • Help sort dried beans.
  • Carry canned beans from the pantry to the kitchen counter.
  • Carry onion from pantry to kitchen counter.
  • Learn vocabulary—“This is an onion. This is a knife. These are white beans.”


Middle kiddos:

  • Help or make chicken broth.
  • Help with making beans or cook them independently.
  • Brown Italian sausage.
  • Chop and measure garlic, using a food chopper.
  • Measure sun-dried tomatoes.
  • Learn knife safety skills by watching you chop food, and talking about ways to hold the food and how to handle a knife. Or take a course in knife skills together. 


Older children (pre-teens and teens):

  • Make chicken broth on their own.
  • Put on a pot of beans independently.
  • Chop onion.
  • Put together entire recipe, start to finish.
  • Plan the week’s family meals.
Print Recipe
No ratings yet

Tuscan Sunset Soup

Also known as Italian Sausage Soup with Sundried Tomatoes, White Beans, and Kale. So much flavor is packed into this delightful soup!
Prep Time15 minutes mins
Cook Time20 minutes mins
Pressure Cooking Time5 minutes mins
Total Time40 minutes mins
Course: Dinner, Soup
Cuisine: Italian, Mediterranean
Keyword: Budget-friendly, Dairy-free, Dinner, Gluten-free, Homemade, Instant Pot, Made from Scratch, Soup
Servings: 8
Author: Holly

Equipment

  • Electric Pressure Cooker

Ingredients

  • 1 lb. Italian sausage
  • 1 cup onion diced
  • 1 tablespoon garlic powder or 2 tablespoons fresh minced garlic
  • 1 quart 4 cups chicken broth
  • 1 bunch kale chopped; can also use frozen kale (6-8 oz.)
  • 6 cups cooked white beans 1 (15 oz) can of cooked beans equals about 1½ cups of cooked beans
  • 4 tablespoons sun-dried tomatoes diced
  • salt to taste
  • 1 tablespoon Balsamic vinegar

Instructions

  • Instructions:
  • Brown Italian sausage on [Sauté] mode in the Instant Pot. Add diced onion and sauté for a minute or two. Throw in the garlic and cook for 1 minute. Scrape off all the browned bits from the bottom of the pot, and deglaze with 1 cup of the broth. Make sure there is nothing stuck to the bottom of the pot.
  • Pour remaining chicken broth into the pot. Add salt and balsamic vinegar. Float chopped kale on top of chicken broth and pour white beans on top of kale. Finally, top with sun-dried tomatoes. Avoid stirring.
  • Set Instant Pot to [Pressure Cook] or [Manual] or [Soup/Broth] for 5 minutes on High Pressure. Natural release for at least 10 minutes before manually releasing the remaining pressure.
    Enjoy!

Tuscan Sunset SoupRead More

Filed Under: Uncategorized Tagged With: Cooking with Kids, Dairy Free, Dinner, Gluten Free, Homemade, Instant Pot, Italian, Soup, Tuscan Sunset Soup

Creamy Salsa Chicken Rice Bowl

August 5, 2020 by //  by Holly Leave a Comment

This dish is one you’ll want to add to the regular rotation. It’s tasty. It’s simple. It’s fast.

And it’s perfect for dressing up with crisp Romaine Lettuce, diced fresh tomatoes, shredded cheddar cheese, and sour cream. Or not. It is so yummy, you can simply serve it over rice and enjoy!

You can even make this Creamy Salsa Chicken with frozen chicken! Just add two extra minutes to the pressure cooking time and a last-minute dinner is on the way.

This recipe calls for Magic Flavor Dust. It is simply our “house” seasoning that we use on practically everything. Make yourself up a batch for a little magic in the kitchen! Here’s where you’ll find the recipe.

Print Recipe
5 from 1 vote

Creamy Salsa Chicken Rice Bowl

A fast, easy, and delicious dinner that the whole family will love!
Prep Time5 minutes mins
Cook Time20 minutes mins
Pressure Cooking Time10 minutes mins
Total Time35 minutes mins
Course: Dinner, Main Course
Cuisine: Mexican, Tex-Mex
Keyword: Budget-friendly, Dinner, Gluten-free, Kid-Friendly
Servings: 8
Calories: 392kcal
Author: Holly

Equipment

  • Electric Pressure Cooker
  • Extra pot that fits inside the inner pot for rice
  • Pressure Cooker Trivet

Ingredients

Creamy Salsa Chicken

  • 1½ pounds chicken pieces I prefer boneless, skinless thighs for this.
  • 1½ cups salsa medium or mild, depending on your family's tastes
  • 1 cup onion, sliced 1 medium onion equals about 1 cup, sliced
  • 1 tablespoon Magic Flavor Dust
  • 3 tablespoons chili powder
  • 3 tablespoons ground cumin
  • 1 cup water or low-sodium chicken broth
  • 1 cup sour cream or plain Greek yogurt

Pot-In-Pot Rice

  • 2 cups white rice
  • 2 cups water or low-sodium chicken broth
  • 1 teaspoon salt
  • 1 teaspoon butter

Optional Rice Bowl Toppings

  • Romaine Lettuce, chopped
  • Fresh Tomatoes, chopped
  • Onion, finely diced
  • Shredded Cheddar Cheese
  • Sour Cream
  • Fresh Cilantro, chopped

Instructions

Creamy Salsa Chicken Instructions

  • Place chicken thighs or pieces into Instant Pot insert. Add 1 cup of water.
  • Sprinkle Magic Flavor Dust, chili powder, and ground cumin over chicken. Add sliced onion. Pour salsa on top of everything.
  • If adding Pot-in-Pot rice, place it in pressure cooker at this point. See below for instructions.
  • Close lid of pressure cooker.
    Check steam release valve to make sure it is set to [Sealing] for pressure cooking.
    Set Instant Pot program to [Pressure Cook] or [Manual] or [Poultry].
    Adjust Pressure Level to [High] pressure for chicken thighs or legs or [Low] pressure for chicken breasts.
    Set pressure cooking time to 10 minutes by pressing the [+] or [-] buttons. Add two minutes to pressure cooking time if your meat is frozen.
    Press [Start] or simply wait for 10 seconds for your Instant Pot to beep and begin heating up.
    Pressure cooker will heat up, come to pressure, count down pressure cooking time, and then beep when finished.
    Allow a ten-minute natural release of pressure before releasing remaining pressure.
  • Using tongs, remove chicken pieces and place on a plate. Transfer each one to a cutting board and dice meat into bite-sized pieces. Return chicken to pot and stir well. Serve over rice with your choice of fixin's as described above. Enjoy!

Pot-In-Pot Rice

  • Add rice, water, salt, and butter to a pot or bowl that fits inside the pressure cooker insert.
  • Use a trivet or sling under this inner pot so you can pull the piping hot bowl of rice out when it is done cooking.
  • Place inner pot over chicken and salsa mixture. May be placed directly on food or on a trivet on top of the food.
  • Proceed with pressure cooking instructions above.

Nutrition

Calories: 392kcal | Carbohydrates: 45g | Protein: 16g | Fat: 16g | Saturated Fat: 6g | Cholesterol: 60mg | Sodium: 763mg | Potassium: 470mg | Fiber: 3g | Sugar: 4g | Vitamin A: 1428IU | Vitamin C: 4mg | Calcium: 103mg | Iron: 3mg

Creamy Salsa Chicken Rice BowlRead More

Filed Under: Uncategorized

Indian Butter Chicken in the Instant Pot

July 30, 2020 by //  by Holly Leave a Comment

Also known as Murgh Makhani, Indian Butter Chicken sounded like a dish I wanted to try. I mean, you had me at “butter!”

Making this dish at home is a fantastic culinary experience, because the smells of all the different spices take you and your family to a place far away–a market in India, where all the spices are on display for the senses to enjoy!

Tools you may need for this recipe are:

Steamer Basket for Pot-in-Pot Rice

Immersion Blender

Coffee grinder/spice grinder

Vitamix Blender

Instant Pot Duo 6-quart

Instant Pot Duo EVO

Print Recipe
No ratings yet

Indian Butter Chicken in the Instant Pot

Rich, creamy spice takes the entire family to exotic places!
Prep Time15 minutes mins
Cook Time20 minutes mins
Pressure Cooking Time10 minutes mins
Total Time45 minutes mins
Course: Dinner, Main Course
Cuisine: Indian
Keyword: Dinner, Gluten-free, Instant Pot, Made from Scratch, Real Food, Restaurant Food at Home
Servings: 8
Calories: 579kcal
Author: Holly
Cost: $10

Equipment

  • Pressure Cooker
  • Blender
  • Immersion Blender (optional)
  • Inner Pot

Ingredients

  • 2 lbs. boneless, skinless chicken thighs
  • 28 ounces diced tomatoes
  • 10 cloves garlic
  • 3 tablespoons fresh ginger
  • 1 jalapeño, diced optional, to taste
  • 2 teaspoons garam masala see recipe for homemade version
  • 2 teaspoons ground cumin
  • 2 teaspoons ground turmeric
  • 1/4 teaspoon cayenne powder optional, depending on your spice level
  • 2 teaspoons paprika
  • 1 ½ teaspoons salt

Add after pressure cooking

  • 1 cup heavy cream
  • ½ cup butter (1 stick)
  • 2 teaspoons garam masala
  • ½ cup fresh chopped cilantro

Basmati Rice

  • 2 cups basmati rice or any kind of white rice
  • 2 cups water
  • 1 teaspoon salt
  • 1 teaspoon butter

Garam Masala

  • 2 teaspoons cardamom seeds not pods
  • 2 tablespoons coriander seeds
  • 1 tablespoon cumin seeds
  • 1 tablespoon black peppercorns
  • ½ teaspoon whole cloves
  • 1 teaspoon freshly grated nutmeg
  • 1 cinnamon stick broken in half
  • 2 bay leaves dried
  • ¼ teaspoon crushed red pepper flakes optional

Instructions

  • Place chicken in pressure cooker insert. Frozen is fine.
  • Pour diced tomatoes over chicken. Add garlic, ginger, jalapeño (if using), and spices. Stir spices gently into tomatoes.
  • If making Pot-in-Pot rice, place rice pot on top of food at this point. See Instructions below.
  • Place lid on Instant Pot or electric pressure cooker.
  • Check Steam Release Valve to make sure it is set to [Sealing].
  • Choose [Pressure Cook] or [Manual] or [Poultry] program by pressing one of these buttons.
  • Set pressure level to [High] pressure if using chicken thighs, [Low] pressure for chicken breasts.
  • Adjust pressure cooking time to 10 minutes by pressing [+] or [-].
  • Depending on your pressure model, either press [Start] (Ultra, EVO, Max) or simply pause and wait for the Instant Pot to begin cooking (DUO, Lux).

After Pressure Cooking

  • Allow pressure to naturally release for 10 minutes before manually releasing remaining pressure and removing lid.
  • If you made pot-in-pot rice, carefully remove the rice pot and set it on a plate, hot pad, or trivet.
  • Remove cooked chicken pieces with tongs and place on a plate or cutting board.
  • Stir together sauce ingredients and blend, either in the pot with an immersion blender or in a regular blender. Be careful, this mixture is HOT. Pour mixture back into pot.
  • Add cream and stir to incorporate well. Add butter and stir again.
  • Place chicken on a cutting board and dice into bite-sized pieces.
  • Place chicken pieces back into pot with sauce and stir well. Garnish with fresh cilantro. Serve over rice or sauteéd veggies for a delightful dinner!

Pot-in-Pot Rice

  • Add rice, water, salt, and butter to a pot or bowl that fits inside the pressure cooker.
  • Use a trivet or sling under inner pot so you can pull the piping hot bowl out when it is done cooking.
  • Place inner pot over chicken and tomato mixture. May be placed directly on food or on a trivet on top of the food.
  • Proceed with pressure cooking instructions above.

Garam Masala

  • Place all spice ingredients in a blender or spice grinder. Pulse and blend well until all pieces are ground thoroughly. Allow dust to settle inside blender before opening the lid and smelling the wonder inside!

Nutrition

Calories: 579kcal | Carbohydrates: 52g | Protein: 29g | Fat: 29g | Saturated Fat: 16g | Cholesterol: 180mg | Sodium: 1088mg | Potassium: 797mg | Fiber: 5g | Sugar: 5g | Vitamin A: 1317IU | Vitamin C: 21mg | Calcium: 160mg | Iron: 5mg

Indian Butter Chicken in the Instant PotRead More

Filed Under: Uncategorized

No-Chop Spaghetti Squash in the Instant Pot

July 23, 2020 by //  by Holly Leave a Comment

Cutting up hard winter squash to roast is my nemesis! In the Instant Pot, you can cook it whole, with ease!

Spaghetti Squash is fabulous as a side dish on its own, but because it has a neutral flavor, you can serve it with tons of different toppings and flavors!

We love it plain, with butter, salt, and pepper, or topped with our Texas Chili or Spaghetti Sauce.

Print Recipe
No ratings yet

No-Chop Spaghetti Squash in the Instant Pot

Use this shortcut way to cook delicious Spaghetti Squash in your electric pressure cooker.
Prep Time1 minute min
Cook Time20 minutes mins
Total Time21 minutes mins
Course: Dinner, Main Course, Side Dish
Keyword: Dairy-free, Gluten-free, Keto, Low Carb, Paleo, THM-S, Whole 30
Servings: 5
Calories: 60kcal
Author: Holly
Cost: $3

Equipment

  • Electric Pressure Cooker

Ingredients

  • 1 Spaghetti Squash
  • 1-2 cups water

Instructions

  • Remove any produce stickers from outside of spaghetti squash and rinse outside of spaghetti squash.
  • Place trivet in the pressure cooker insert.
  • Place whole spaghetti squash on top of the trivet.
  • Pour water into pot.
  • Check that the sealing ring is secure, and place lid on Instant Pot or other electric pressure cooker.
  • Make sure steam release valve is set to [Sealing].
  • Press [Pressure Cook] or [Manual] to select cooking program.
  • Check pressure level and adjust to [High Pressure], if applicable. (Some pressure cookers have High and Low pressure settings, some only have one setting.)
  • Set pressure cooking time to 20 minutes by pressing the [+] or [-] buttons to adjust the time.
  • Start Instant Pot by waiting ten seconds for your pot to beep, turn on and start heating up. ~OR~ Some machines have a [Start] button which you have to press to start the machine.
  • When the pressure cooking time ends, you can either Quick Release the pressure or allow the pressure to naturally release.
    Note: The squash will continue to cook while naturally releasing, and will be more "done" than if you quick release the pressure manually. This is a matter of preference on how you like your spaghetti squash; some like it more on the crunchy side, some prefer it softer. If it is more crunchy than you like, you can always place it back in the pressure cooker and cook for another few minutes.
  • Using hot pads, carefully pull the cooked spaghetti squash out of the Instant Pot and place on a cutting board.
  • With a large, sharp knife, cut the spaghetti squash in half. I usually cut vertically, through the stem, but if you want your strands to be longer, you can cut horizontally through the equator.
  • Scoop out the seeds and pulp from the middle and discard.
  • Next, scoop out the cooked spaghetti squash. Season with butter, salt, and parmesan cheese and enjoy. Or use in another dish like One Pot Faux-getti Pasta.

Notes

I use cooked spaghetti squash as a side dish, seasoned with butter, salt, pepper, and parmesan cheese. It is also fabulous topped with salsa and cooked, diced chicken. This versatile veggie can also be substituted for pasta or rice for a low-carb version of your favorite entree or casserole.

Nutrition

Calories: 60kcal | Carbohydrates: 13g | Protein: 1g | Fat: 1g | Saturated Fat: 1g | Sodium: 35mg | Potassium: 209mg | Fiber: 3g | Sugar: 5g | Vitamin A: 232IU | Vitamin C: 4mg | Calcium: 44mg | Iron: 1mg

No-Chop Spaghetti Squash in the Instant PotRead More

Filed Under: Uncategorized

Homemade Yogurt in the Instant Pot

July 16, 2020 by //  by Holly Leave a Comment

Last updated on March 17th, 2021 at 10:56 am

Yogurt. Delicious, creamy, and nutritious, loaded with beneficial bacteria and good protein.

But the stuff you buy in the store can also be loaded with unwanted thickeners and sweeteners. Some packaged products do not even contain the live and active cultures that yogurt is known for, and you have to be a careful package reader to know for sure!

Not to mention grocery store prices that are often around 25 cents per ounce, compared to 2 or 3 cents per ounce for the cost of milk.

So why not try your hand at making yogurt at home with your Instant Pot?

Homemade yogurt tastes so much fresher than store-bought! And you know exactly what is in it. You get to control the sweetness level and flavor. And you know without a doubt that the cultures are live and active because those little guys just produced that creamy, tangy yogurt in your own kitchen!

Although it can seem complicated, making yogurt at home is really a simple process once you understand what’s happening in each step. And you can even make yogurt in your sleep!

The Science of Yogurt

The first thing to understand is that fresh milk from a cow is loaded with beneficial bacteria and enzymes. However, it can easily become contaminated with dangerous pathogens if it is mishandled. Therefore, store-bought milk is pasteurized by heating it up to varying temperatures to ensure it is safe for people to drink and use. Most milk is pasteurized to a standard temperature of 161 degrees Fahrenheit and held for at least 15 seconds to kill off much of the bacteria in the milk. Then when milk is properly refrigerated under 45 degrees, it will remain tasty and food-safe for 12-21 days.

Some milk is pasteurized at even higher temperatures (280 degrees Fahrenheit), thus rendering it completely sterile. This is called Ultra-Pasteurization (UP) or Ultra-High Temperature Pasteurization (UHT). This kills all good and bad bacteria in the milk and allows it to be shelf-stable for months without refrigeration until it is opened.

When you’re making yogurt at home, you are creating an environment that is ideal for the growth of the good yogurt-producing bacteria in your milk. The problem is that this is also the environment for bad bacteria to grow. Therefore, you want to inhibit all the other bacteria in your milk before “planting” those good yogurt bacteria into your milk.

The way to do this is by pasteurizing your milk by heating it up to 180 degrees Fahrenheit to eliminate non-yogurt bacteria right before culturing so the desired yummy, healthy yogurt bacteria are the ones that grow and multiply. You will want a kitchen thermometer like this one for this job.

Then you cool the milk back down to the culturing temperature of between 105-115 degrees.

Next, you add the yogurt starter, which is simply regular, plain yogurt that contains live and active cultures. The fresher this yogurt starter is, the better the result will be.

We use 2 Tablespoons of starter yogurt for every half-gallon of milk or 1/4 cup of starter for a gallon of milk.

Now, maintain the culturing temperature at between 105-115 degrees Fahrenheit for 6-12 hours, depending on how tangy you like your yogurt. This easily done in an Instant Pot or other electric pressure cooker with a Yogurt setting.

Finally, chill the yogurt to allow it to set properly by placing it in the refrigerator for at least 4-6 hours. Sweeten and add toppings like honey, jam, granola, and fresh fruit. Enjoy!

A bowl of creamy Greek Yogurt topped with golden honey

If you’d like to make your yogurt even more thick and creamy, you can strain it and make Greek Yogurt. Use a cheesecloth and mesh strainer, or this Greek Yogurt maker is fantastic!

Simply place your finished yogurt in the strainer and allow whey to drain off for 10-24 hours, or until it reaches the thickness you prefer. You can always stir some whey back in to thin it out if it gets too thick.

Print Recipe
No ratings yet

Homemade Yogurt in the Instant Pot

Fresh, creamy, delicious yogurt is easily made at home in the electric pressure cooker.
Prep Time15 hours hrs
Total Time15 hours hrs
Course: Breakfast
Cuisine: American, Health Food, Real Food
Keyword: Budget-friendly, Gluten-free, Homemade, Make-Ahead Breakfast, Real Food
Servings: 8
Calories: 147kcal
Author: Holly
Cost: $1.50

Equipment

  • Electric Pressure Cooker with Yogurt setting
  • Kitchen Thermometer
  • Whisk

Ingredients

  • ½ gallon milk whole is best, non-fat is not ideal
  • 2 tablespoons plain yogurt that contains live and active cultures

Instructions

Pasteurize the Milk

  • Pour milk into cold insert.
  • On the Instant Pot, choose the Yogurt program and select "More" to heat the milk to 180°F.
  • Whisk milk frequently avoiding scraping the bottom of the p to allow it to heat evenly.
  • It should take about 30 minutes for the milk to reach 180°F.

Cool the Milk

  • Remove insert from Instant Pot and place it in an ice bath in the sink or a large bowl. Whisk the milk while avoiding scraping the bottom of the pot. Allow the temperature to drop to between 105-115°F.

Add the Yogurt Starter Culture

  • Place the yogurt starter in a small bowl.
    Ladle some warm milk (105-115°) into the starter and whisk to combine.
  • Pour starter and milk back into the pot and whisk thoroughly in fully incorporate starter.

Maintain Culturing Temperature

  • Dry off outside of inner pot and place it back into Instant Pot and cover.
  • Select Yogurt Program again. This time, select "Normal" setting. The display should read 8:00. The Instant Pot will automatically keep the temperature between 105-110°F.
  • To adjust the time, press [+] or [-]. More time will result in a tangier yogurt.

Chill Yogurt to Set

  • When culturing time is completed, remove lid and insert a knife or spoon into yogurt to make sure it has thickened and cultured properly. A knife should be able to separate the thick yogurt and come out fairly clean. Don't stir yet.
  • Place a lid or plastic wrap over the pot and place it in the refrigerator for at least 4-6 hours.
  • Remove from refrigerator and stir well for a creamier consistency. Some people enjoy eating without stirring.
  • Serve with fruit, berries, honey, sweetener, jam, or granola. Enjoy!

To make Greek Yogurt or Strained Yogurt

  • Place chilled yogurt into a mesh strainer, lined with cheesecloth. Place over a bowl that is deep enough to keep the bottom of the mesh strainer out of the whey that will drain off the yogurt. Or use this Greek Yogurt Maker to strain your yogurt.

Nutrition

Calories: 147kcal | Carbohydrates: 12g | Protein: 8g | Fat: 8g | Saturated Fat: 5g | Cholesterol: 24mg | Sodium: 104mg | Potassium: 320mg | Sugar: 12g | Vitamin A: 383IU | Calcium: 273mg | Iron: 1mg

Homemade Yogurt in the Instant PotRead More

Filed Under: Breakfast, Instant Pot, Recipes Tagged With: Instant Pot, recipe, Yogurt

Savory Egg Bites in the Instant Pot

June 25, 2020 by //  by Holly Leave a Comment

Print Recipe
5 from 1 vote

Egg Bites in the Instant Pot

A yummy and quick breakfast that you can make ahead and take anywhere.
Prep Time10 minutes mins
Cook Time13 minutes mins
Pressure Cooking Time5 minutes mins
Total Time28 minutes mins
Course: Breakfast, Snack
Cuisine: American
Keyword: Budget-friendly, Gluten-free, Instant Pot, Keto, Kid-Friendly, Low Carb, Made from Scratch, Make-Ahead Breakfast
Servings: 5
Calories: 244kcal
Author: Holly

Equipment

  • Pressure Cooker
  • Silicone Egg Bite Molds or Muffin Cups that can fit in an Instant Pot
  • Blender

Ingredients

  • 7 eggs
  • 4 ounces cream cheese
  • 4 ounces heavy cream
  • ½ teaspoon salt
  • 1 tablespoon mix-ins, such as crumbled bacon, shredded cheese, sauteéd veggies, caramelized onions, etc.

Instructions

  • Butter eggbite molds to keep the eggbites from sticking.
  • Add mix-ins to each egg cup.
  • Place eggs, cream cheese, cream, and salt into blender and blend until smooth.
  • Pour mixture evenly into prepared egg cups. If too foamy, allow to settle for a few minutes.
  • Place trivet and 1 to 1½ cups water in Instant Pot insert.
  • Set eggbite molds on top of trivet. The molds can be stacked, but for best results, make sure top mold is off-set and not covering lower mold. Alternatively, use a taller trivet for the second silicone mold.
  • Close lid of Instant Pot and make sure steam release valve is set to [Sealing].
  • Choose the Pressure Cook program and select [Egg] setting.
  • Adjust pressure level to [Low] pressure by pressing the Pressure Level button or selecting the Pressure Level on the dial.
  • Adjust pressure cooking time to 5 minutes by pressing [+] or [-] OR by selecting pressure cooking time with the knob and turning to select the desired time.
  • Press [Start] or wait for pot to beep and begin heating up.
  • When pressure cooking time is over, allow eggbites to naturally release for 3 minutes and then release remaining pressure while keeping hands and face away from steam.
  • Remove lid carefully, allowing steam to go away from your face and avoiding allowing condensation from the lid dripping onto eggbites.
  • Serve hot or refrigerate to enjoy later!

Nutrition

Calories: 244kcal | Carbohydrates: 2g | Protein: 10g | Fat: 22g | Saturated Fat: 12g | Cholesterol: 285mg | Sodium: 401mg | Potassium: 133mg | Sugar: 1g | Vitamin A: 971IU | Calcium: 71mg | Iron: 1mg

Savory Egg Bites in the Instant PotRead More

Filed Under: Breakfast, Gluten Free, Instant Pot, Keto, Recipes

Cream Eggs with Herbs in the Instant Pot

June 25, 2020 by //  by Holly Leave a Comment

Print Recipe
No ratings yet

Cream Eggs in the Instant Pot

Something different and a bit fancier for brunch. Sooo creamy and delicious!
Prep Time10 minutes mins
Cook Time10 minutes mins
Pressure Cooking Time3 minutes mins
Total Time23 minutes mins
Course: Breakfast, Breakfast for Dinner, Brunch
Cuisine: American, French
Keyword: Budget-friendly, Eggs, Gluten-free, Incredible Egg, Instant Pot, Keto, Low Carb, THM-S
Servings: 1
Calories: 148kcal
Author: Holly

Equipment

  • Pressure Cooker
  • Ramekins

Ingredients

  • 1 egg
  • 1½ tablespoons cream
  • 1 smidge butter
  • 1 sprinkle fresh herbs parsley, green onion, basil, etc.

Nutrition

Calories: 148kcal | Carbohydrates: 1g | Protein: 6g | Fat: 13g | Saturated Fat: 7g | Cholesterol: 197mg | Sodium: 79mg | Potassium: 61mg | Sugar: 1g | Vitamin A: 653IU | Vitamin C: 1mg | Calcium: 39mg | Iron: 1mg

Cream Eggs with Herbs in the Instant PotRead More

Filed Under: Breakfast, Gluten Free, Keto, Recipes

Meatloaf Bites with Awesome Sauce

June 18, 2020 by //  by Holly 2 Comments

Last updated on May 2nd, 2022 at 08:09 am

Print Recipe
No ratings yet

Meatloaf Bites with Awesome Sauce

Savory meatloaves in miniature. Fantastic flavor, and cooks in a fraction of the time of traditional meatloaf.
Prep Time20 minutes mins
Cook Time10 minutes mins
Pressure Cooking Time10 minutes mins
Total Time40 minutes mins
Course: Dinner, Main Course
Cuisine: American, Southern
Keyword: Dairy-free, Dinner, Made from Scratch
Servings: 5
Calories: 408kcal
Author: Holly

Equipment

  • Pressure Cooker
  • Food Processor
  • Knife
  • Cutting Board
  • Egg bite molds or ramekins or custard cups
  • Pressure Cooker Trivet

Ingredients

Dry Ingredients to Process First

  • 3 oz. rolled oats
  • ½ teaspoon Magic Flavor Dust See recipe on TheCookingFamily.com
  • ¼ teaspoon ground black pepper
  • ¼ teaspoon cayenne pepper
  • ½ teaspoon chili powder
  • ½ teaspoon dried thyme

Aromatic Vegetables to Process

  • ¼ cup onion, rough chopped About half of one small onion equals about a quarter cup.
  • ¼ cup carrot, rough chopped About half of one average carrot equals about a quarter cup.
  • ¼ cup bell pepper, rough chopped About a quarter of one medium bell pepper equals about a quarter cup.
  • ¼ cup celery, rough chopped About a half of one stalk of celery equals about a quarter cup.
  • 4 cloves garlic

The Protein

  • 8 oz. ground beef
  • 8 oz. pork sausage or breakfast sausage
  • 1 egg
  • ¾ teaspoon salt
  • 1 teaspoon liquid smoke

Awesome Sauce

  • ⅓ cup ketchup
  • ½ teaspoon ground cumin
  • few drops Worcestershire sauce
  • few drops hot sauce
  • few drops liquid smoke
  • 2 teaspoons honey

Instructions

Process the dry ingredients

  • Measure oats, black pepper, cayenne pepper, Magic Flavor Dust, chili powder, and dried thyme into the bowl of a food processor. Process well until oats are ground and ingredients are well-combined. Place into a large mixing bowl.

Process the aromatic veggies.

  • Place onion, carrot, celery, bell pepper, and garlic into the bowl of the food processor. Pulse until all are finely chopped, but not puréed. Place in large mixing bowl with spice mixture.

Mix it all together.

  • Add ground beef, sausage, egg, liquid smoke, and salt to the mixing bowl with the spices and aromatics. Gently mix together well with hands.

Cook the meatloaf bites.

  • Prepare eggbite molds by spraying with cooking spray.
  • Using a small scoop or a spoon, place meatloaf mixture into eggbite molds and form the meatloaf bites.
  • Pour 1½ cups water into Instant Pot insert. Place trivet into pot. Place eggbite molds on top of trivet, stacking in an offset manner so the top loaves aren't sitting directly on top of the bottom ones.
  • Check the sealing ring placement and close the lid of the Instant Pot. Make sure the Steam Release valve is set to [Sealing].
  • Choose the [Pressure Cook] or [Manual] or [Meat/Stew] cooking program.
  • Set pressure level to [High] pressure, if your model has High and Low pressure options.
  • Set pressure cooking time to 10 minutes by pressing the [+] and [-] buttons.
  • Wait for Instant Pot to beep and start cooking, or press [Start] to begin the pressure cooking process.
  • When pressure cooking time ends, allow pot to Naturally Release for 5 minutes before releasing remaining pressure.

Awesome Sauce

  • Mix together all ingredients for the Awesome Sauce and brush on top of finished Meatloaf Bites or serve as a dipping sauce.

Nutrition

Calories: 408kcal | Carbohydrates: 26g | Protein: 21g | Fat: 24g | Saturated Fat: 8g | Cholesterol: 98mg | Sodium: 695mg | Potassium: 438mg | Fiber: 4g | Sugar: 1g | Vitamin A: 1302IU | Vitamin C: 8mg | Calcium: 43mg | Iron: 3mg

Meatloaf Bites with Awesome SauceRead More

Filed Under: Uncategorized

Mac & Cheeeese in the Instant Pot

June 18, 2020 by //  by Holly 1 Comment

Last updated on May 2nd, 2022 at 08:05 am

Print Recipe
5 from 1 vote

Mac & Cheeeese in the Instant Pot

This yummy crowd favorite only takes one dish when made in an electric pressure cooker.
Prep Time3 minutes mins
Cook Time5 minutes mins
Pressure Cooking Time5 minutes mins
Total Time13 minutes mins
Course: Dinner, Lunch, Side Dish
Cuisine: American, Comfort Food
Keyword: Comfort Food, Gluten-free options, Instant Pot, Kid-Friendly
Servings: 8
Calories: 464kcal
Author: Holly

Ingredients

  • 16 ounces pasta any kind, can substitute gluten free
  • 32 ounces water
  • 1 teaspoon dry ground mustard
  • 1 teaspoon Magic Flavor Dust https://thecookingfamily.com/magic-flavor-dust/
  • ¾ teaspoon salt
  • 1 tbsp butter
  • 10 ounces sharp cheddar cheese shredded
  • 8 ounces cream cheese softened

Instructions

  • Measure 32 ounces (1 quart) of water. Add ground mustard, Magic Flavor Dust, and salt to the water. Stir to dissolve.
  • Pour pasta into pressure cooker insert. Place pat of butter on pasta. Pour seasoned water over pasta. Stir and make sure all pasta is submerged under the water.
  • Check pressure cooker lid to make sure sealing ring is properly seated, and close lid. Make sure Steam Release Valve is set to [Sealing].
  • Set pressure cooking program to [Pressure Cook] or [Manual]. Make sure pressure level is set to [High] pressure, if your model has dual pressure options.
  • Set pressure cooking time to half the lowest recommended cooking time on your particular package of pasta. If the amount is a half number, round down.
    For example, if the time on package says to boil for 9-11 minutes, cut 9 in half, which equals 4½. Then round down to 4 minutes.
  • Pause to wait for your Instant Pot to beep and start cooking or press [Start], depending on your model of pressure cooker.
  • While pasta is cooking, shred the cheddar cheese and soften the cream cheese by cutting into 8 pieces and microwaving for 30 seconds.
  • When pressure cooking time is finished, immediately Quick Release the pressure. If starchy liquid starts spewing from the valve, simply close the valve and proceed to do an intermittent steam release, also known as a controlled steam release.
  • After the float valve drops, open the pot and immediately drop the cream cheese in. Stir quickly to melt and incorporate the cream cheese. Then sprinkle the cheddar cheese over pasta and keep stirring rapidly until cheese melts and is well-incorporated.
  • Finish with fresh-cracked black pepper and grated parmesan cheese. Enjoy!

Nutrition

Calories: 464kcal | Carbohydrates: 44g | Protein: 18g | Fat: 24g | Saturated Fat: 14g | Cholesterol: 72mg | Sodium: 551mg | Potassium: 200mg | Fiber: 2g | Sugar: 3g | Vitamin A: 780IU | Calcium: 299mg | Iron: 1mg

Mac & Cheeeese in the Instant PotRead More

Filed Under: Uncategorized

Flourless Chocolate Mini-Cakes in the Instant Pot

June 11, 2020 by //  by Holly 3 Comments

Print Recipe
5 from 1 vote

Flourless Chocolate Mini-Cakes in the Instant Pot

Rich and decadent, these mini-cakes are sure to hit your chocolate craving!
Prep Time10 minutes mins
Cook Time10 minutes mins
Pressure Cooking Time5 minutes mins
Total Time25 minutes mins
Course: Dessert
Cuisine: American
Keyword: Chocolate, Comfort Food, Gluten-free, Instant Pot, Made from Scratch
Servings: 6
Calories: 440kcal
Author: Holly

Equipment

  • Pressure Cooker
  • Oven-Safe Ramekins
  • Trivet for Pressure Cooker

Ingredients

  • ½ cup butter or 1 stick butter or 4 oz. butter
  • 1 cup semi-sweet chocolate chips I use 60% cocoa chocolate chips
  • 1 cup powdered sugar
  • 3 eggs
  • 1 egg yolk
  • 1 teaspoon vanilla extract
  • 5 tablespoons cocoa powder
  • orange oil or raspberry extract, optional

Instructions

  • Prepare ramekins by spraying with non-stick spray or buttering the inside of the dishes.
  • Gently melt butter and chocolate chips in the microwave. Use 50% power for 1-minute increments, stirring in between. Do not hurry this step.
  • Once butter and chocolate are completely melted, stir in powdered sugar and cocoa until well-combined.
  • Mix in eggs, yolk, and vanilla, stirring until smooth. Add additional flavoring, if desired.
  • Spoon batter evenly into six prepared ramekins.
  • Add 1 cup water to Instant Pot insert.
  • Place ramekins on trivet in Instant Pot, stacking a second layer on top of the first.
  • Close lid of Instant Pot, and check steam release valve to make sure it is set to [Sealing].
  • Choose [Pressure Cook] or [Manual] program.
  • Select [Low] pressure if possible.
  • Adjust pressure cook time to 5 minutes by pressing the [+] or [-] buttons.
  • Instant Pot will heat up, come to pressure, count down the 5 minutes, and then beep. Being careful to keep hands and face away from hot steam, quick release the pressure by turning steam release valve to [Venting].
  • Once float valve has dropped, carefully open the Instant Pot, pointing the lid away from you. Use tongs and hot pads to carefully remove the hot ramekins. Invert mini-cakes on individual plates and serve. Enjoy with ice cream or whipped cream!

Nutrition

Calories: 440kcal | Carbohydrates: 38g | Protein: 6g | Fat: 30g | Saturated Fat: 18g | Cholesterol: 157mg | Sodium: 172mg | Potassium: 264mg | Fiber: 4g | Sugar: 31g | Vitamin A: 650IU | Calcium: 45mg | Iron: 3mg

Flourless Chocolate Mini-Cakes in the Instant PotRead More

Filed Under: Uncategorized

Keto Zuppa Toscana in the Instant Pot

June 11, 2020 by //  by Holly Leave a Comment

Last updated on March 30th, 2022 at 07:11 am

Print Recipe
No ratings yet

Keto Zuppa Toscana

A Low-Carb version of a restaurant favorite. Creamy and delicious, this is such a comfort food that you won't even miss the carbs!
Prep Time20 minutes mins
Cook Time19 minutes mins
Pressure Cooking Time1 minute min
Total Time40 minutes mins
Course: Dinner, Soup
Cuisine: Italian
Keyword: Budget-friendly, Comfort Food, Dinner, Fall, Gluten-free, Keto, Low Carb, THM-S
Servings: 6
Calories: 538kcal
Author: Holly

Equipment

  • Pressure Cooker

Ingredients

  • 1 pound Italian Sausage, ground or links links may be used, but should be pre-cooked
  • 1 tbsp olive oil
  • 1 cup onion diced
  • 8 cloves garlic minced, fresh
  • 8 cups chicken broth low sodium
  • 12 oz. kale frozen, chopped or fresh, chopped
  • 12 oz. cauliflower florets frozen or fresh
  • 1/2 cup bacon pieces cooked
  • 1 cup heavy whipping cream
  • 1 teaspoon red pepper flakes optional
  • 1/2 to 1 teaspoon salt salt to taste

Instructions

  • Brown Italian Sausage and onion on [Sauté] mode in your Instant Pot.
  • When onion is almost clear, add garlic and stir for one minute. Set a timer if you need to–you don't want your garlic to burn.
  • Pour chicken broth into pot. Add kale, cauliflower florets, and bacon to pot.
  • Check lid to make sure silicone sealing ring is in place, and place lid on Instant Pot.
  • Set Steam Release Valve to [Sealing] to pressure cook.
  • Set Instant Pot to [Pressure Cook] or [Manual] mode, in Low Pressure if available.
  • Adjust pressure cooking time to 1 minute under pressure by pressing the [+] or [-] buttons.
  • Start the Instant Pot by pausing for ten seconds to wait for Instant Pot to turn on, OR if you have a machine with a Start button, such as Ultra, press [Start].
  • Pot will heat up, come to pressure, and begin to count down. After pressure cooking time is finished, the Instant Pot will switch to Keep Warm mode and begin counting up.
  • Quick Release the pressure from the Pot by turning the Steam Release Valve to [Venting]. Hot steam will begin to pour out, so make sure to keep hands and face away.
  • Stir in cream and red pepper flakes, if using. Taste and add salt, if needed.
  • Serve and enjoy!

Nutrition

Calories: 538kcal | Carbohydrates: 16g | Protein: 26g | Fat: 43g | Saturated Fat: 20g | Cholesterol: 125mg | Sodium: 1184mg | Potassium: 985mg | Fiber: 2g | Sugar: 3g | Vitamin A: 6346IU | Vitamin C: 100mg | Calcium: 158mg | Iron: 3mg

Keto Zuppa Toscana in the Instant PotRead More

Filed Under: Uncategorized

Zuppa Toscana in the Instant Pot

June 11, 2020 by //  by Holly Leave a Comment

Last updated on March 29th, 2022 at 06:28 am

Print Recipe
No ratings yet

Zuppa Toscana in the Instant Pot

A copycat version of a restaurant favorite. Creamy and delicious, this is such a comfort food that is super simple to make!
Prep Time20 minutes mins
Cook Time19 minutes mins
Pressure Cooking Time3 minutes mins
Total Time43 minutes mins
Course: Dinner, Soup
Cuisine: Italian
Keyword: Budget-friendly, Comfort Food, Dinner, Gluten-free
Servings: 6
Calories: 665kcal
Author: Holly

Equipment

  • Pressure Cooker

Ingredients

  • 1 pound Italian Sausage, ground or links links may be used, but should be pre-cooked
  • 1 tbsp olive oil optional, if meat is very lean
  • 1 cup onion diced
  • 8 cloves garlic minced, fresh
  • 8 cups chicken broth low sodium
  • 12 oz. kale frozen, chopped or fresh, chopped
  • 2 lbs. potatoes sliced very thin
  • 1/2 cup bacon pieces cooked
  • 1 cup heavy whipping cream
  • 1 teaspoon red pepper flakes optional
  • 1/2 to 1 teaspoon salt salt to taste

Instructions

  • Brown Italian Sausage and onion on [Sauté] mode in your Instant Pot.
  • When onion is almost clear, add garlic and stir for one minute. Set a timer if you need to–you don't want your garlic to burn.
  • Pour chicken broth into pot. Add kale, potato slices, and bacon to pot.
  • Check lid to make sure silicone sealing ring is in place, and place lid on Instant Pot.
  • Set Steam Release Valve to [Sealing] to pressure cook.
  • Set Instant Pot to [Pressure Cook] or [Manual] mode.
  • Adjust pressure cooking time to 3 minutes under pressure by pressing the [+] or [-] buttons.
  • Start the Instant Pot by pausing for ten seconds to wait for Instant Pot to turn on, OR if you have a machine with a Start button, such as Ultra, press [Start].
  • Pot will heat up, come to pressure, and begin to count down. After pressure cooking time is finished, the Instant Pot will switch to Keep Warm mode and begin counting up.
  • Quick Release the pressure from the Pot by turning the Steam Release Valve to [Venting]. Hot steam will begin to pour out, so make sure to keep hands and face away.
  • Stir in cream and red pepper flakes, if using. Taste and add salt, if needed.
  • Serve and enjoy!

Nutrition

Calories: 665kcal | Carbohydrates: 41g | Protein: 28g | Fat: 45g | Saturated Fat: 20g | Cholesterol: 125mg | Sodium: 1176mg | Potassium: 1468mg | Fiber: 4g | Sugar: 3g | Vitamin A: 6346IU | Vitamin C: 103mg | Calcium: 169mg | Iron: 4mg

Zuppa Toscana in the Instant PotRead More

Filed Under: Uncategorized

Spicy Pinto Beans in the Instant Pot

June 3, 2020 by //  by Holly Leave a Comment

Print Recipe
No ratings yet

Spicy Pintos

Refried Beans get a kick in the pants with these flavorful pinto beans.
Course: Side Dish
Cuisine: Beans & Rice, Mexican, Tex-Mex
Keyword: Budget-friendly, Dairy-free, Dinner, Gluten-free
Servings: 12
Calories: 274kcal
Author: Holly

Ingredients

  • 2 pounds pinto beans, dried
  • 12 cups water
  • 2 tbsp Magic Flavor Dust
  • 1 tbsp oregano
  • 1 tbsp fat or oil lard, bacon grease, olive oil, or coconut oil
  • 1-2 tbsp jalapeños jarred
  • 1-2 tbsp jalapeño liquid from jar

Instructions

  • Sort and rinse dried beans. Note: These can be cooked immediately, but even if you only have 20 minutes to soak them, the final product will be more consistent, with less of a chance of having any crunchy beans.
  • Place beans into the Instant Pot insert. Add water, Magic Flavor Dust, oregano, and oil or fat.
  • Check the seal and close the lid of the Instant Pot.
  • Make sure Steam Release Valve is set to [Sealing].
  • Set pressure cooking program to [Bean/Chili] or [Pressure Cook] or [Manual].
  • Make sure pressure level is set to High Pressure by pressing the [Pressure] button.
  • Adjust the cooking time to 35 minutes by pressing the [+] or [-] buttons.
  • When pressure cooking time is finished, allow pressure in pot to Naturally Release for at least 10-15 minutes before manually releasing remaining pressure.
  • When float valve drops, signaling that no pressure remains inside the pot, open it up with steam going away from your face.
  • Taste for seasoning and add salt, if necessary.
  • Remove and reserve one to two cups of cooking liquid.
  • Using a potato masher or immersion blender, carefully mash beans until they are your preferred consistency.
  • Remove a serving for the non-spicy people in your family and add finely chopped jalapeños and jalapeño liquid, stirring well.
  • Alternatively, these beans can be served as a soup or a side, like charro beans.
  • Leftovers freeze perfectly in a ziptop bag; freeze flat.

Nutrition

Calories: 274kcal | Carbohydrates: 48g | Protein: 16g | Fat: 2g | Saturated Fat: 1g | Cholesterol: 1mg | Sodium: 23mg | Potassium: 1061mg | Fiber: 12g | Sugar: 2g | Vitamin A: 21IU | Vitamin C: 6mg | Calcium: 99mg | Iron: 4mg

Spicy Pinto Beans in the Instant PotRead More

Filed Under: Dairy Free, Gluten Free, Recipes

Quick Carnitas in the Instant Pot

June 3, 2020 by //  by Holly Leave a Comment

Print Recipe
No ratings yet

Quick Carnitas

Savory, tender morsels of meat in a fraction of the time!
Course: Dinner, Main Course
Cuisine: Mexican, Taco Night, Tex-Mex
Keyword: Budget-friendly, Dairy-free, Instant Pot, Keto, Kid-Approved, Low Carb, THM-S
Servings: 6
Calories: 326kcal
Author: Holly

Ingredients

  • 3 lbs pork butt steaks or beef chuck steaks
  • 1 cup onion, sliced thin 1 medium onion equals about 1 cup sliced onion
  • 10 cloves garlic can substitute jarred minced garlic or garlic powder
  • 1 tablespoon oregano
  • 1 tablespoon ground cumin
  • 1 tablespoon coriander seeds can substitute 1 teaspoon ground coriander
  • 2 teaspoons salt
  • 1 tablespoon Magic Flavor Dust can substitute this for fresh onion and garlic, for ultra quick option.

Instructions

  • Place steaks into inner pot. Sprinkle onions, garlic, cumin, oregano, coriander, and salt over all the steaks.
  • Add one cup of water to Instant Pot.
  • Check the lid to make sure ring is securely in place and close the lid.
  • Make sure the steam release valve is set to [Sealing].
  • Set pressure cooking program to [Meat/Stew] or [Pressure Cook] or [Manual].
  • Set pressure level to High pressure by pressing the [Pressure] button.
  • Adjust the pressure cooking time to 20 minutes by pressing the [+] or [-] buttons.
  • Wait for the Instant Pot to beep and turn on or press [Start] to turn it on, depending on your pressure cooker model.
  • Once Instant Pot reaches pressure, cooks for 20 minutes and then beeps indicating pressure cooking time is finished, allow the meat to Naturally Release pressure for at least 10 minutes before manually releasing remaining pressure. At this point, you can safely leave the meat in the pot for up to 10 hours on the Keep Warm setting.
  • Pull steaks out and place them on a cutting board. Remove bones and excess fat. Chop up meat and place in a serving dish.
  • Serve in tacos, tostadas, burrito bowls, on a salad, or with the broth over rice. We love serving with all the fixin's–diced tomatoes, cilantro, salsa, sour cream, cheese, etc.

Nutrition

Calories: 326kcal | Carbohydrates: 6g | Protein: 43g | Fat: 13g | Saturated Fat: 5g | Cholesterol: 136mg | Sodium: 927mg | Potassium: 867mg | Fiber: 1g | Sugar: 1g | Vitamin A: 27IU | Vitamin C: 4mg | Calcium: 75mg | Iron: 4mg

Quick Carnitas in the Instant PotRead More

Filed Under: Dinner Accomplished, Gluten Free, Instant Pot, Keto, Recipes

Magic Flavor Dust

May 28, 2020 by //  by Holly 3 Comments

Last updated on August 5th, 2020 at 11:19 pm

You can speed up dinner prep exponentially by keeping a batch of our pre-mixed seasonings on hand. You’ll save money, too!

We use this “house” seasoning on practically everything but dessert! While cooking, sprinkle it on sautéed veggies, meat, soups, and dried beans. It adds so much flavor to everything, and you only have to reach for one jar, instead of 4! It is Magic!

Print Recipe
5 from 1 vote

Magic Flavor Dust

Use this basic seasoning to easily add lots of flavor to meats, veggies, and dips. It is Magic!
Prep Time5 minutes mins
Course: Seasoning
Keyword: Budget-friendly, Dairy-free, Gluten-free, No Fillers, Seasoning
Author: Holly

Equipment

  • Funnel
  • Empty spice container

Ingredients

  • 2 parts garlic powder
  • 2 parts onion powder
  • 1 part salt
  • 1 part ground black pepper

Instructions

  • Measure all parts through a funnel and into empty spice container.
  • Close lid and shake thoroughly.
  • Use to season meats, veggies, sauces, soups, and dips.

Magic Flavor DustRead More

Filed Under: Kitchen Survival, Kitchen Tools, Recipes

  • Page 1
  • Page 2
  • Go to Next Page »

Primary Sidebar

Search for Recipes

Recent Posts

  • Breakfast Casserole w/Roasted Veggies
  • Italian Lentil Soup
  • Bacon & Onion Breakfast Casserole
  • Make-Ahead Breakfast Casserole
  • Superfood Chili w/Sweet Potatoes, Quinoa, and Black Beans

Follow the Fun on Facebook

Categories

  • Breakfast
  • Dairy Free
  • Dessert
  • Dinner Accomplished
  • Freezer Meal
  • Gluten Free
  • Holiday
  • Instant Pot
  • Keto
  • Kids in the Kitchen
  • Kitchen Survival
  • Kitchen Tools
  • Recipes
  • Soup
  • Uncategorized

Get Social With Us!

  • Facebook
  • Instagram
  • Pinterest
  • Twitter
  • YouTube

Recent Comments

  • Greg on Instant Pot Ham ‘n’ Beans
  • Liberty Kellogg on Creamy Ginger Butternut Squash Soup in the Instant Pot
  • Rebecca on How Many Eggs Can You Make in the Instant Pot?
  • thebangalore dhaba on Creamy Ginger Butternut Squash Soup in the Instant Pot
  • Linda on Southern Collards in the Instant Pot

Footer

Affiliate Disclosure

The Cooking Family is a participant in the Amazon Services LLC Associates Program, an affiliate advertising program designed to provide a means for sites to earn advertising fees by advertising and linking to amazon.com. Click Here for our full disclosure and privacy policy.

Recent Posts

  • Breakfast Casserole w/Roasted Veggies
  • Italian Lentil Soup
  • Bacon & Onion Breakfast Casserole
  • Make-Ahead Breakfast Casserole
  • Superfood Chili w/Sweet Potatoes, Quinoa, and Black Beans

Join Us!

  • Facebook
  • Instagram
  • Pinterest
  • Twitter
  • YouTube

Search Form

  • Home
  • About
  • Blog
  • Contact

© 2025 The Cooking Family

Rate This Recipe

Your vote:


A rating is required
A name is required
An email is required